Scenes are the foundation of every Effi event. Think of each scene as a canvas you can fill with guests, media, interactive elements, backgrounds, and more. You can have as many scenes as you like in a single event, and switch between them at any time — before or during your broadcast.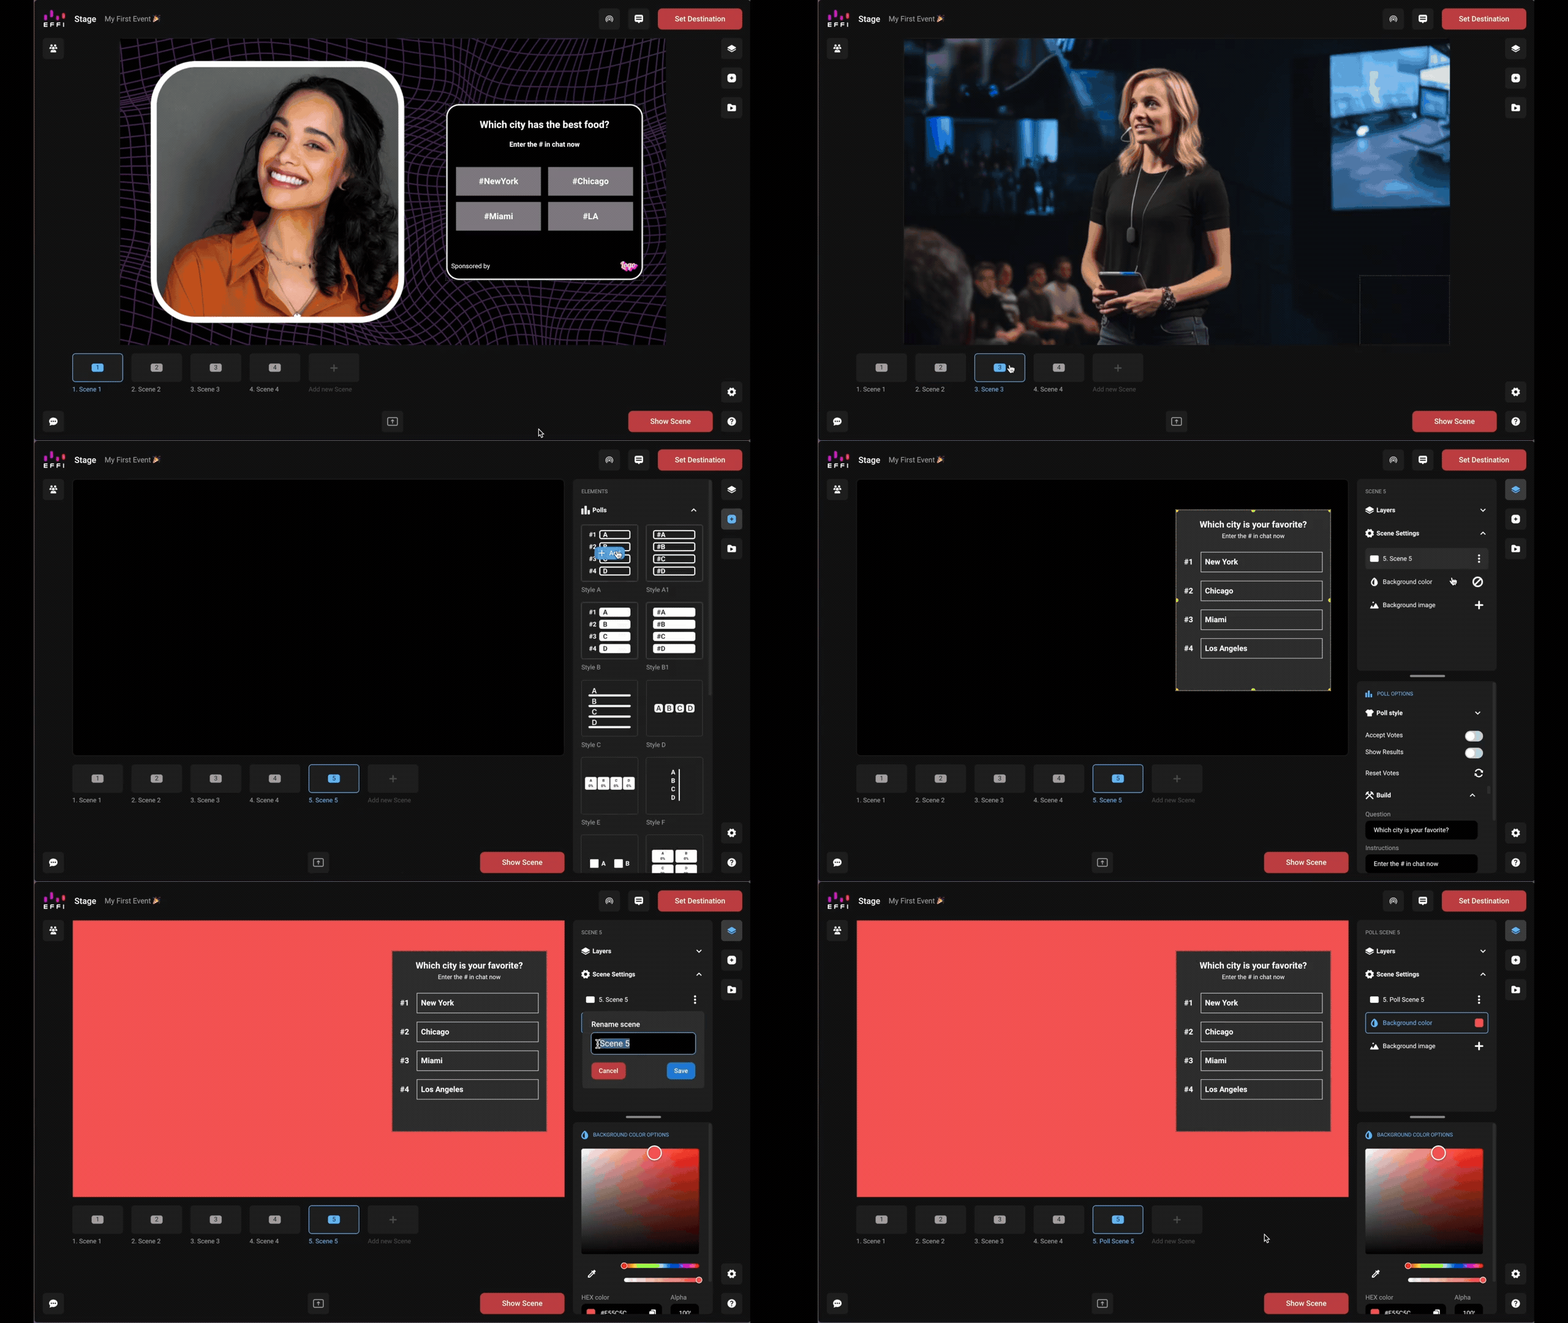
When you create a new event, Effi automatically creates your first scene — Scene 1 — so you can start building right away.
Creating a Scene
You can add new scenes to your event at any time from inside Stage.
1. Click Add New Scene at the bottom of the screen.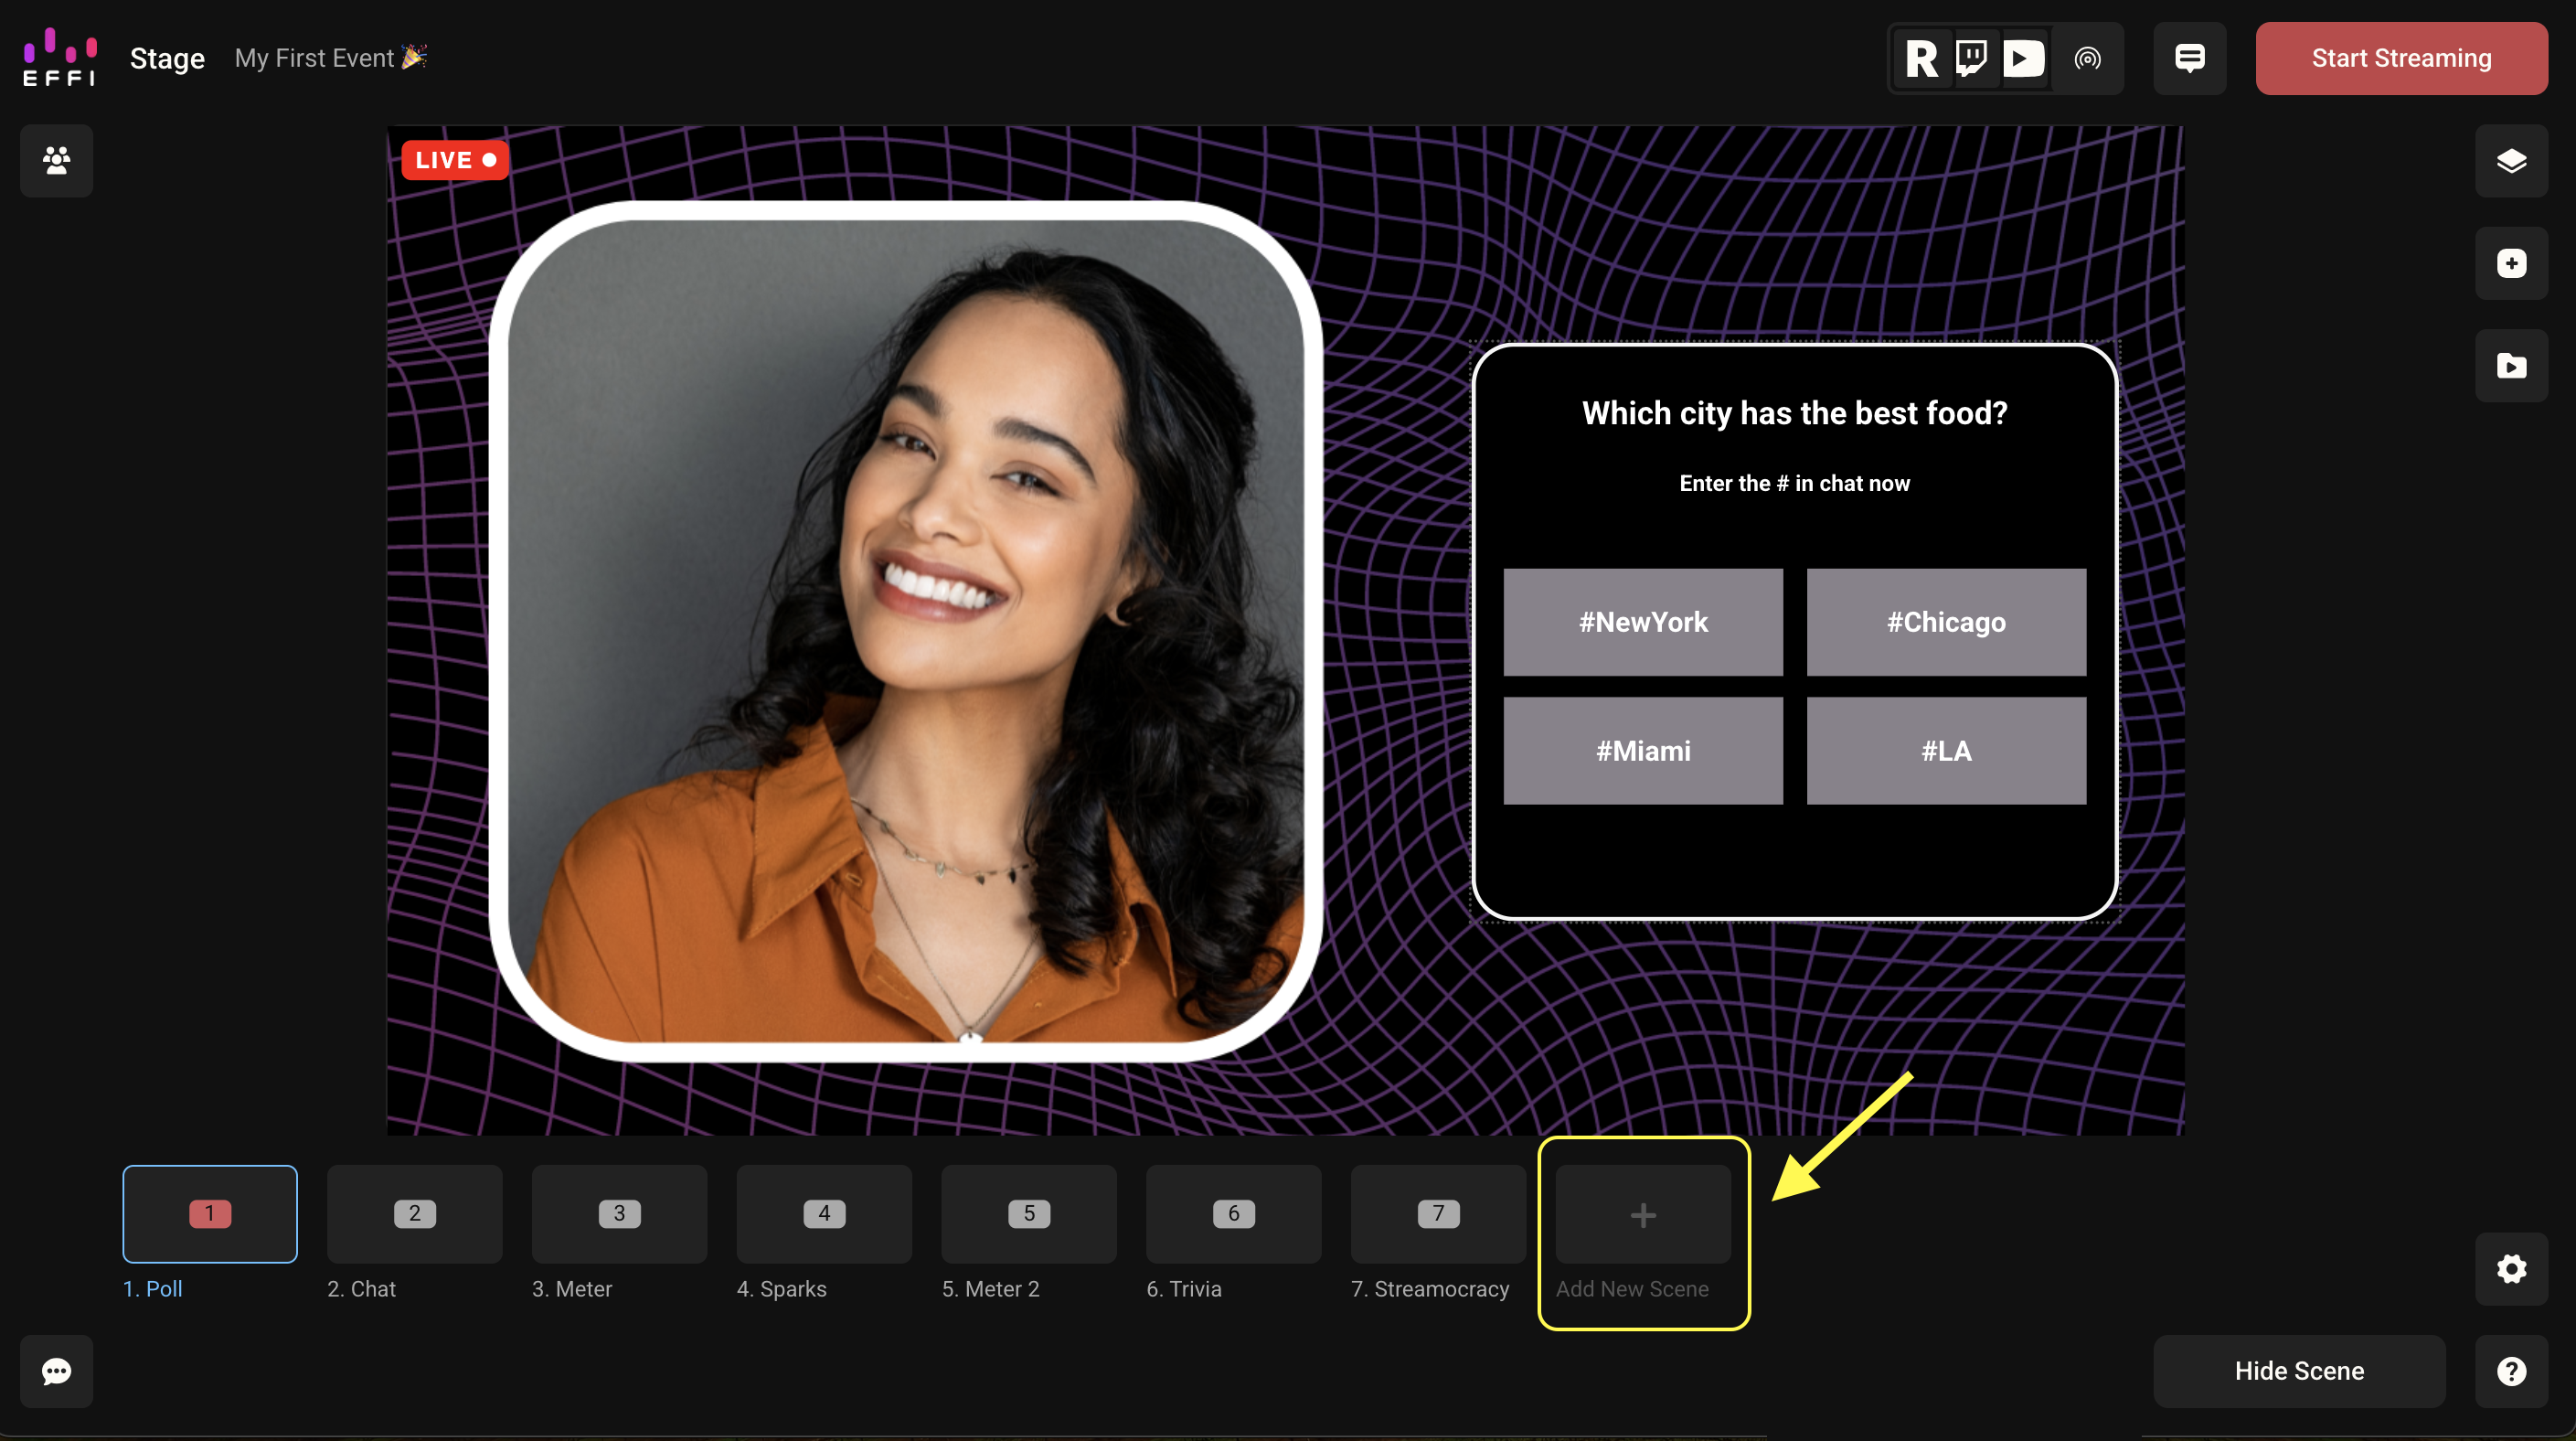
2. Choose how you want to create it — Blank Scene or Scene Template.
- Blank Scene — start with an empty canvas and build from scratch
- Scene Template — pick a pre-designed layout from Effi's library
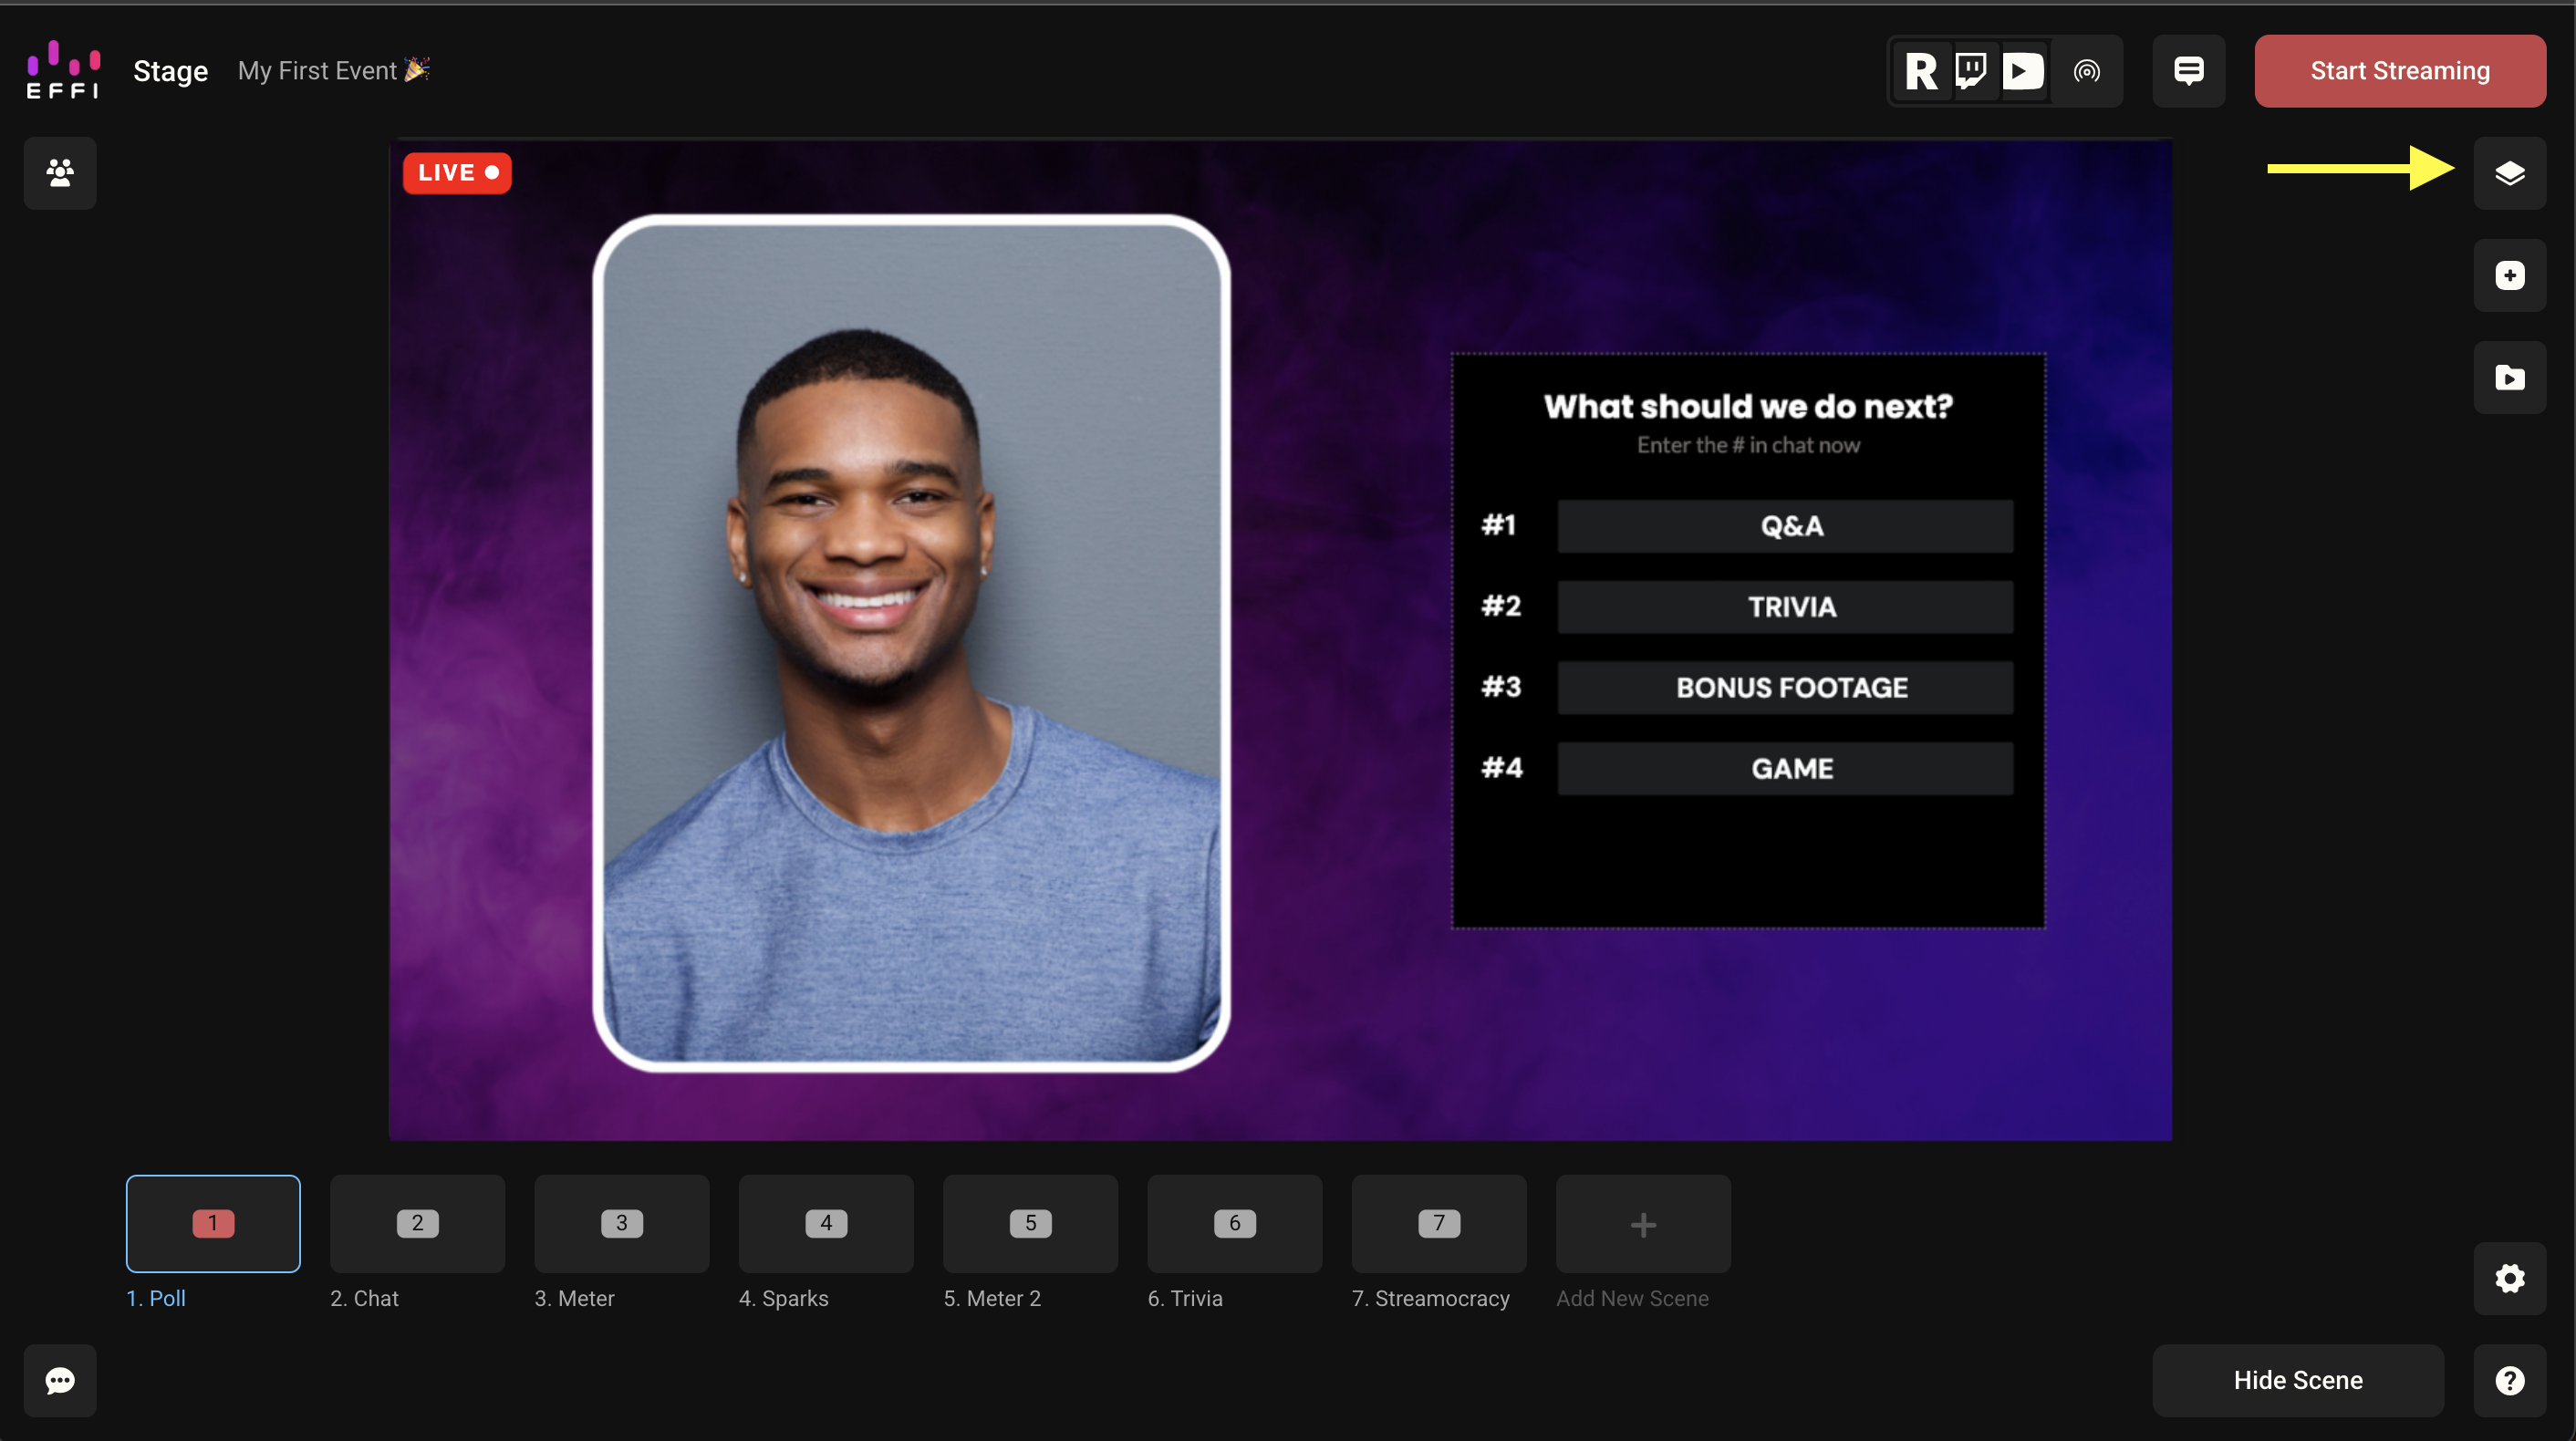
Add as many scenes as you need. There's no limit.
Tip: If you plan on having a lot of scenes, rename them in a way that's clear about what's happening in each one — for example: 2. Q&A, 4. Product Demo, 6. Closing. It makes switching scenes much easier during a live broadcast.
Creating a Scene From a Template
1. Click Add New Scene, then select Scene Template.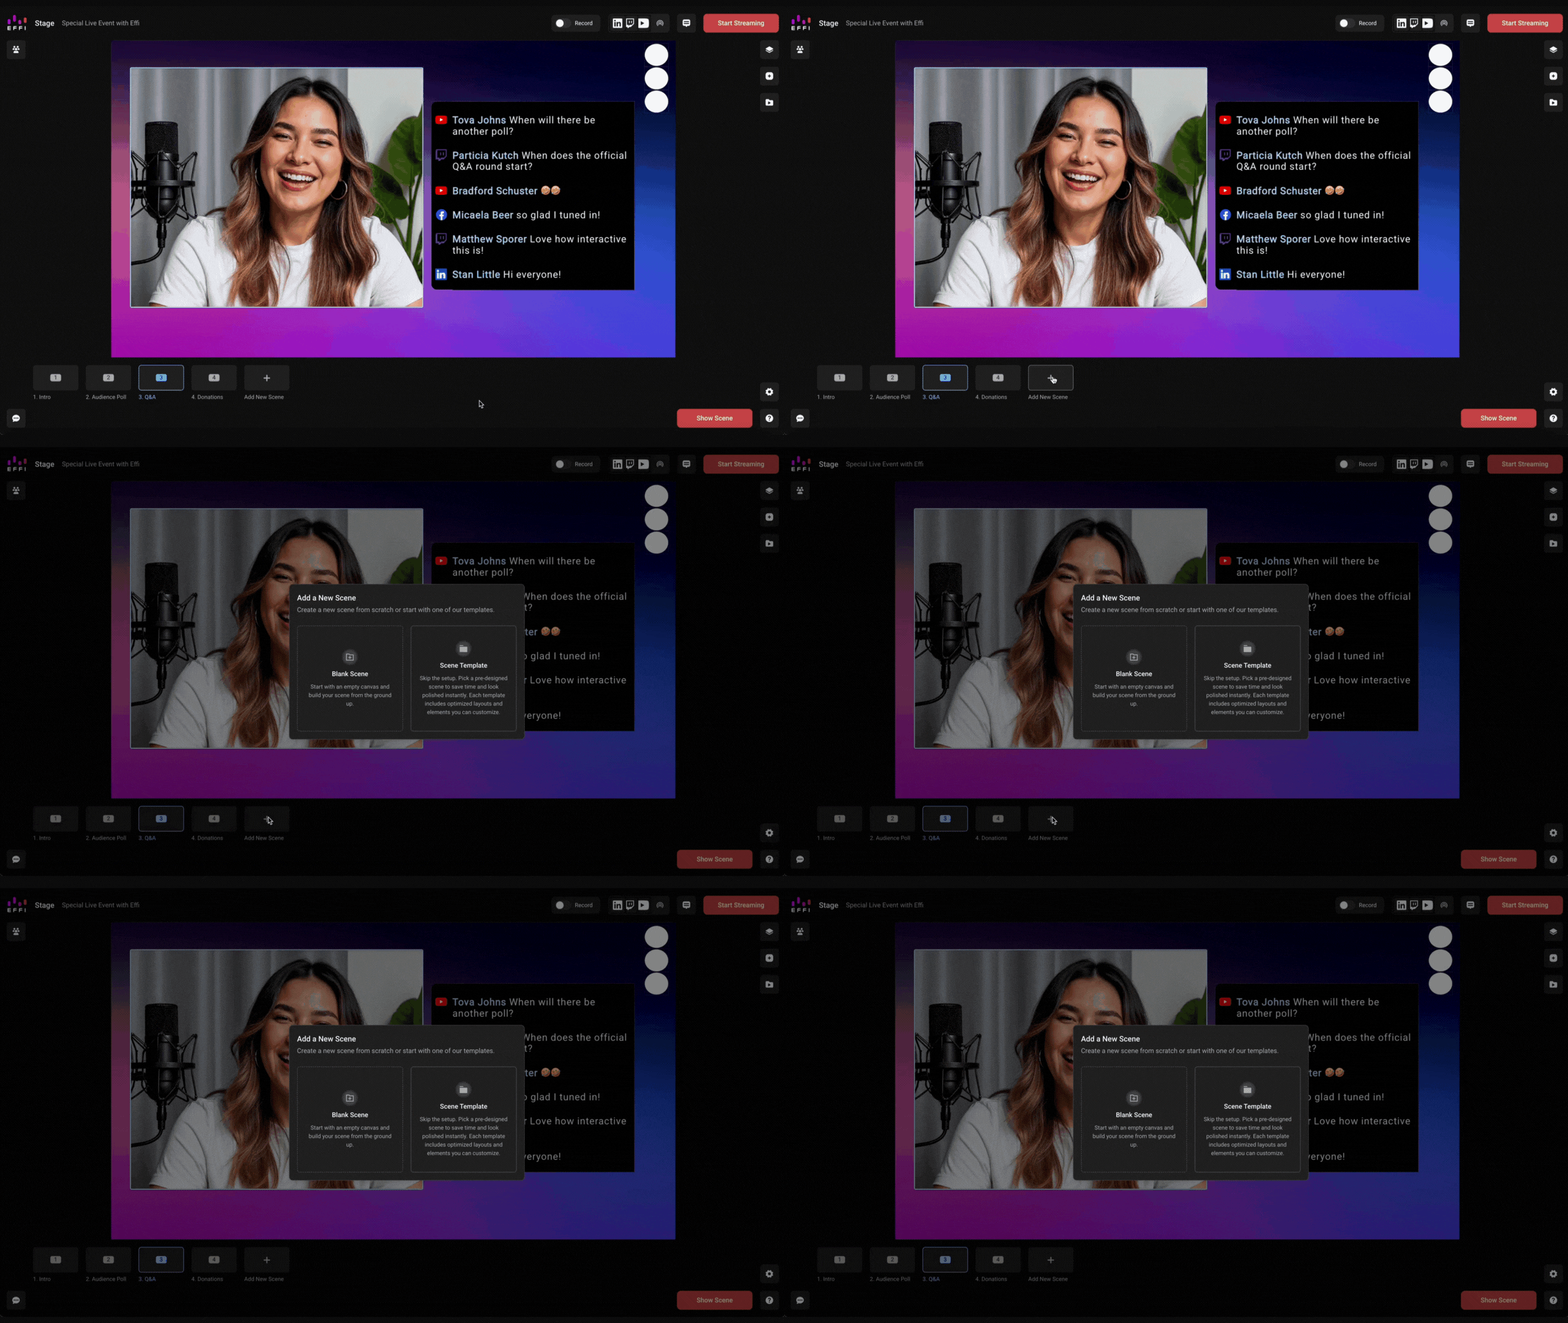
2. Select Scene Template from the options.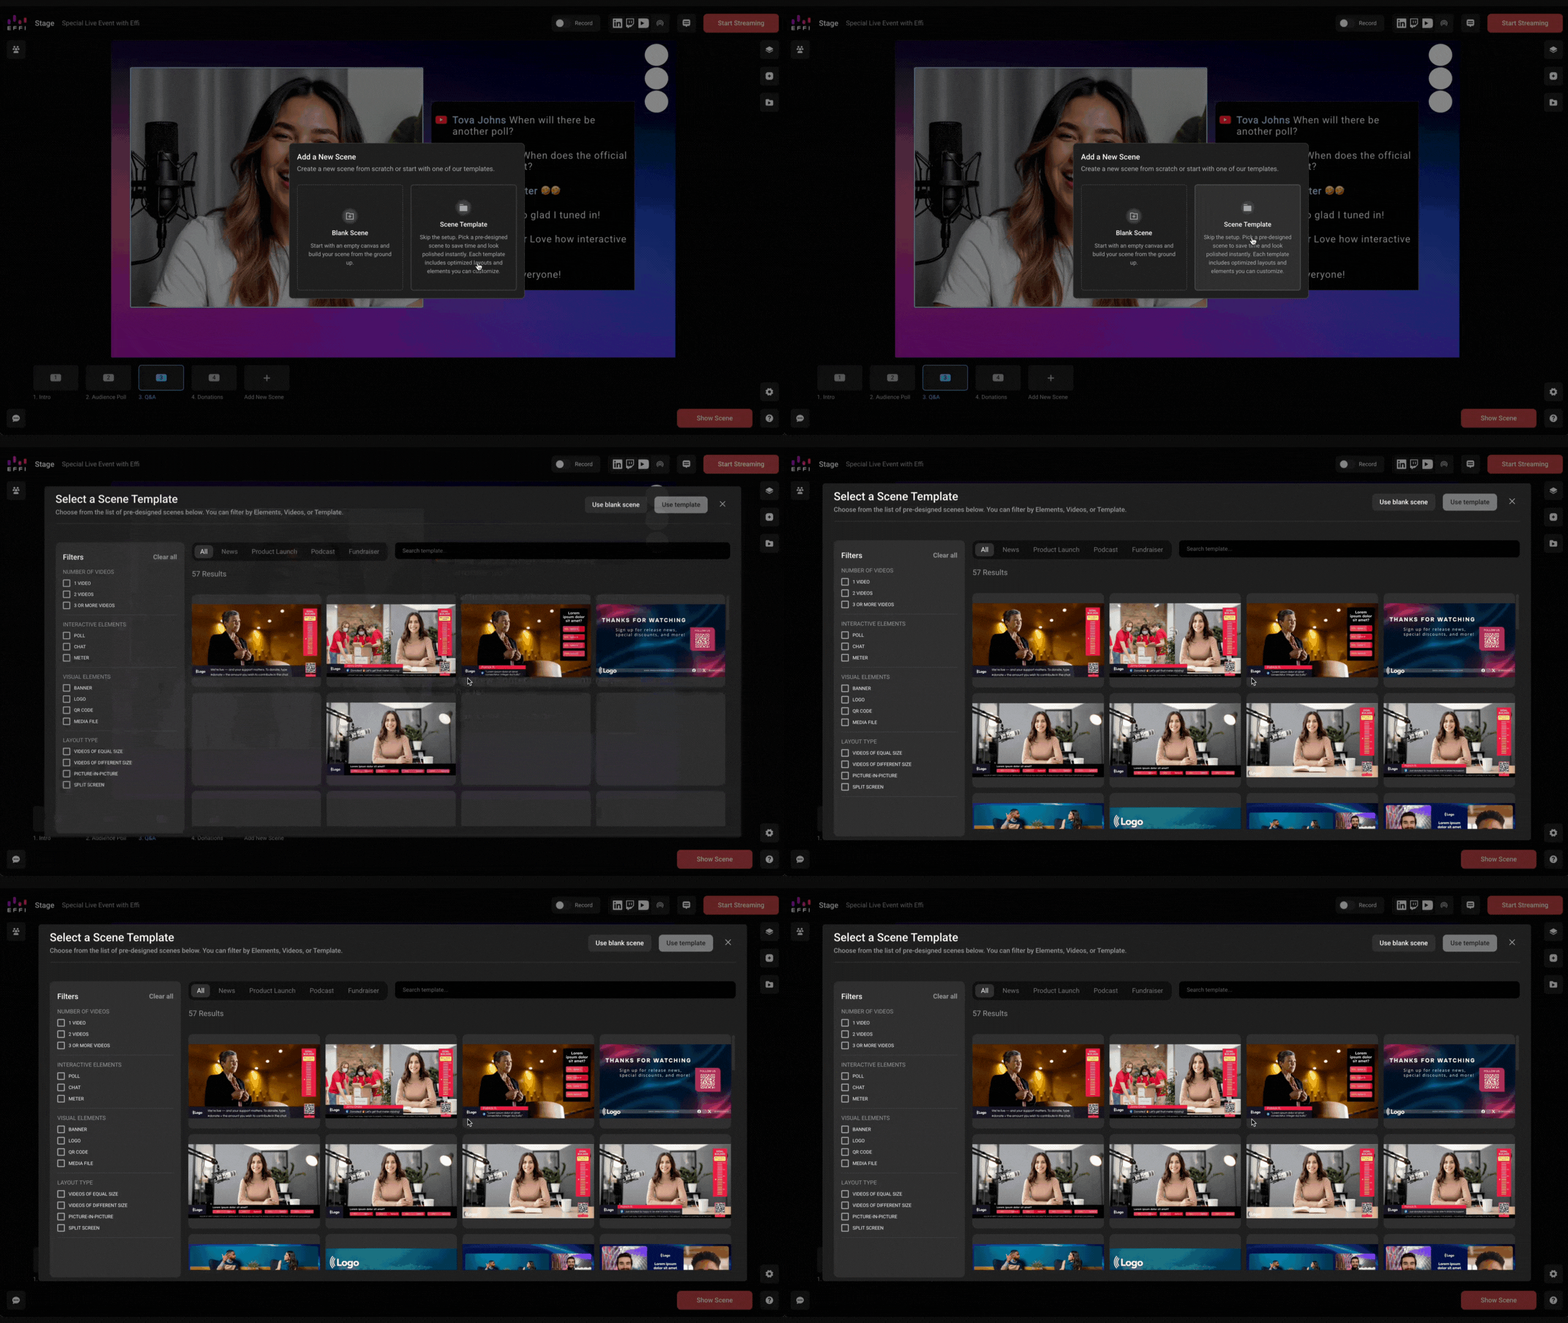
3. Browse the library. Use the filters to narrow by number of guests, interactive elements, visual elements, or layout type. You can also filter by event type — Podcast, News, Product Launch, or Fundraiser.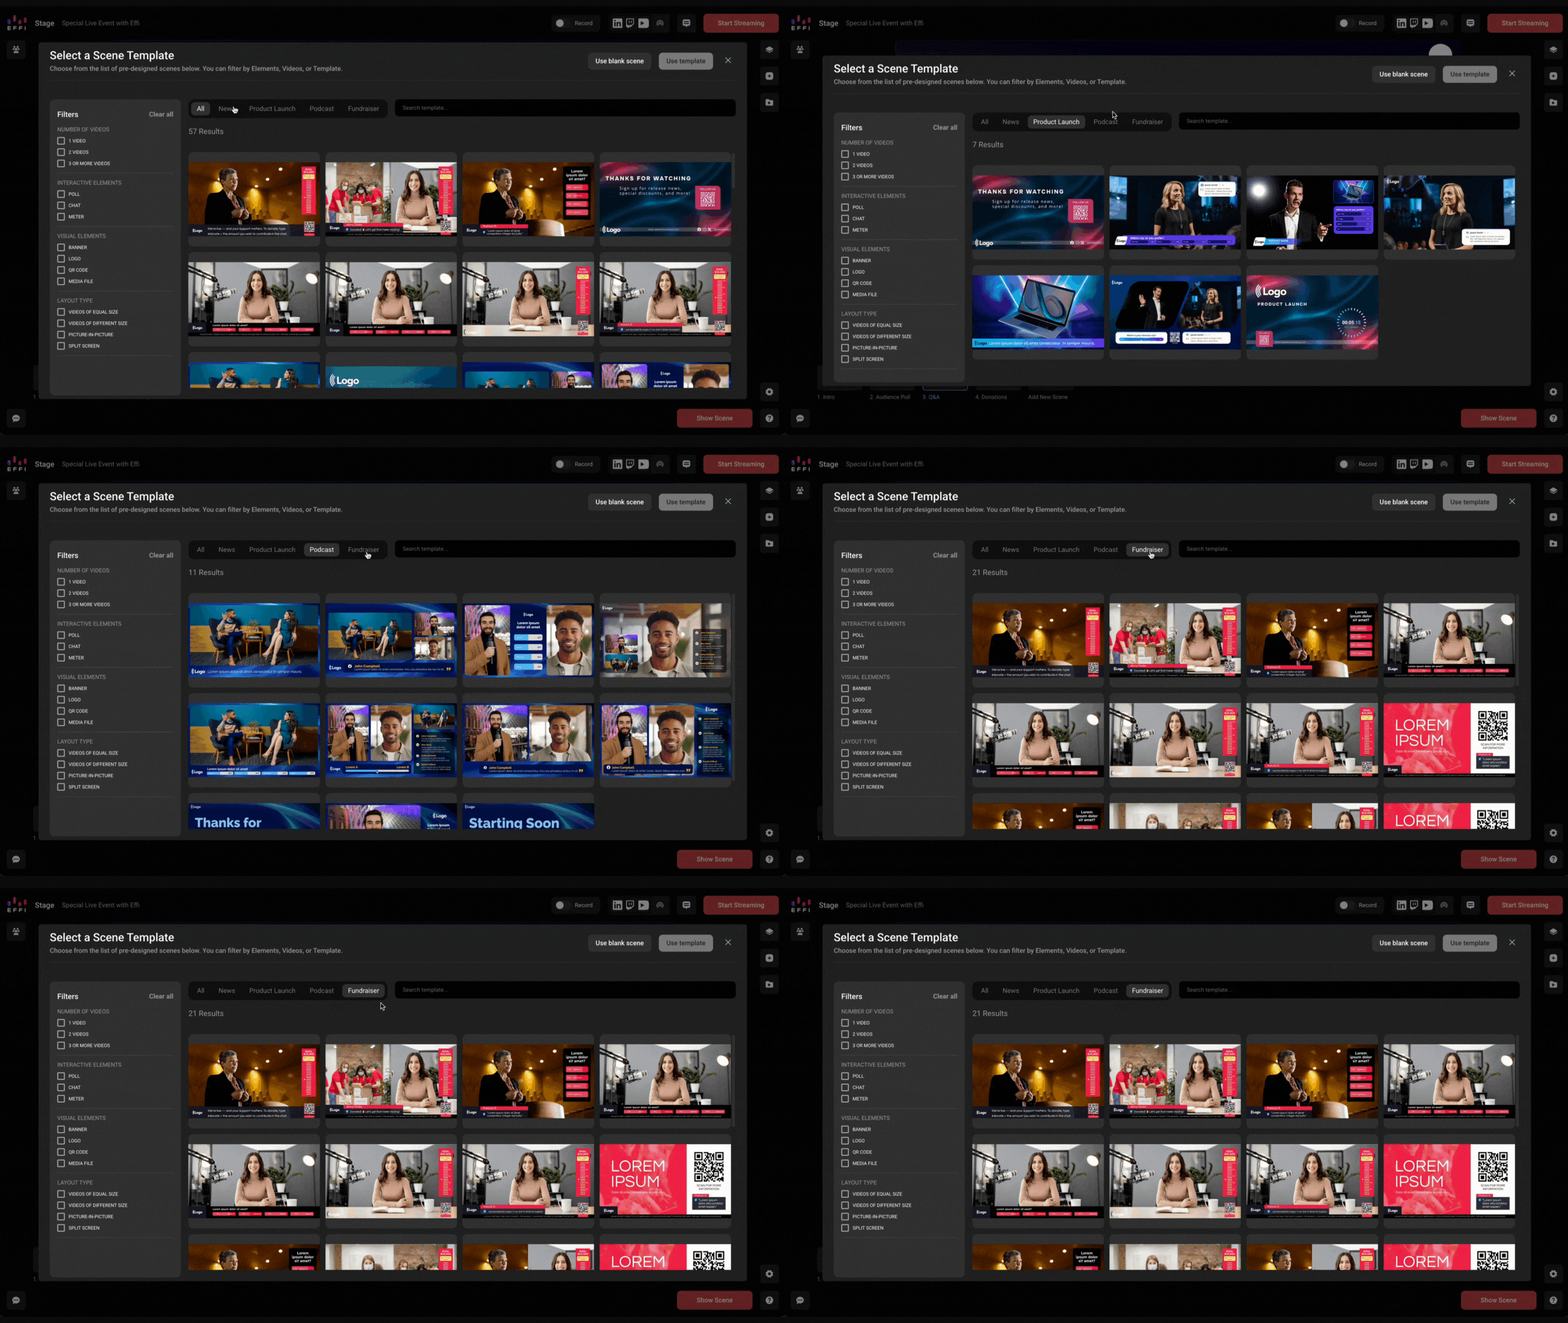
4. Select a scene and click Use Template. The scene will be added directly to your event's scene list.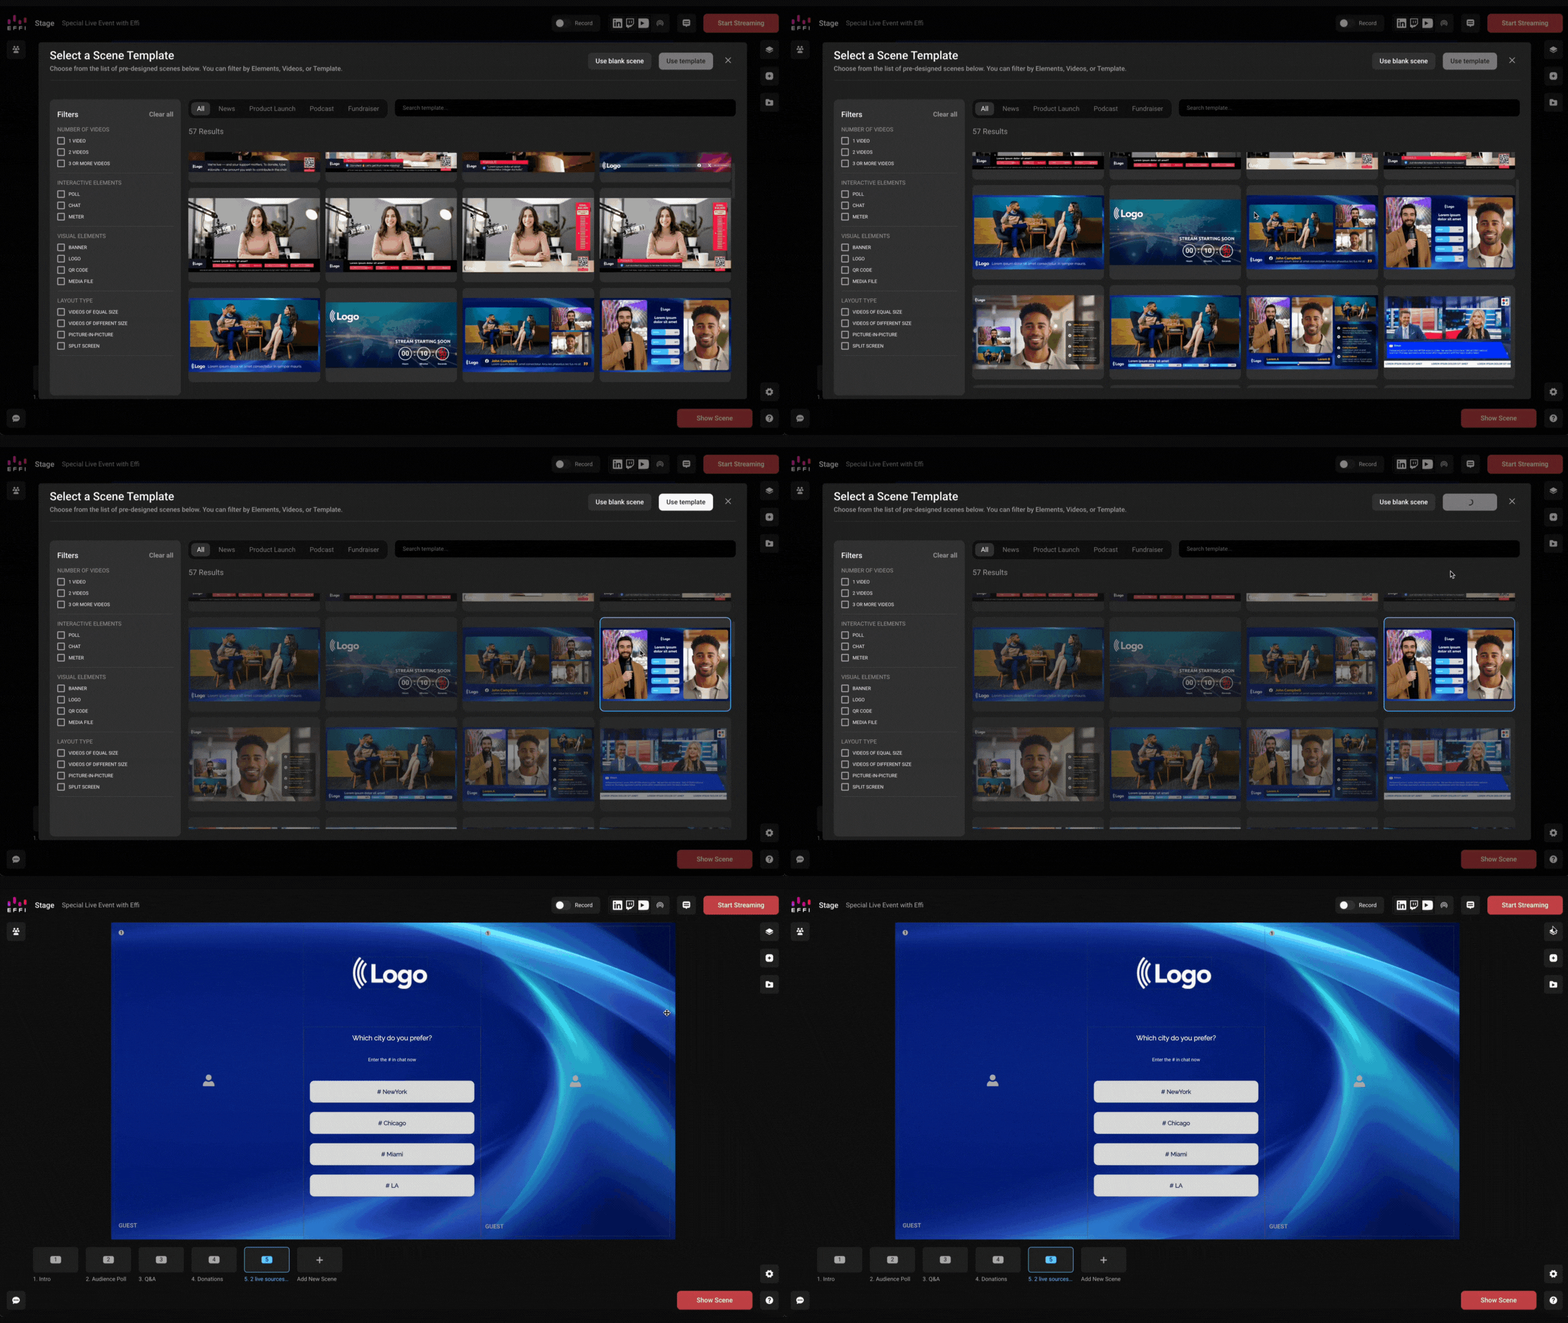
5. Customize the scene. Edit anything — layout, branding, content, elements. Editing a scene does not affect the original template in the library.
Note: You can also drag and drop the scenes to reorder it within your event
Scene Settings
Each scene has its own settings — name, background, and more. To access them:
1. Click the Layers icon on the right-hand panel.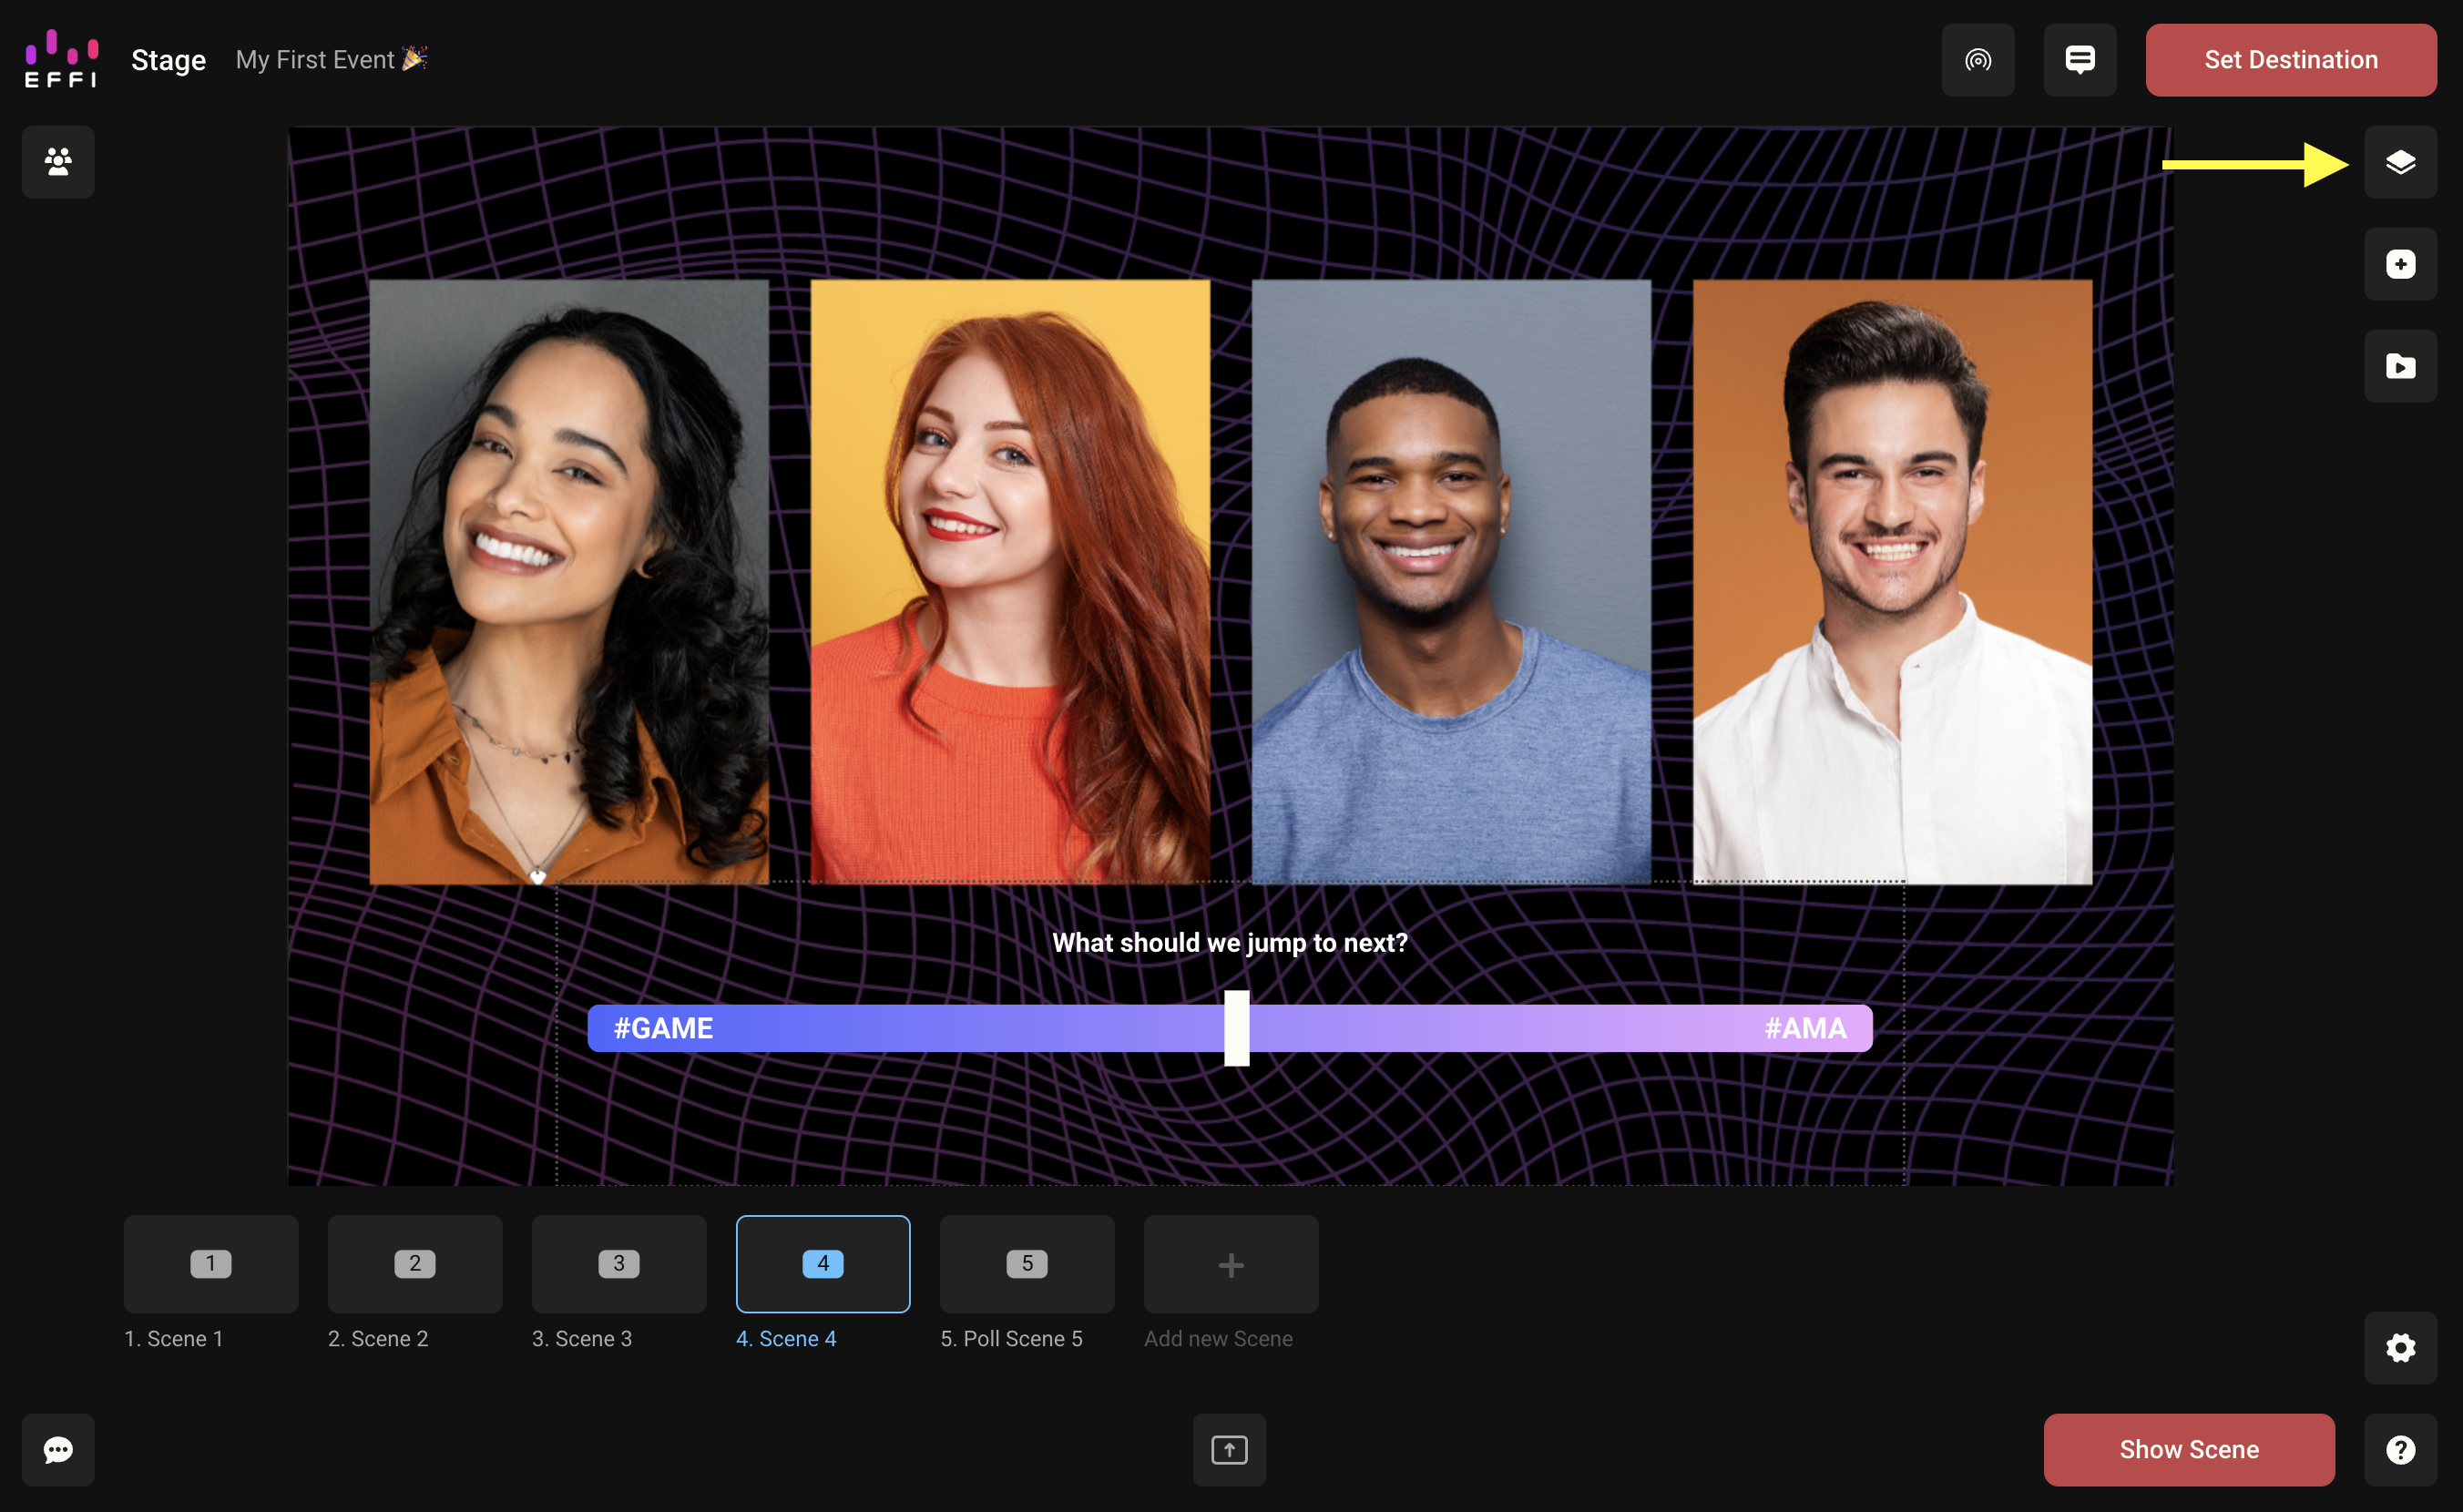
2. The panel shows Layers and Scene Settings for the scene you're currently on.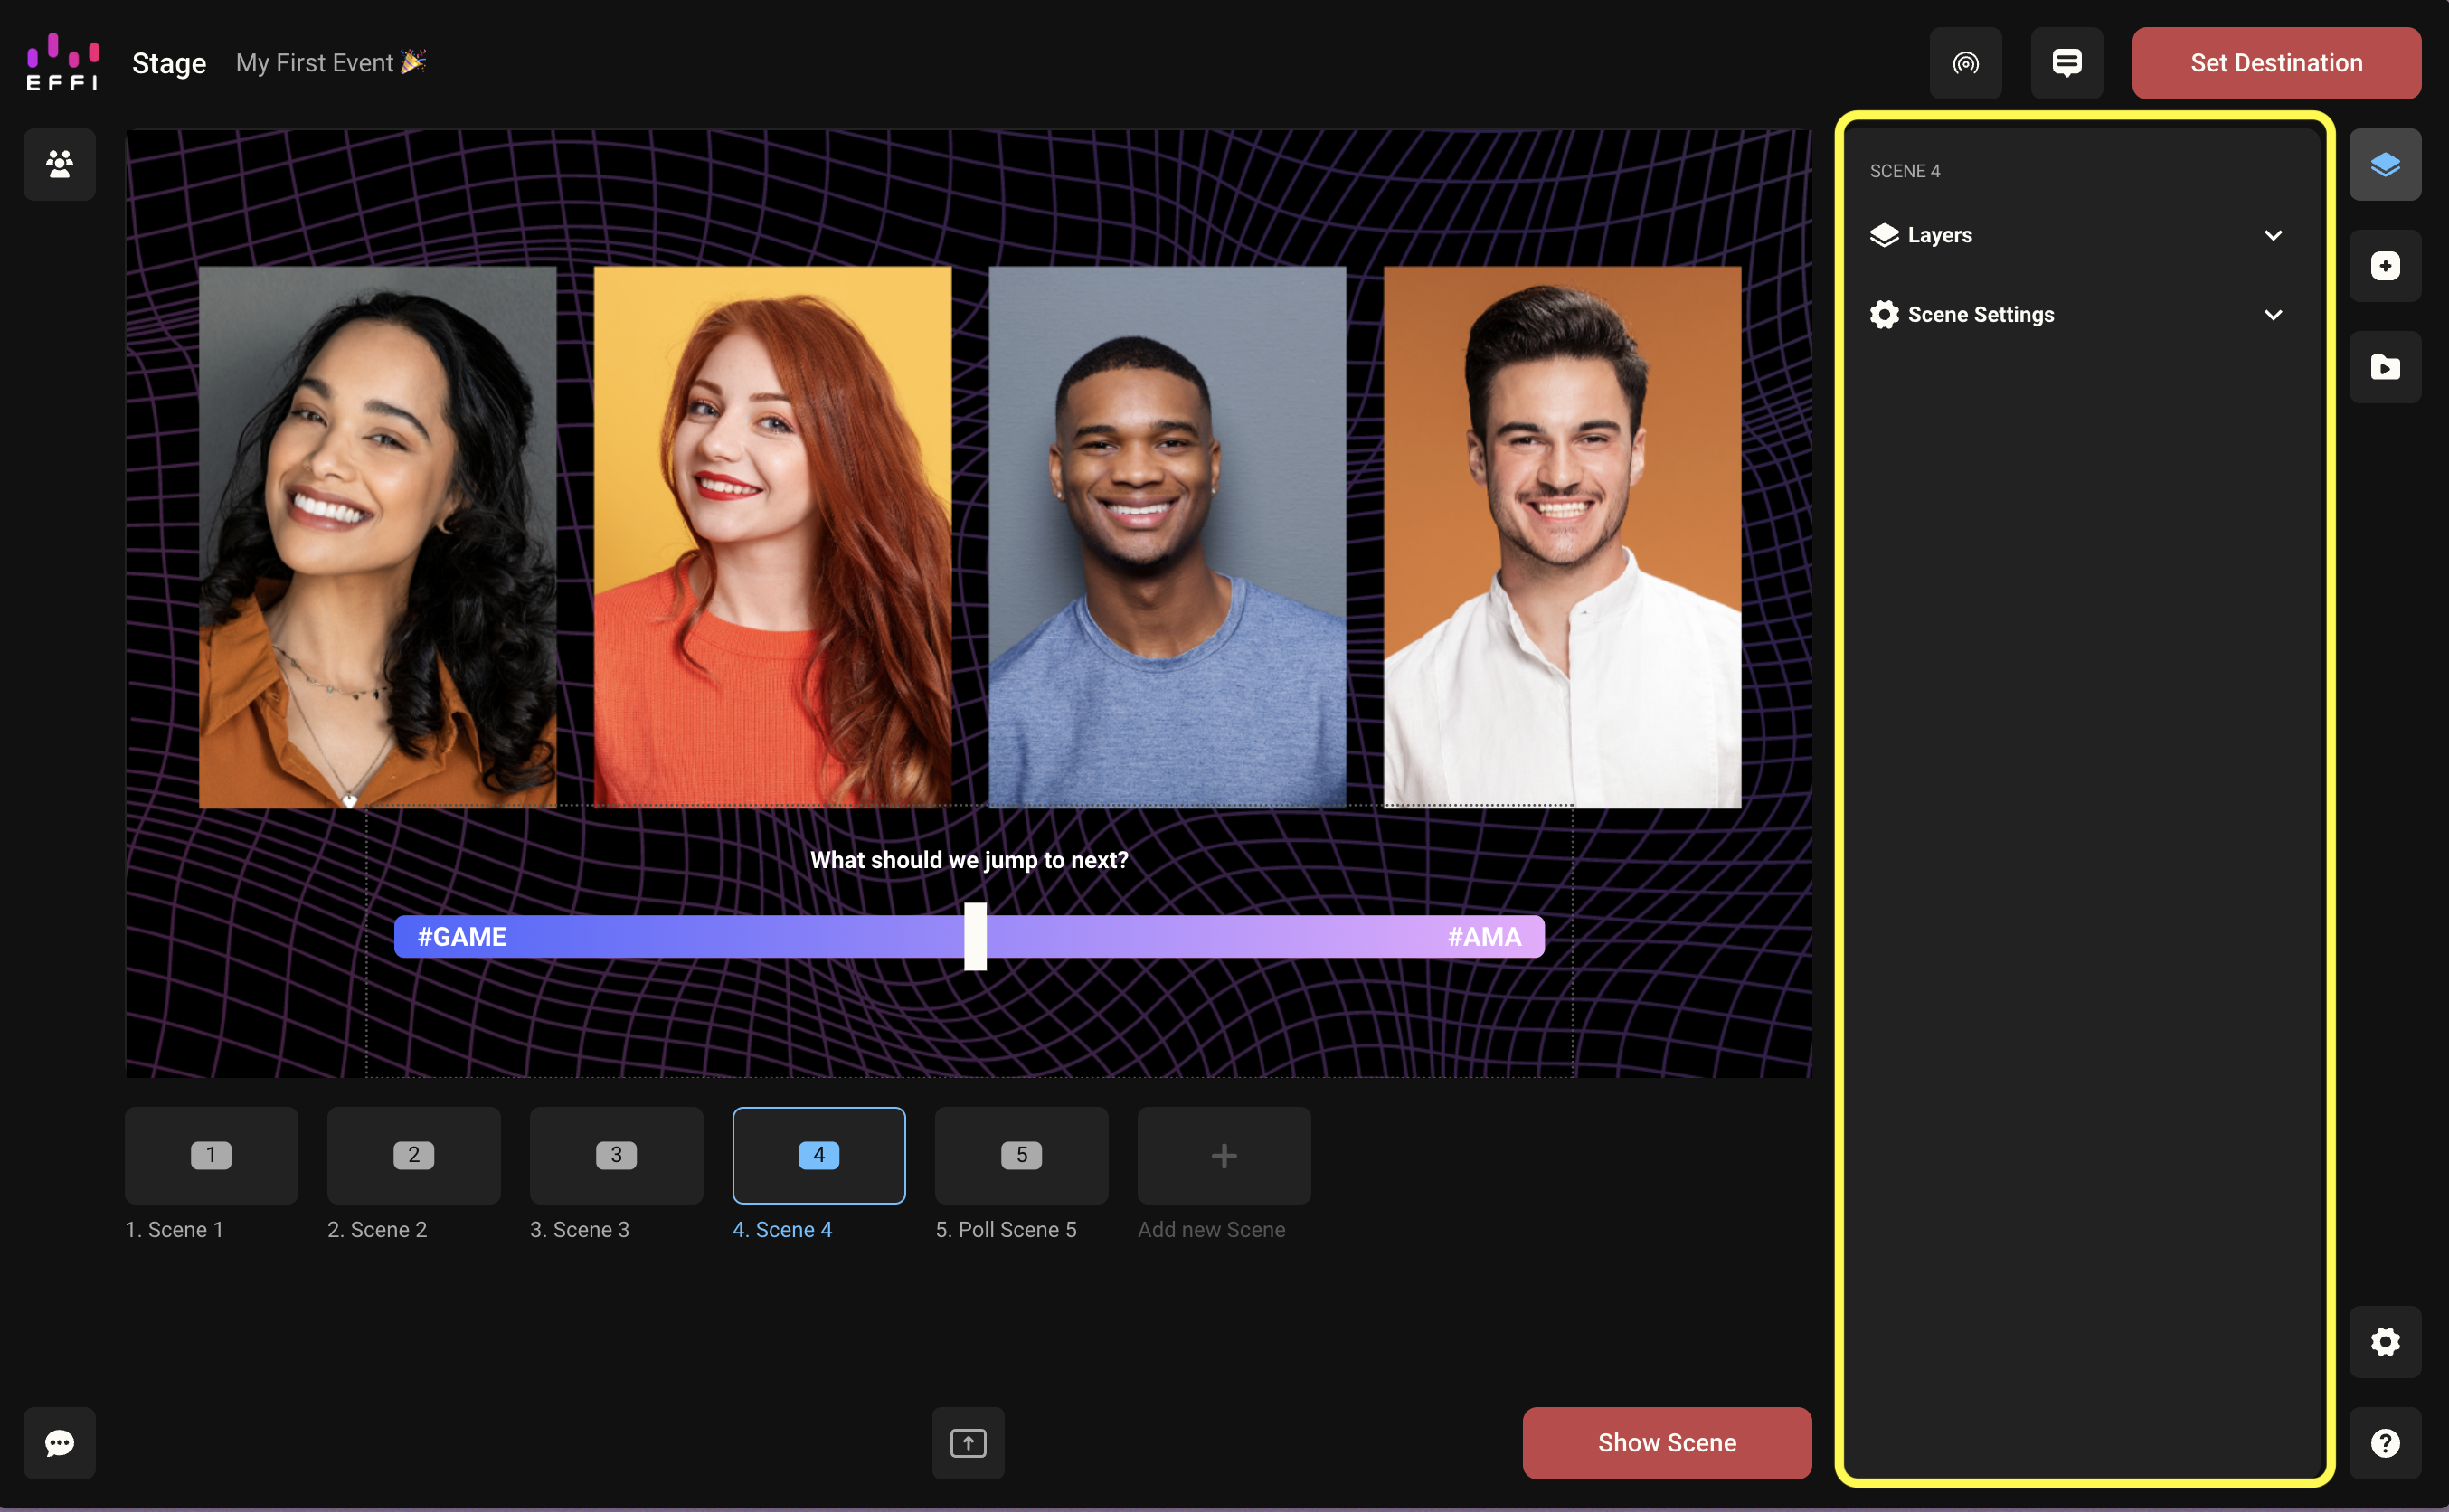
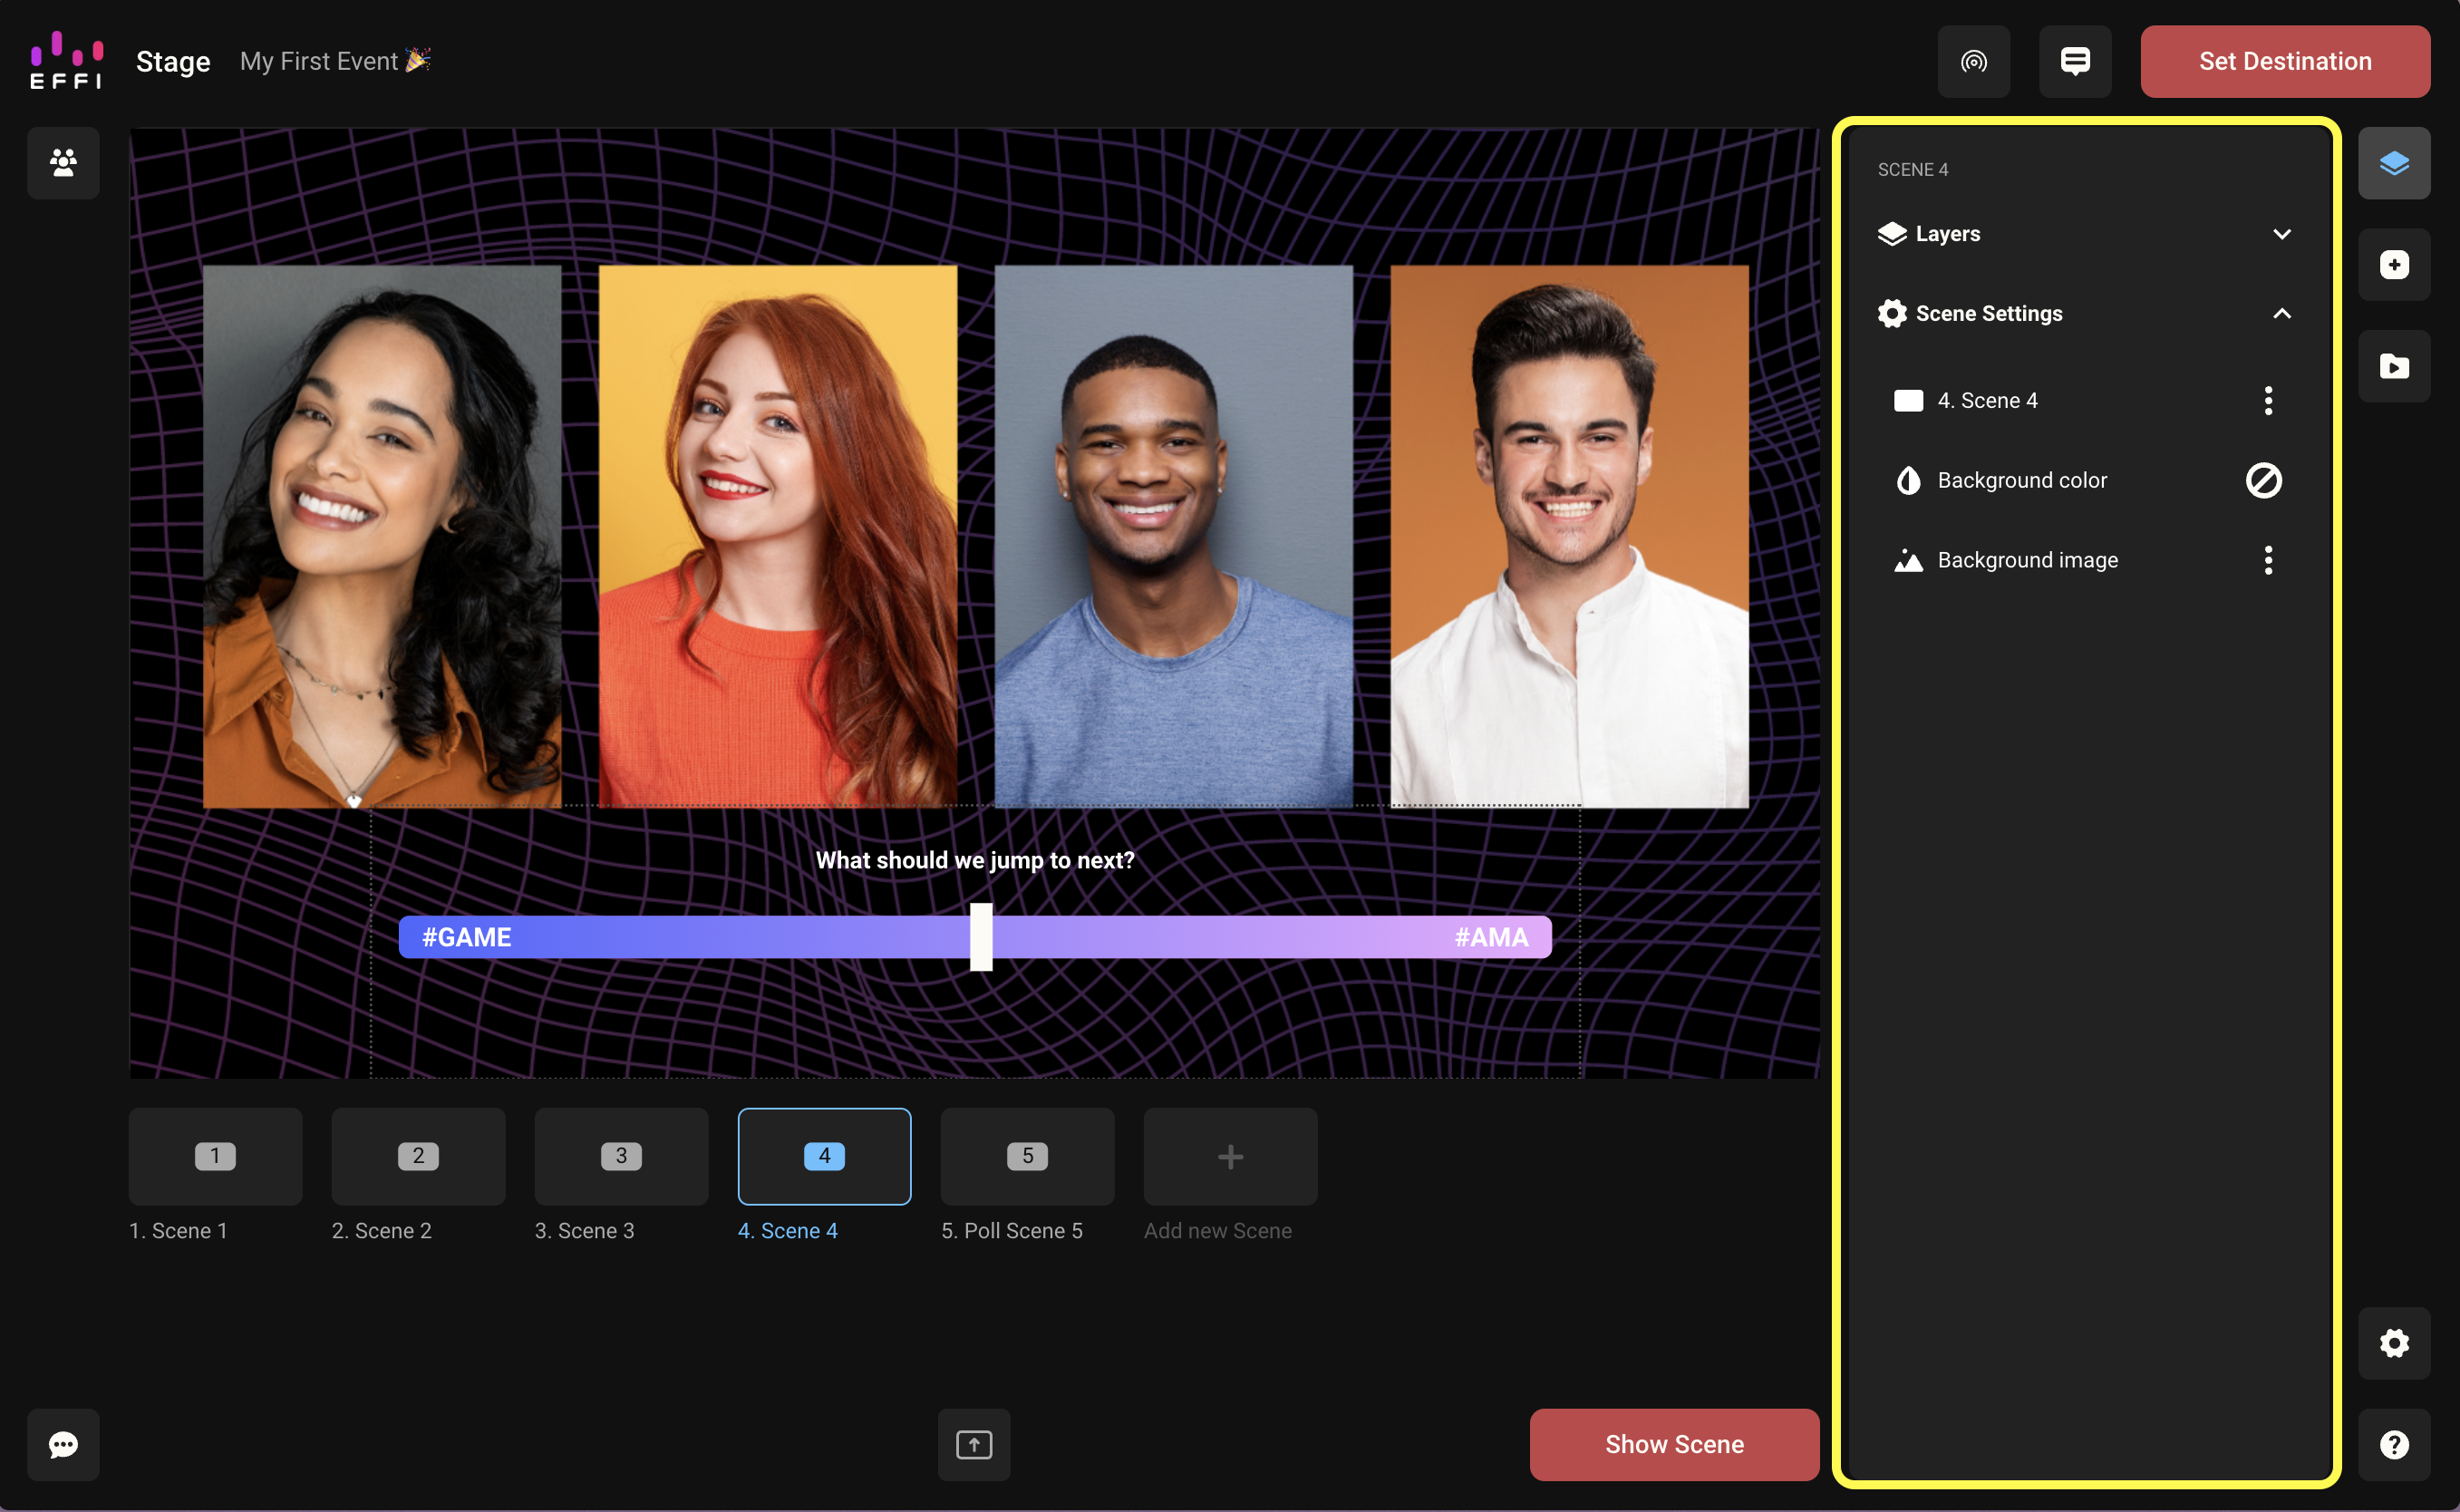
3. Click Scene Settings to expand the menu.
Here you'll see the scene name, background color option, and background image option. Each scene has its own independent settings — what you apply to Scene 1 has no effect on Scene 2.
4. Click the three-dot menu next to any scene name for additional options: Rename, Duplicate, and Delete.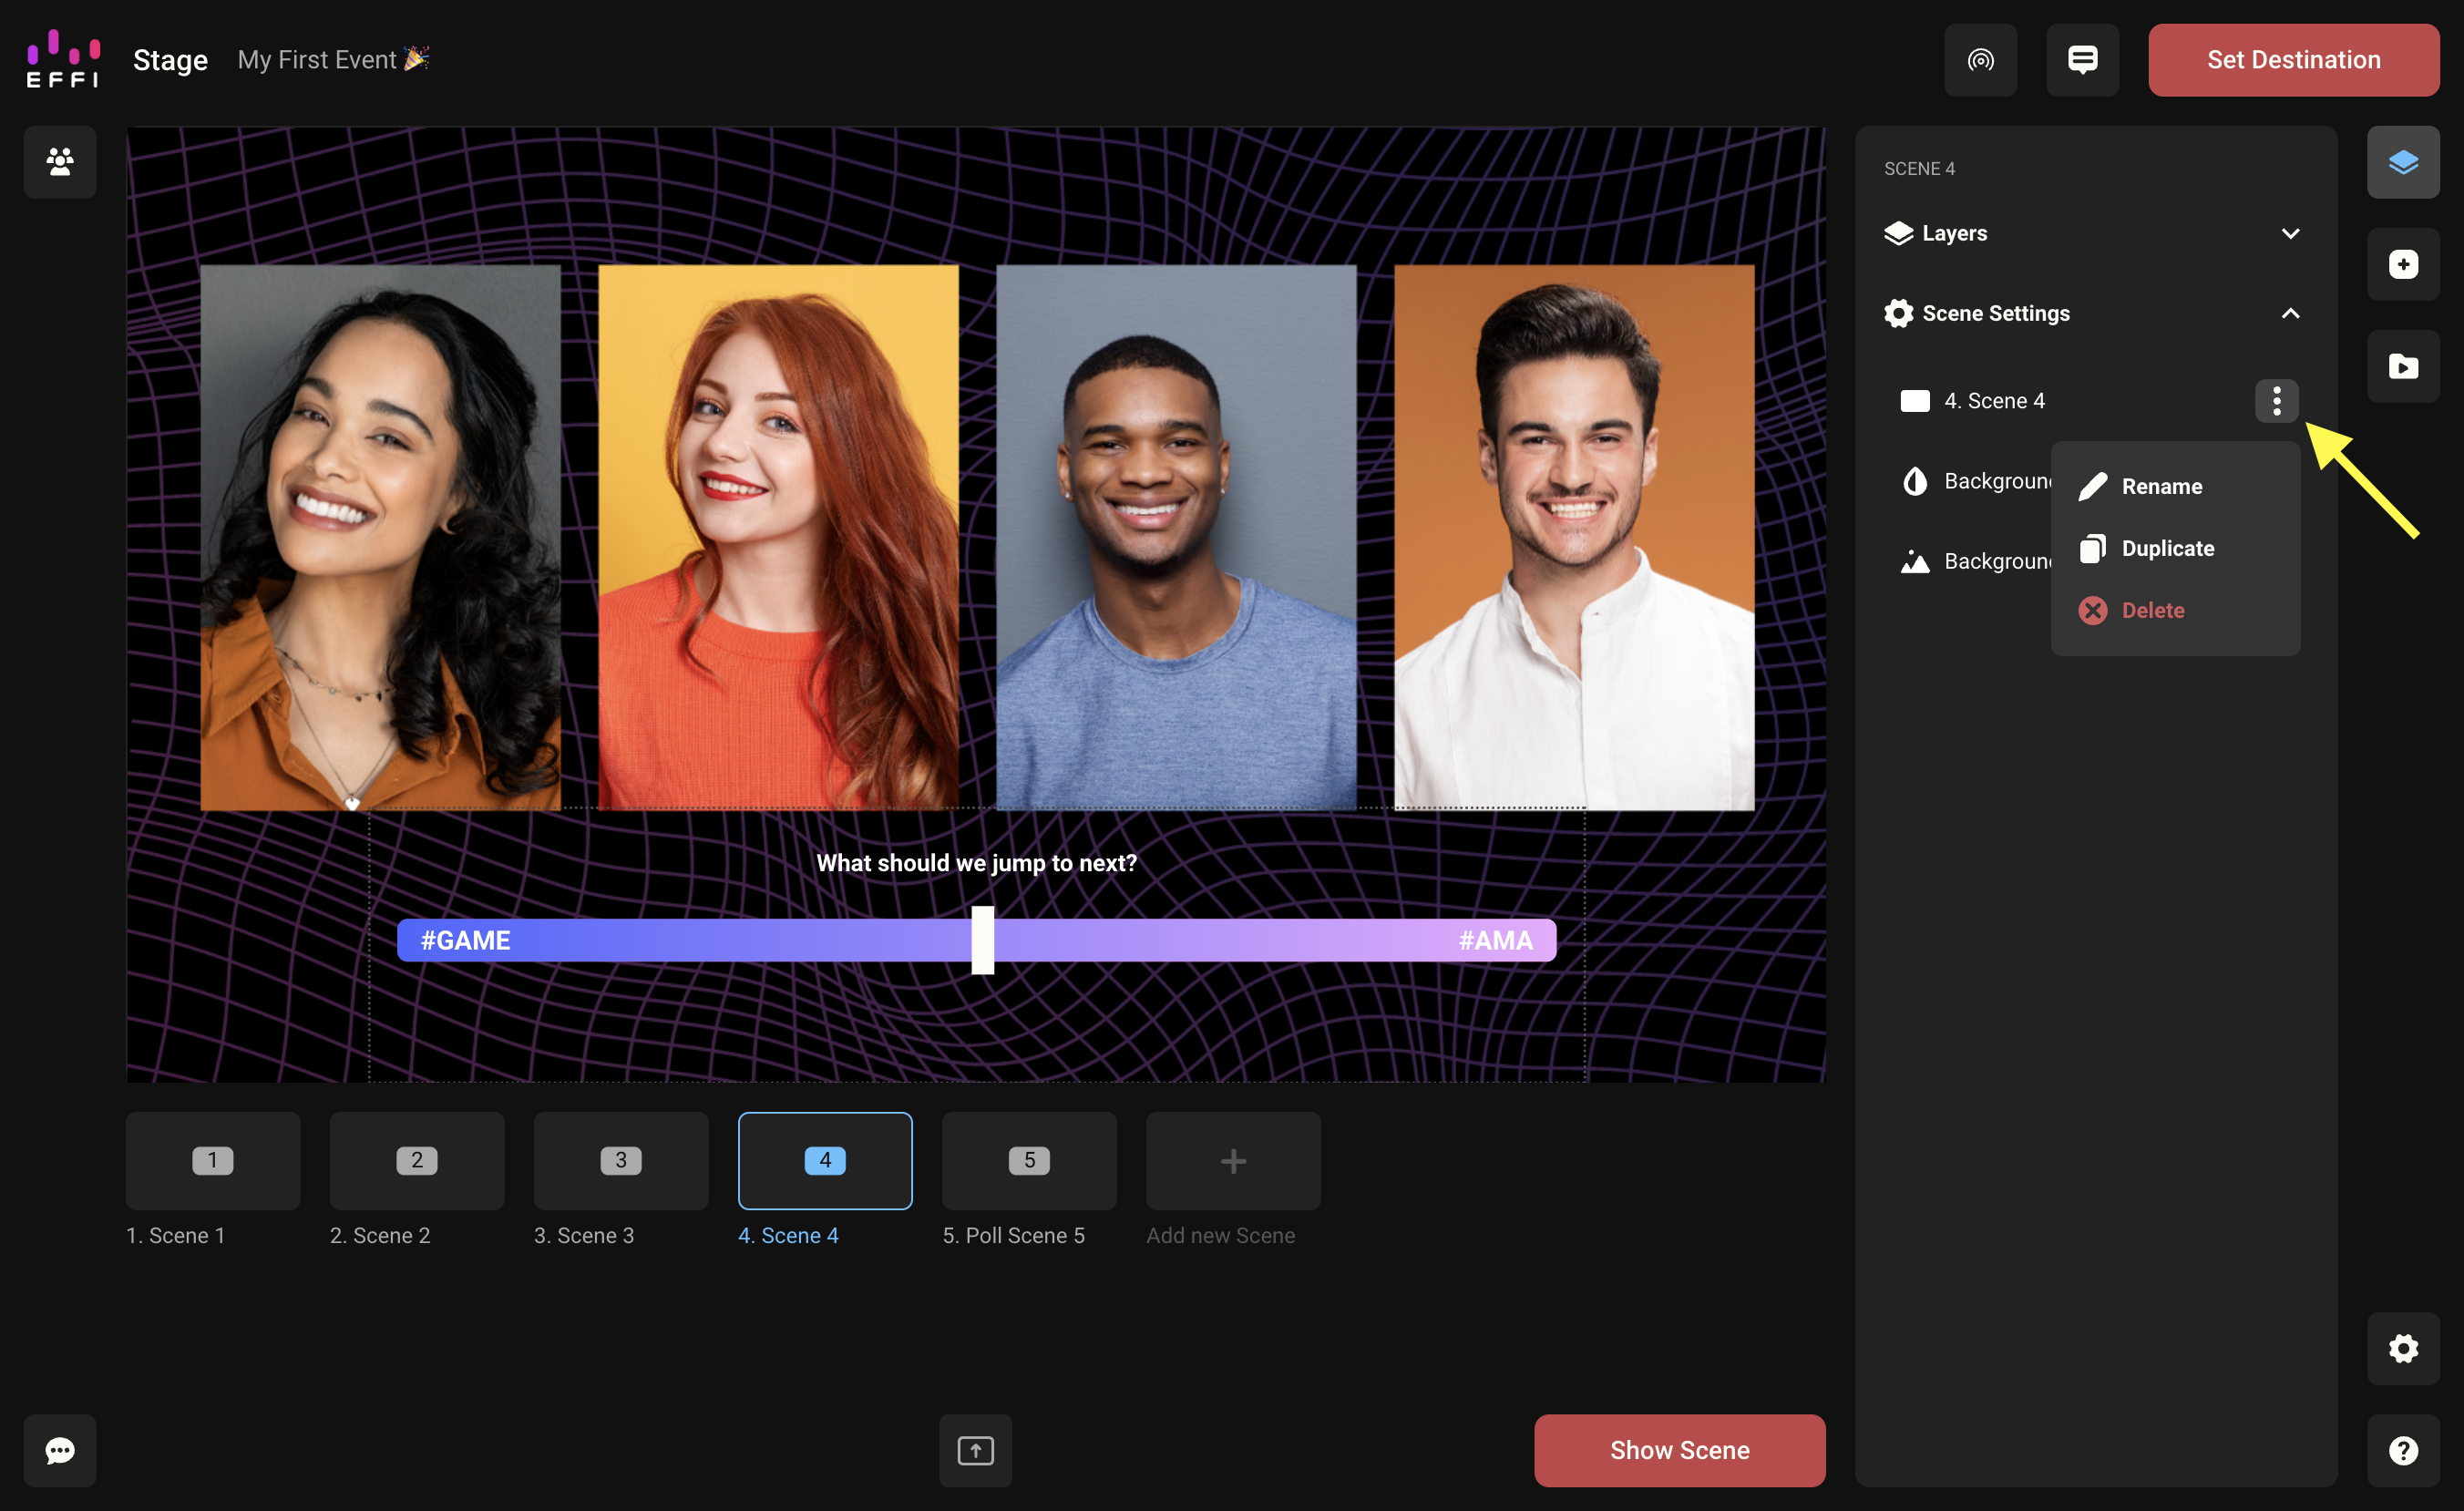
Adding Elements to a Scene
You can also add elements directly to a scene at any time using the Scene Settings panel from within Stage.
Making Changes While Live
Can I add more scenes while the broadcast is live?
Yes. You can add new scenes at any time — even after you've gone live. Your viewers will only ever see the scene you've set live. While they're watching that scene, you can add, edit, rename, or delete other scenes in the background without them seeing a thing. Simply click the + button in your scene menu and add however many scenes you need.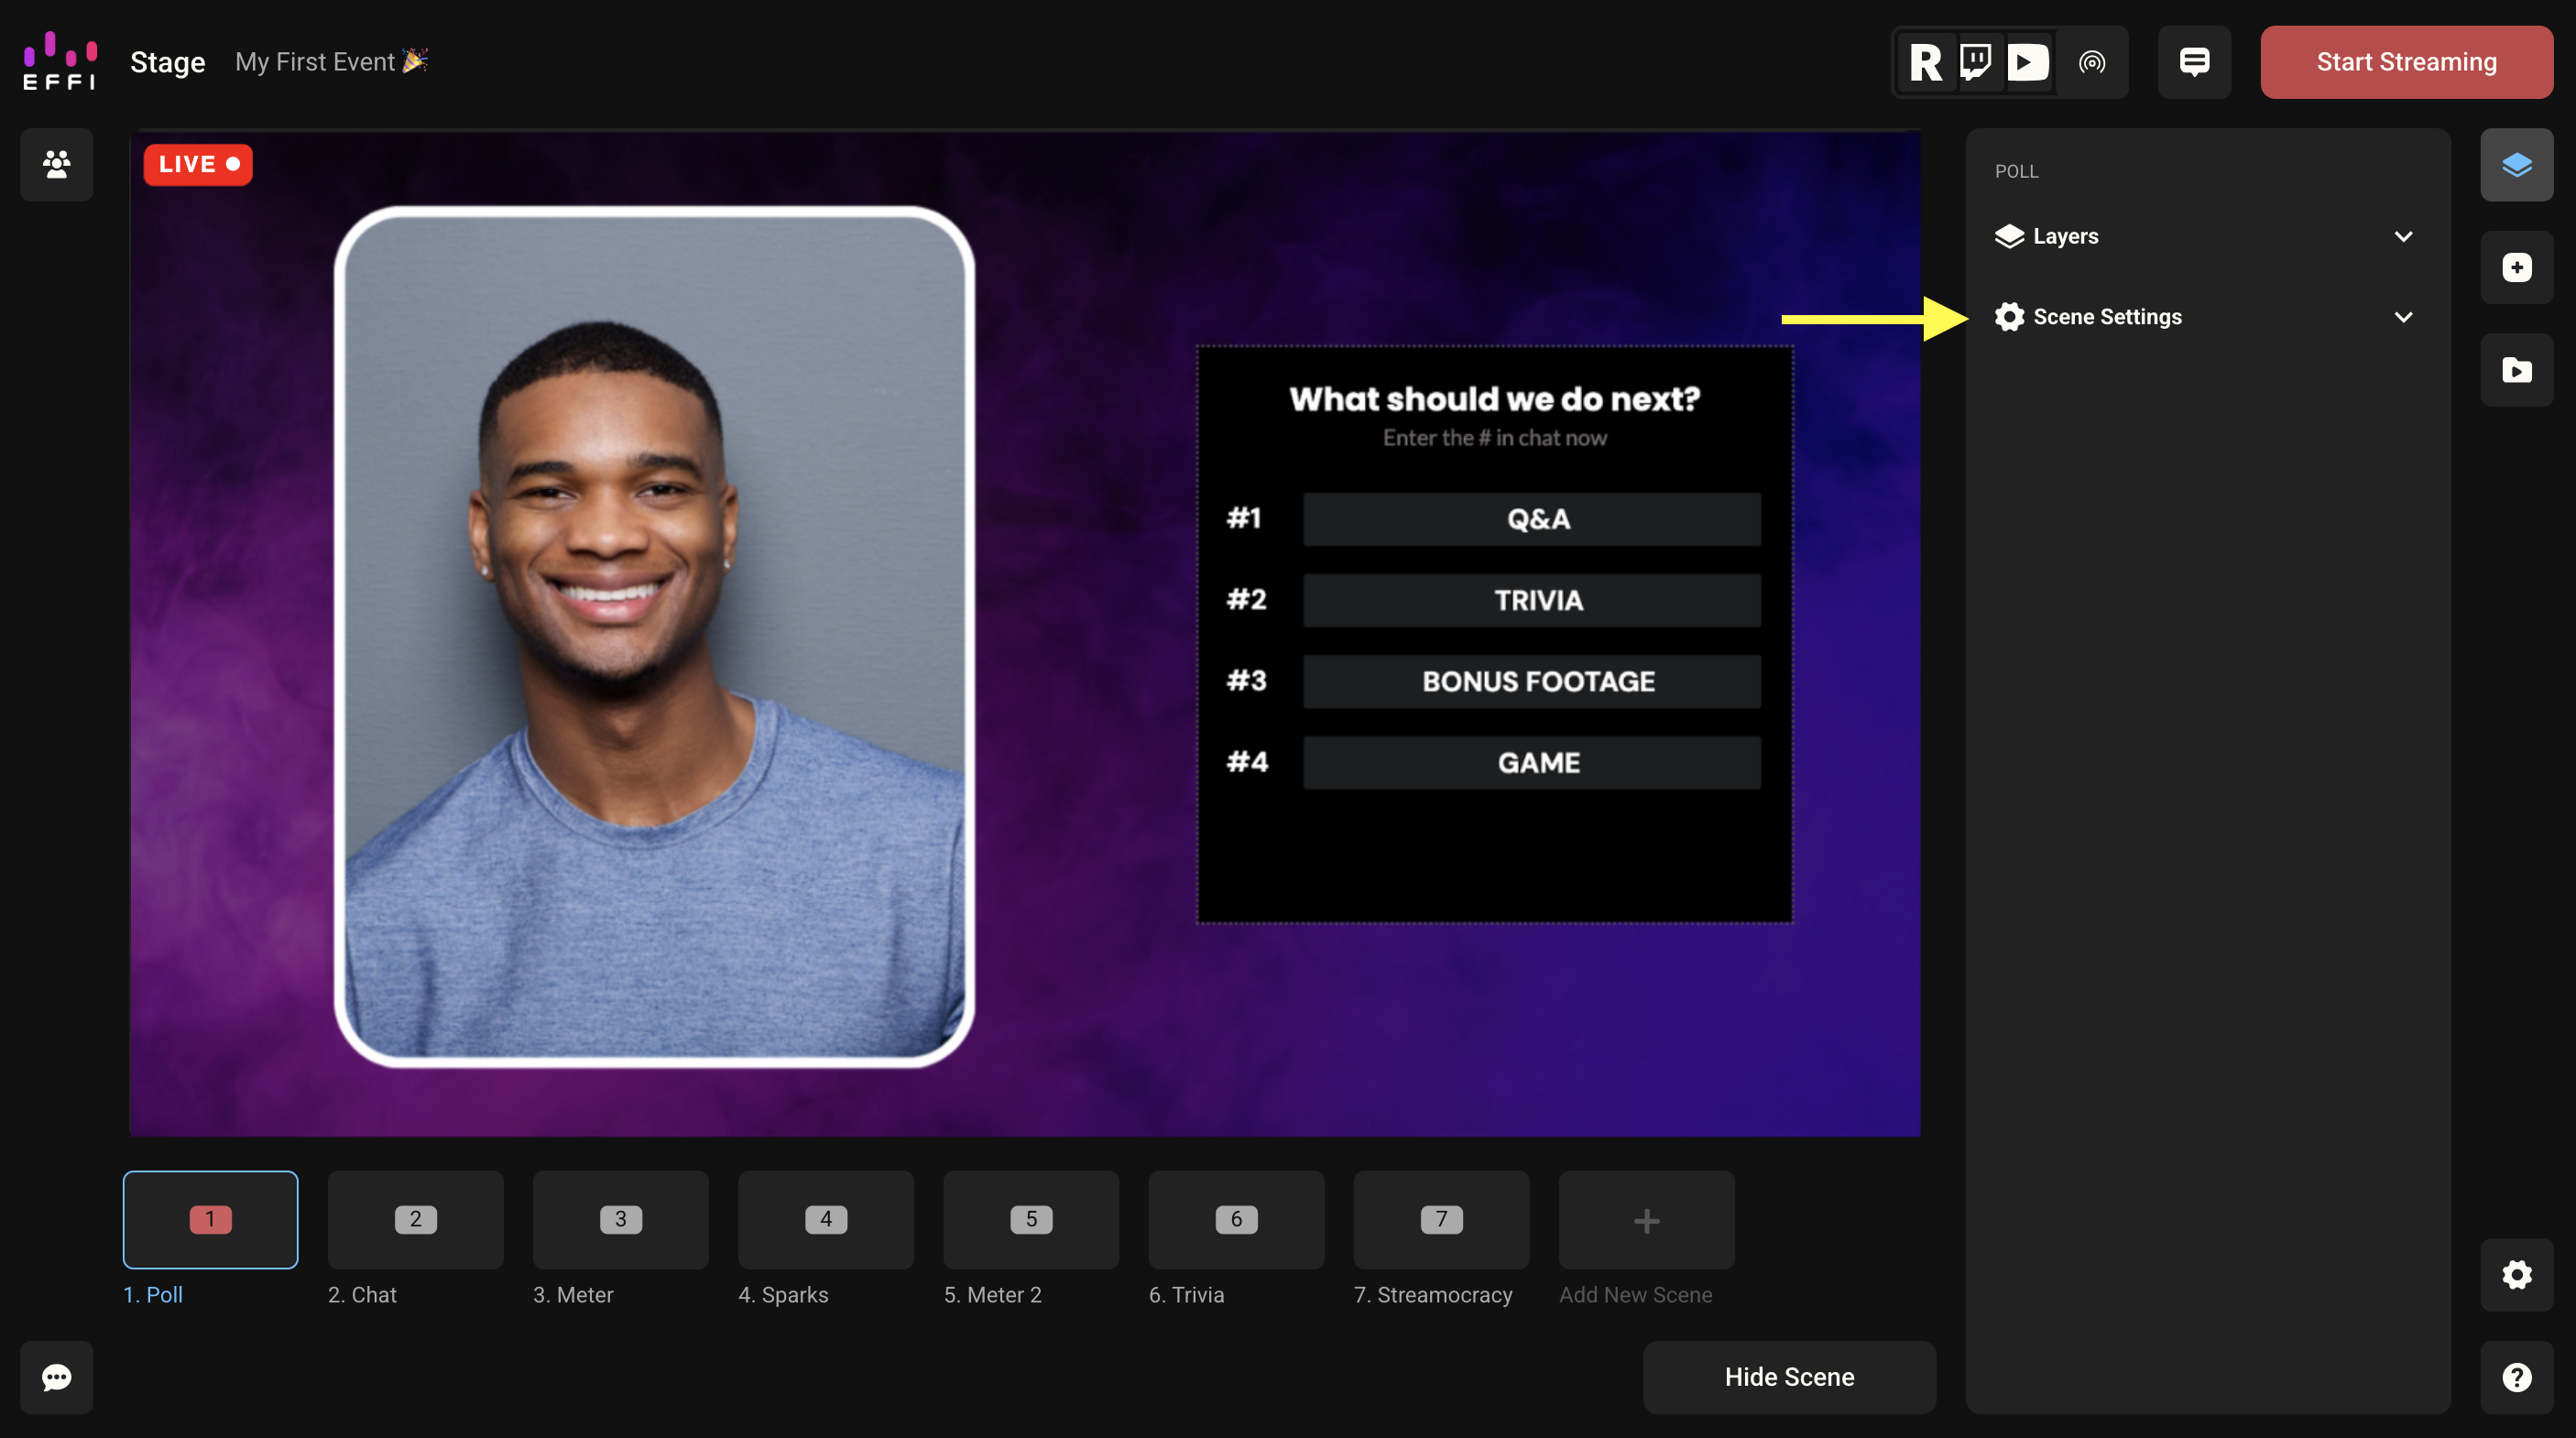
Can I add elements to a scene that's already live?
Yes — but anything you add to a live scene will be immediately visible to your audience. If you're not ready for viewers to see the changes, the best approach is to duplicate the scene first, make your edits there, and then set the updated scene live when you're ready.
To duplicate a scene, hover over it in the scene menu to reveal the quick action menu, then select Duplicate. The duplicate won't be live — only the original stays live until you switch.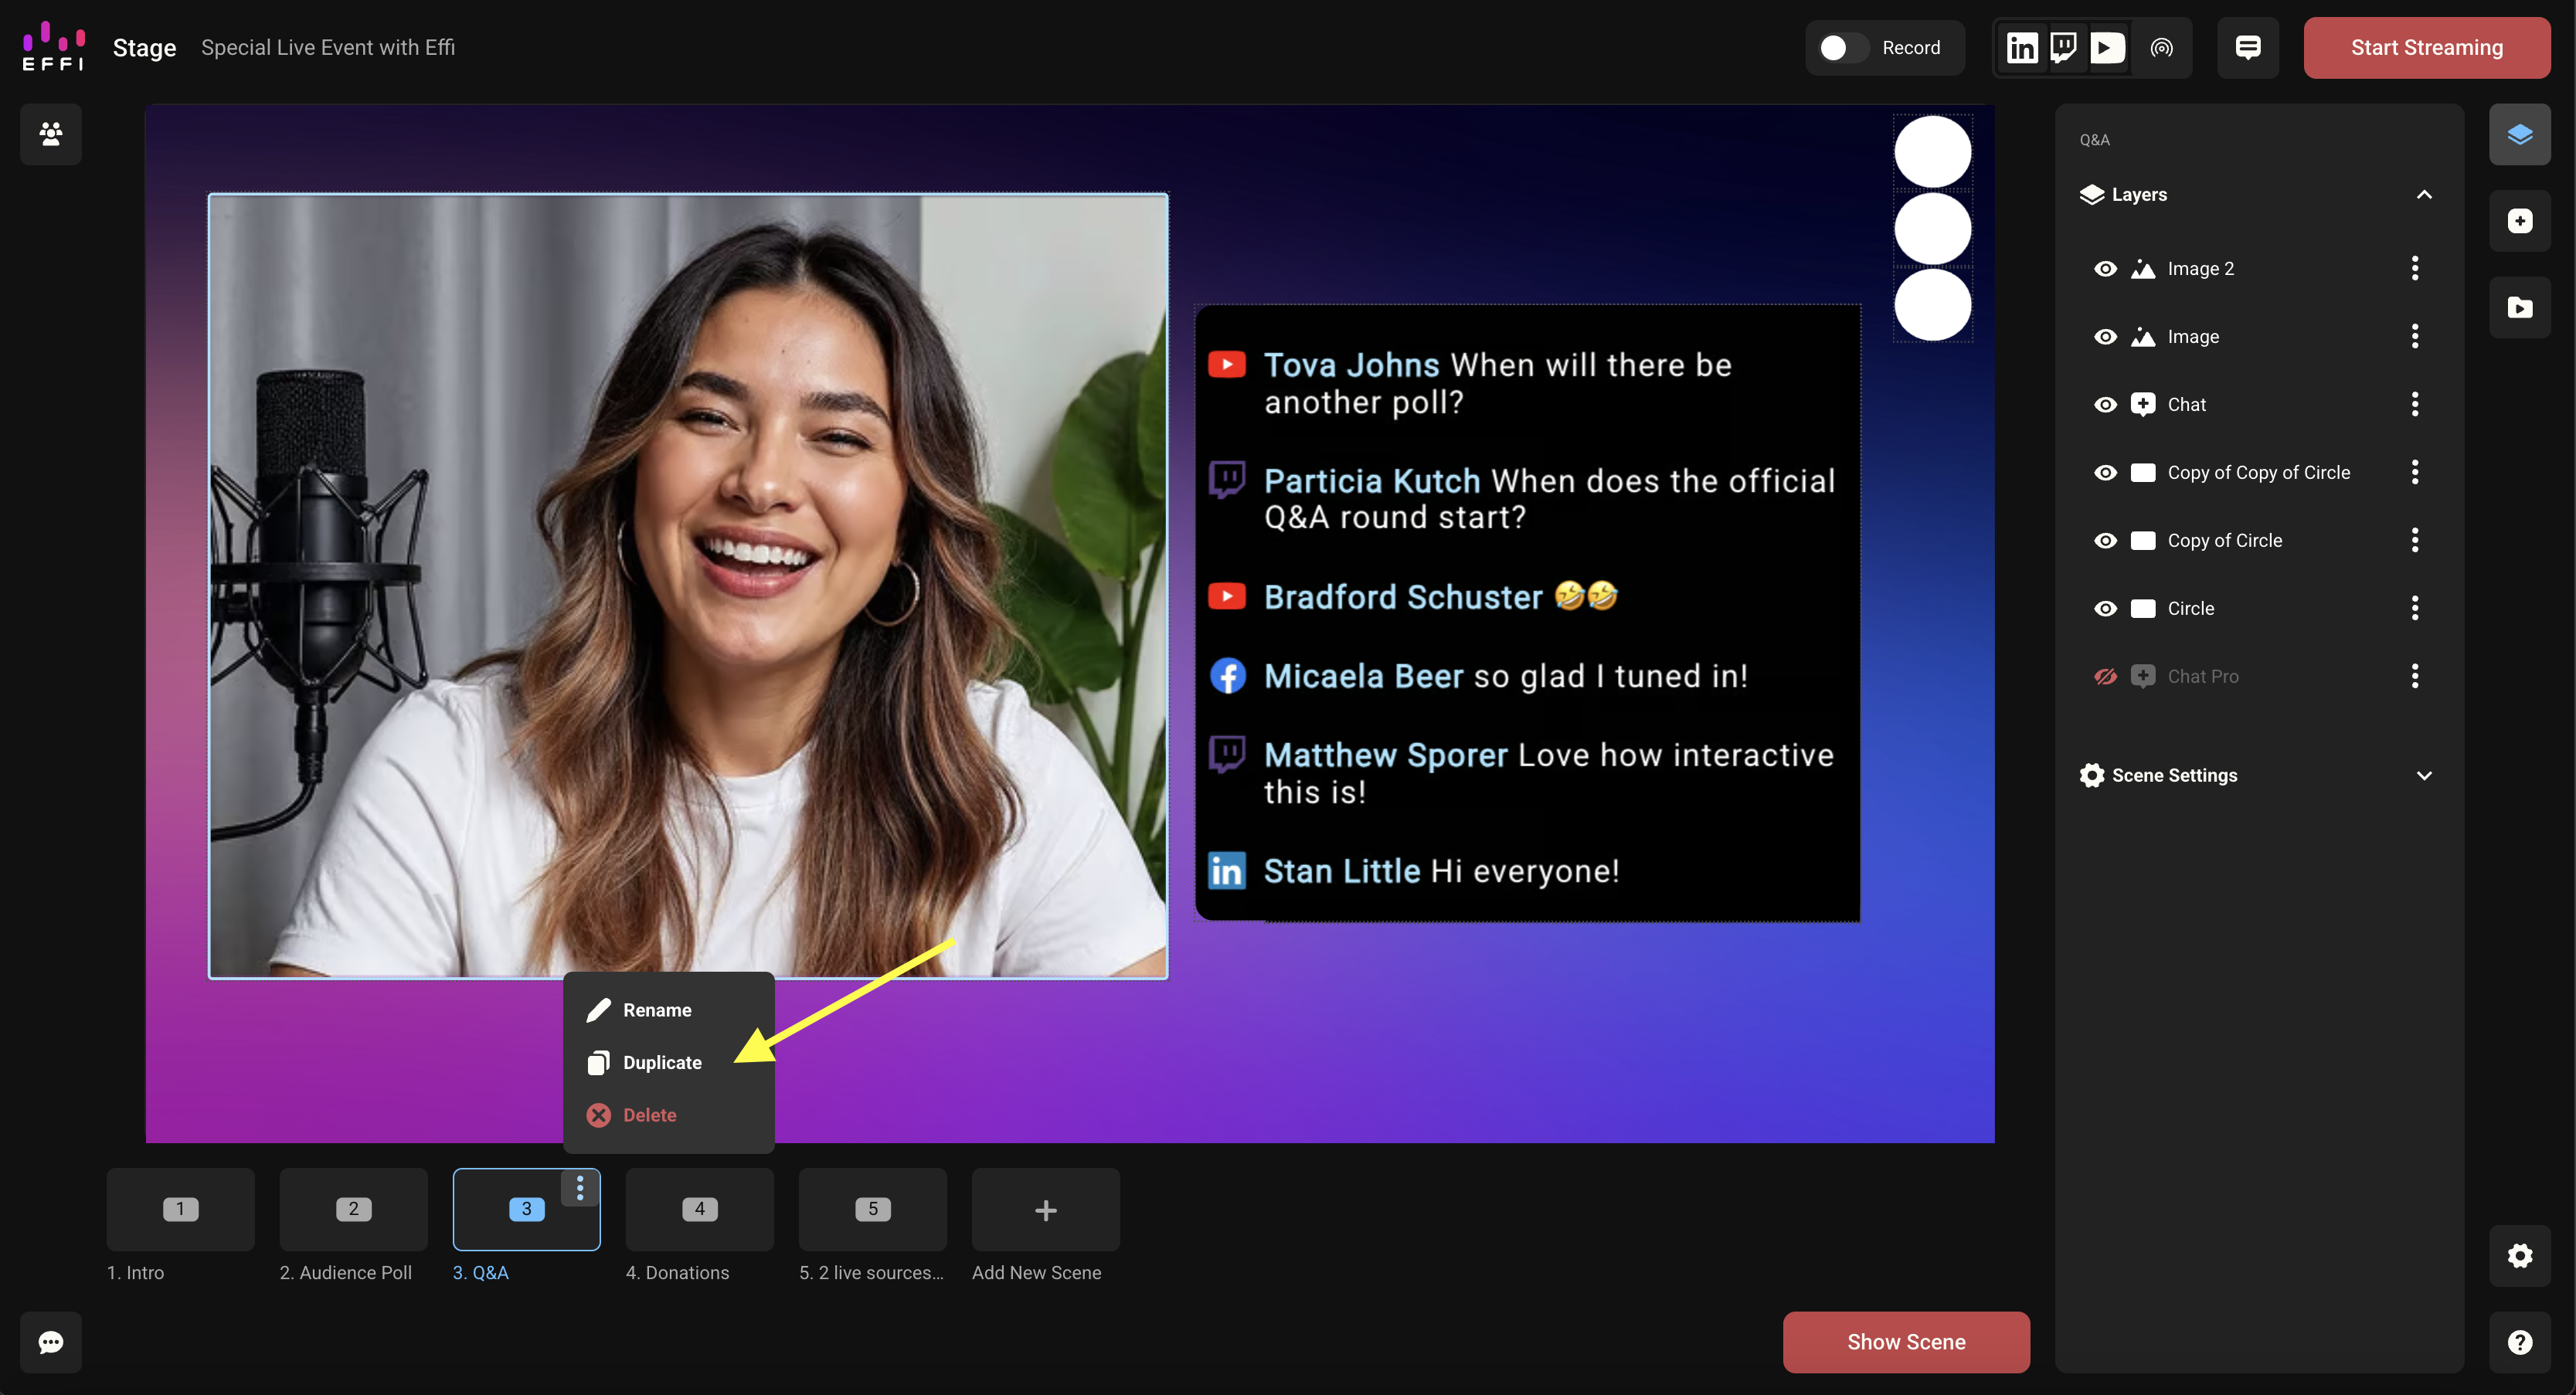
Was this article helpful?
That’s Great!
Thank you for your feedback
Sorry! We couldn't be helpful
Thank you for your feedback
Feedback sent
We appreciate your effort and will try to fix the article