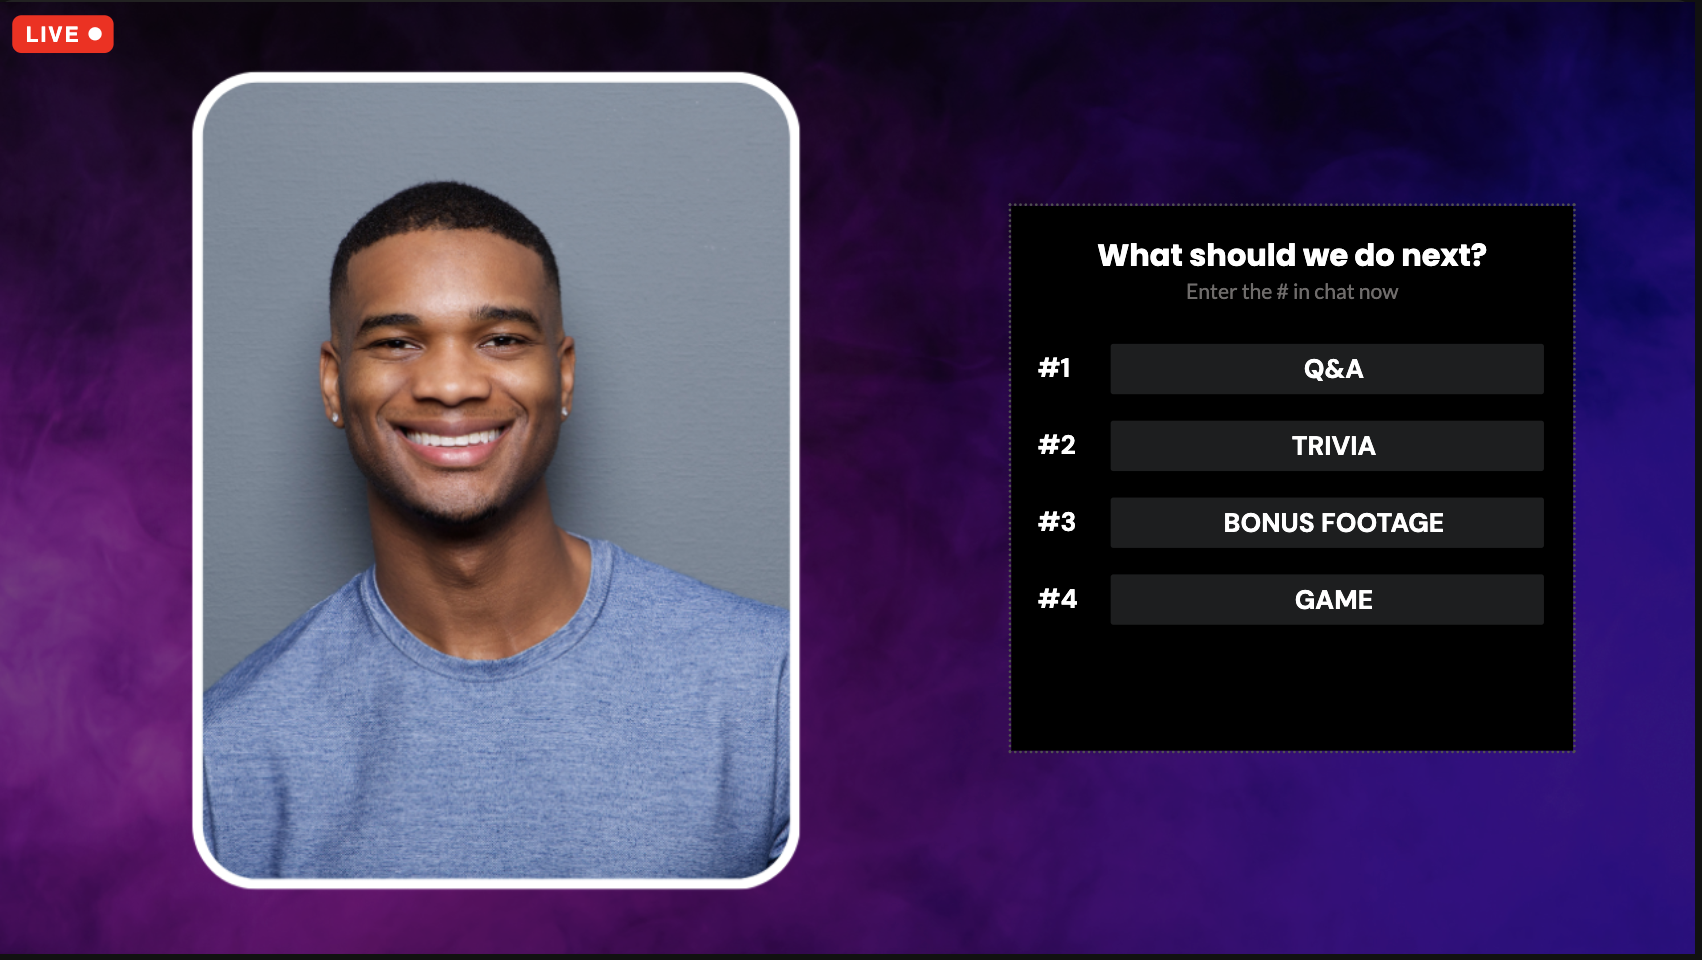
Effi Polls are interactive elements that you can add to your livestream to engage your audience and gather feedback from them in real time. All polls are added and managed from the Elements panel in Stage. You can add one of our pre-designed templates and get going, or completely transform it with Effi's array of customization options to match the look and feel of your broadcast.
There are so many ways you can use Polls to add a layer of interactivity to your livestreams. We can't wait to see what you come up with, but if you are looking for some inspiration, here are some ways to use Effi Polls:
- Let your audience vote on which topics or questions they'd like to see covered during the livestream.
- Pose trivia questions and have your audience vote on the correct answer.
- Get feedback from your audience on product features, pricing, or other aspects of your product and offerings.
- Planning an event? Gather opinions on decisions like activities, themes, and locations.
- Get ideas for future content like livestreams and video.
However you decide to incorporate polls into your livestream, they will add a level of interactivity and engagement that can level up your content in a big way that your audience is sure to love.
How to Add Polls to My Stream
Add Polls to Your Event
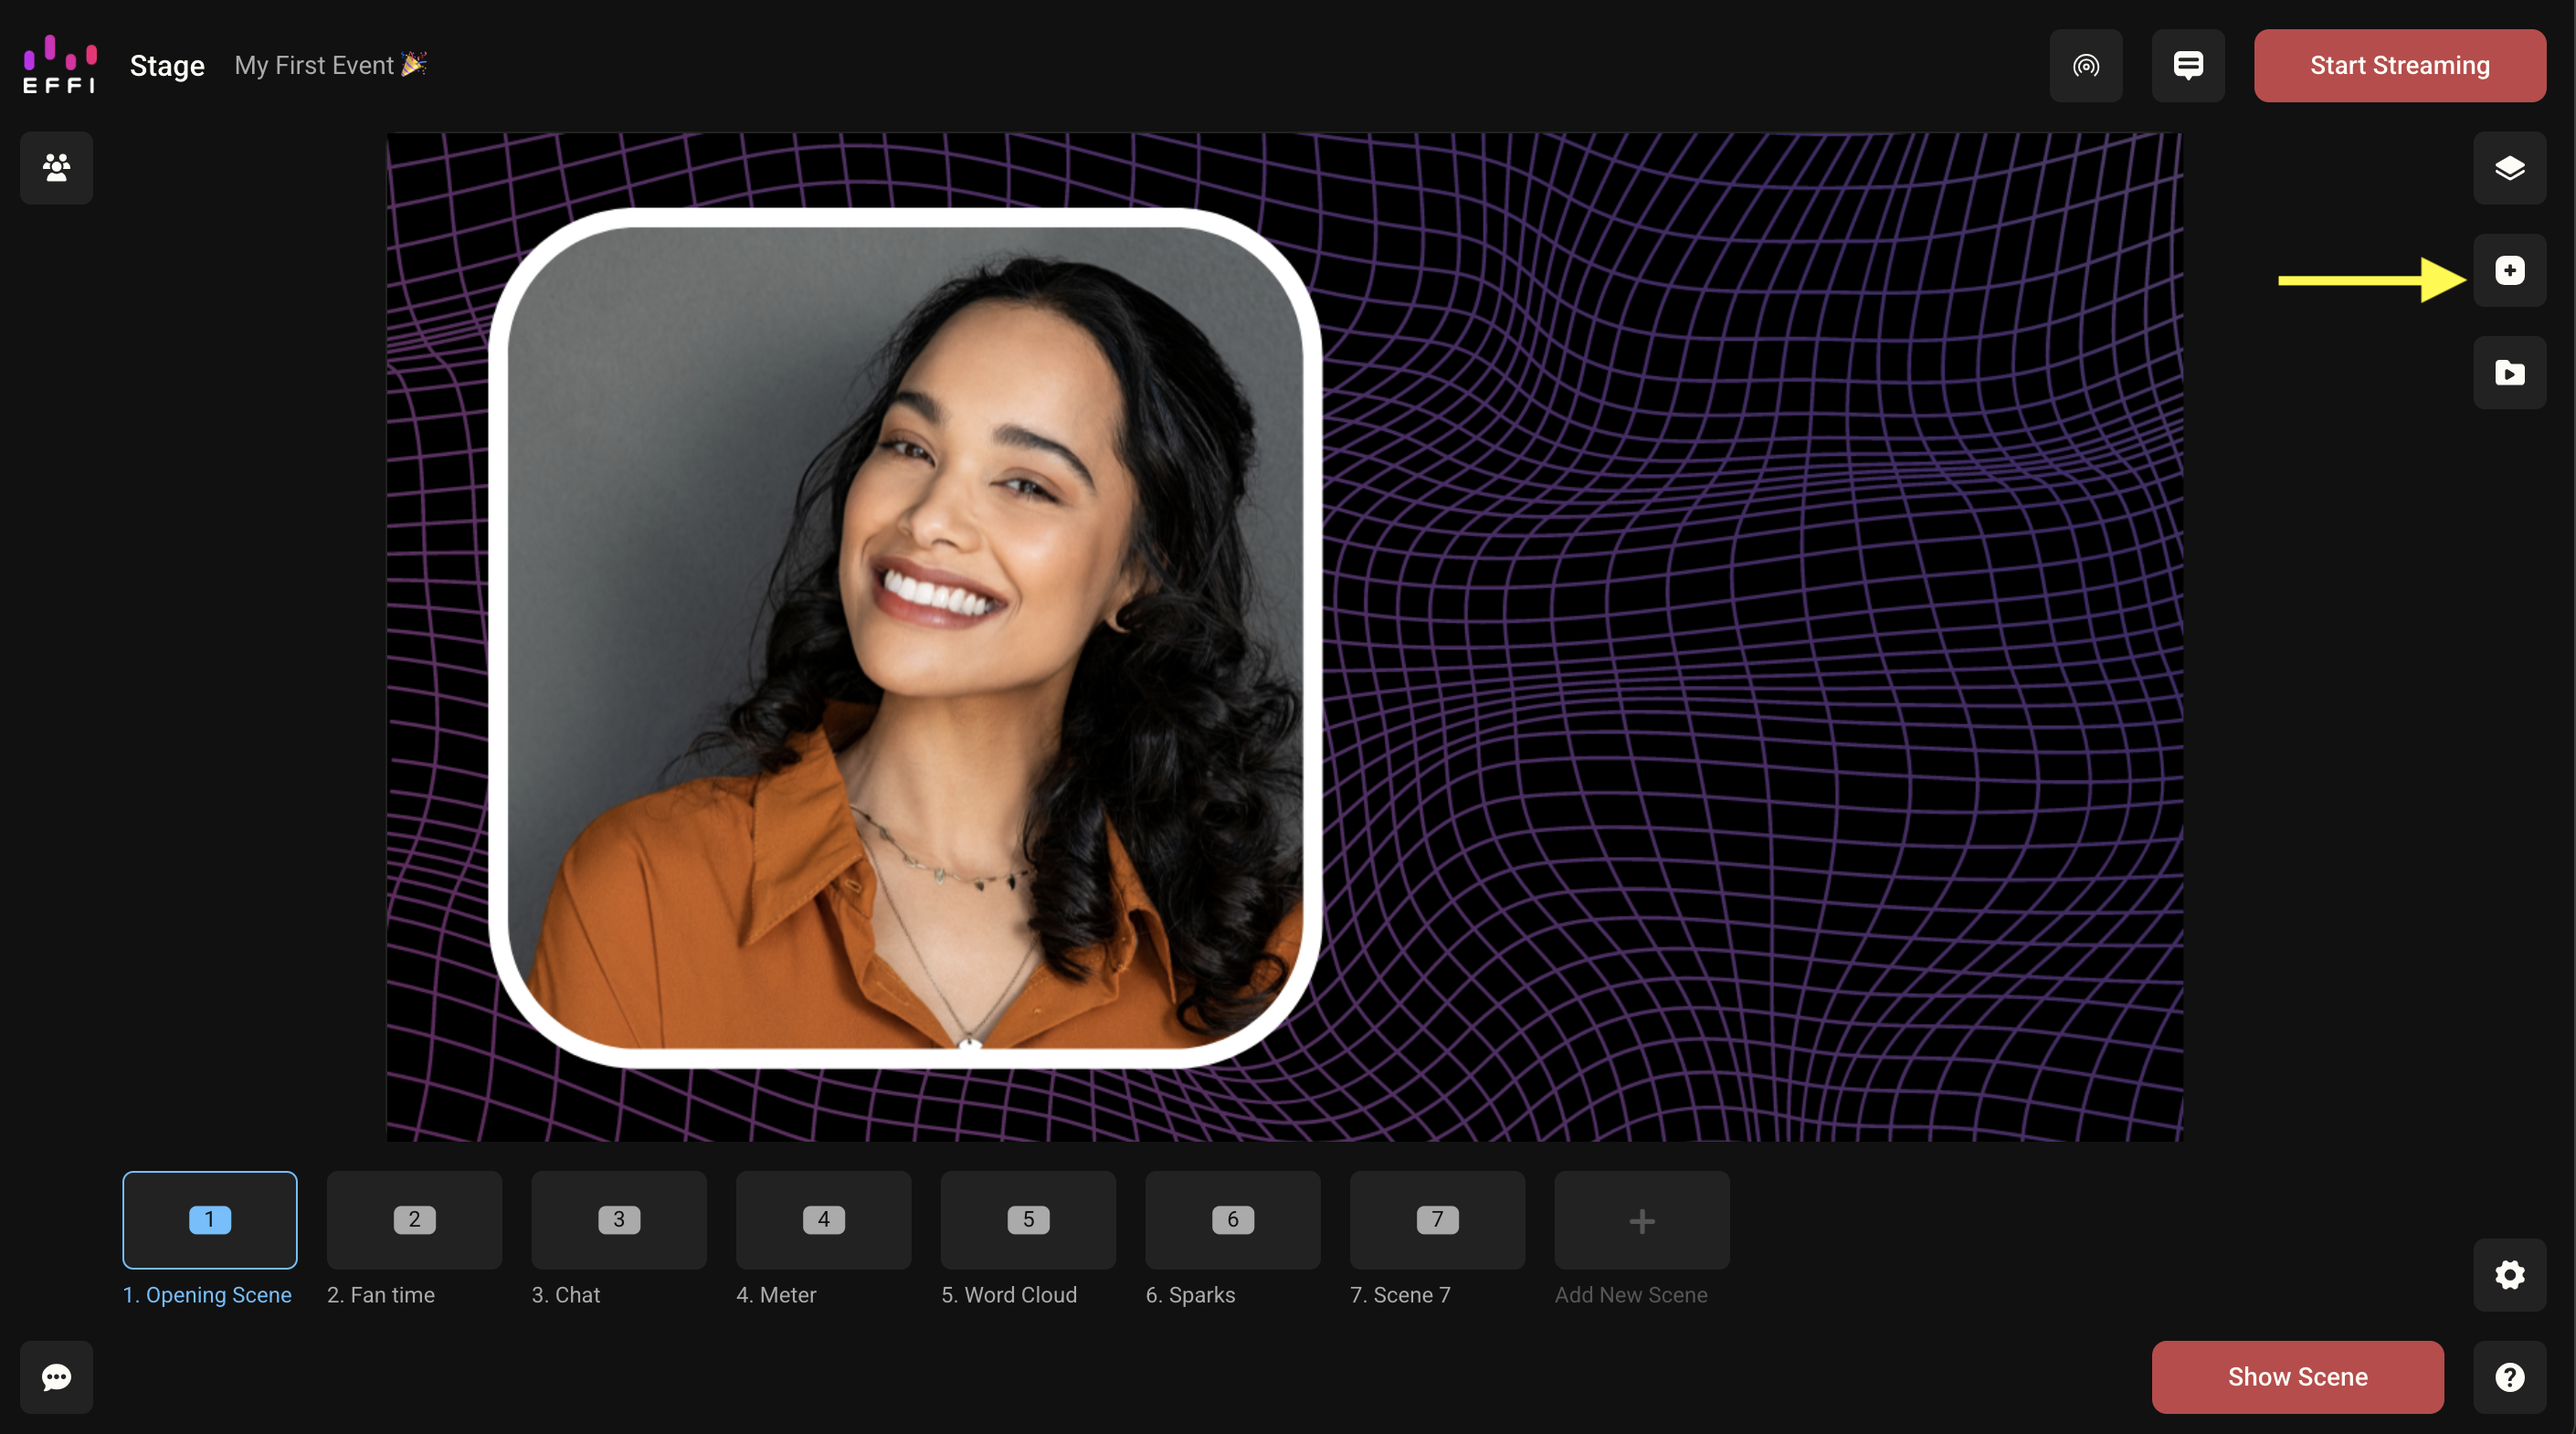
- Select the scene you'd like to add a Poll to from the bottom of your studio, then click the Elements icon on the right-hand side.
- Choose "Polls" and select a style from the panel. Once you click it, the poll will populate in your scene preview window.
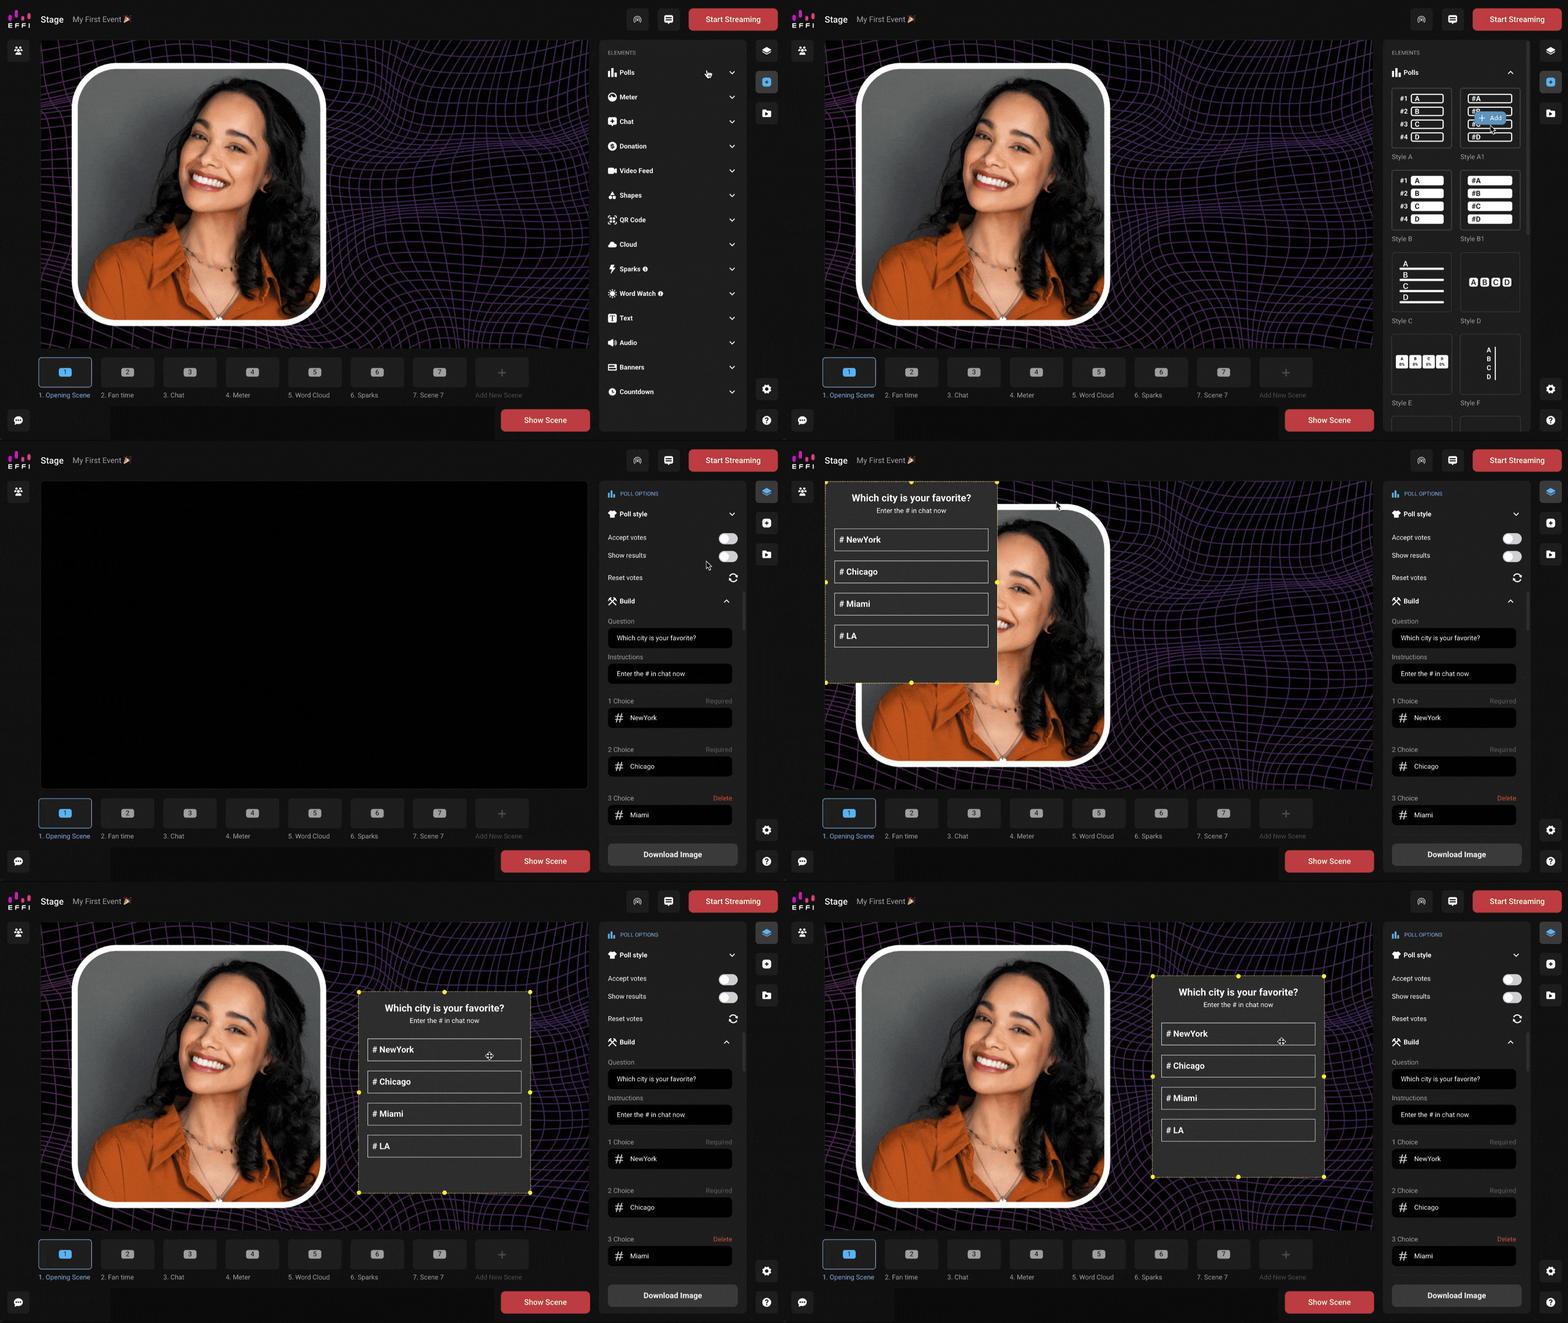
Adding a poll to your event is that easy, now it's time to build out your Poll with the question and choices you'd like your audience to vote on.
Build Your Poll
Note: You can open your poll options at any time by clicking the poll directly, or opening the layers tab on the scene containing the poll and then choosing "poll."
- Your menu options will be open by default, but if not click "Build" in the Poll Options menu on the right-hand side.
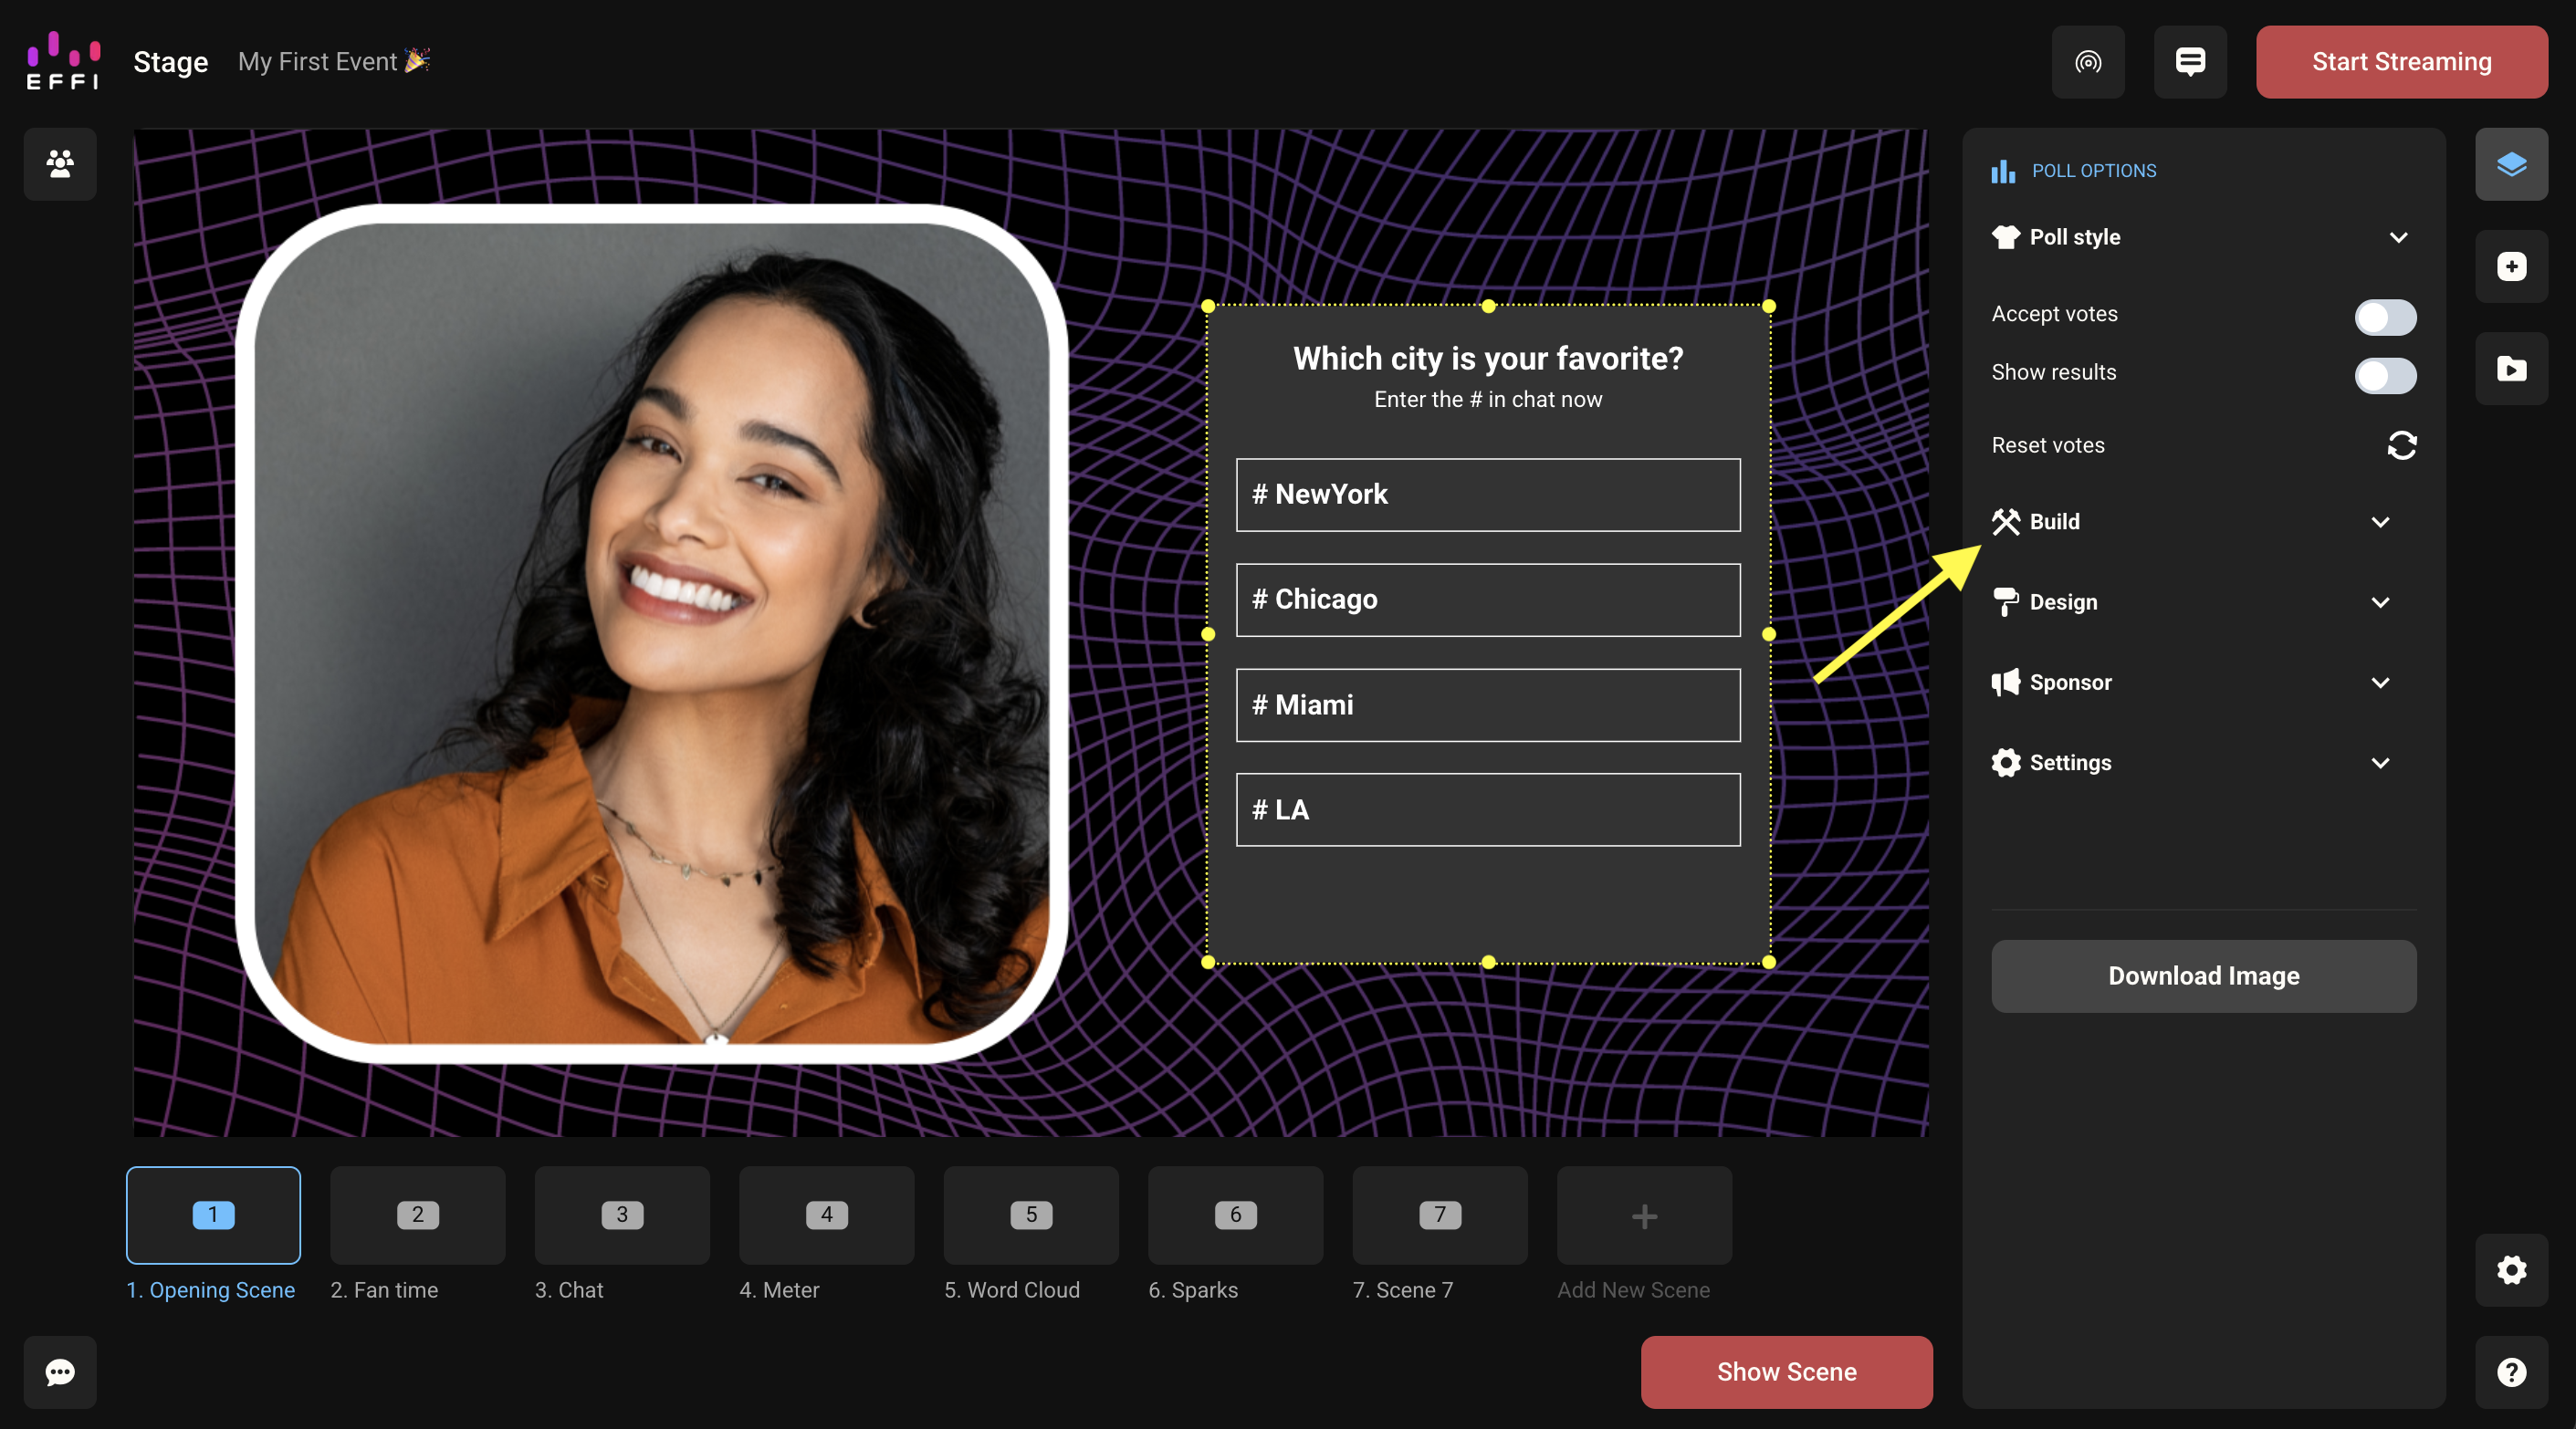
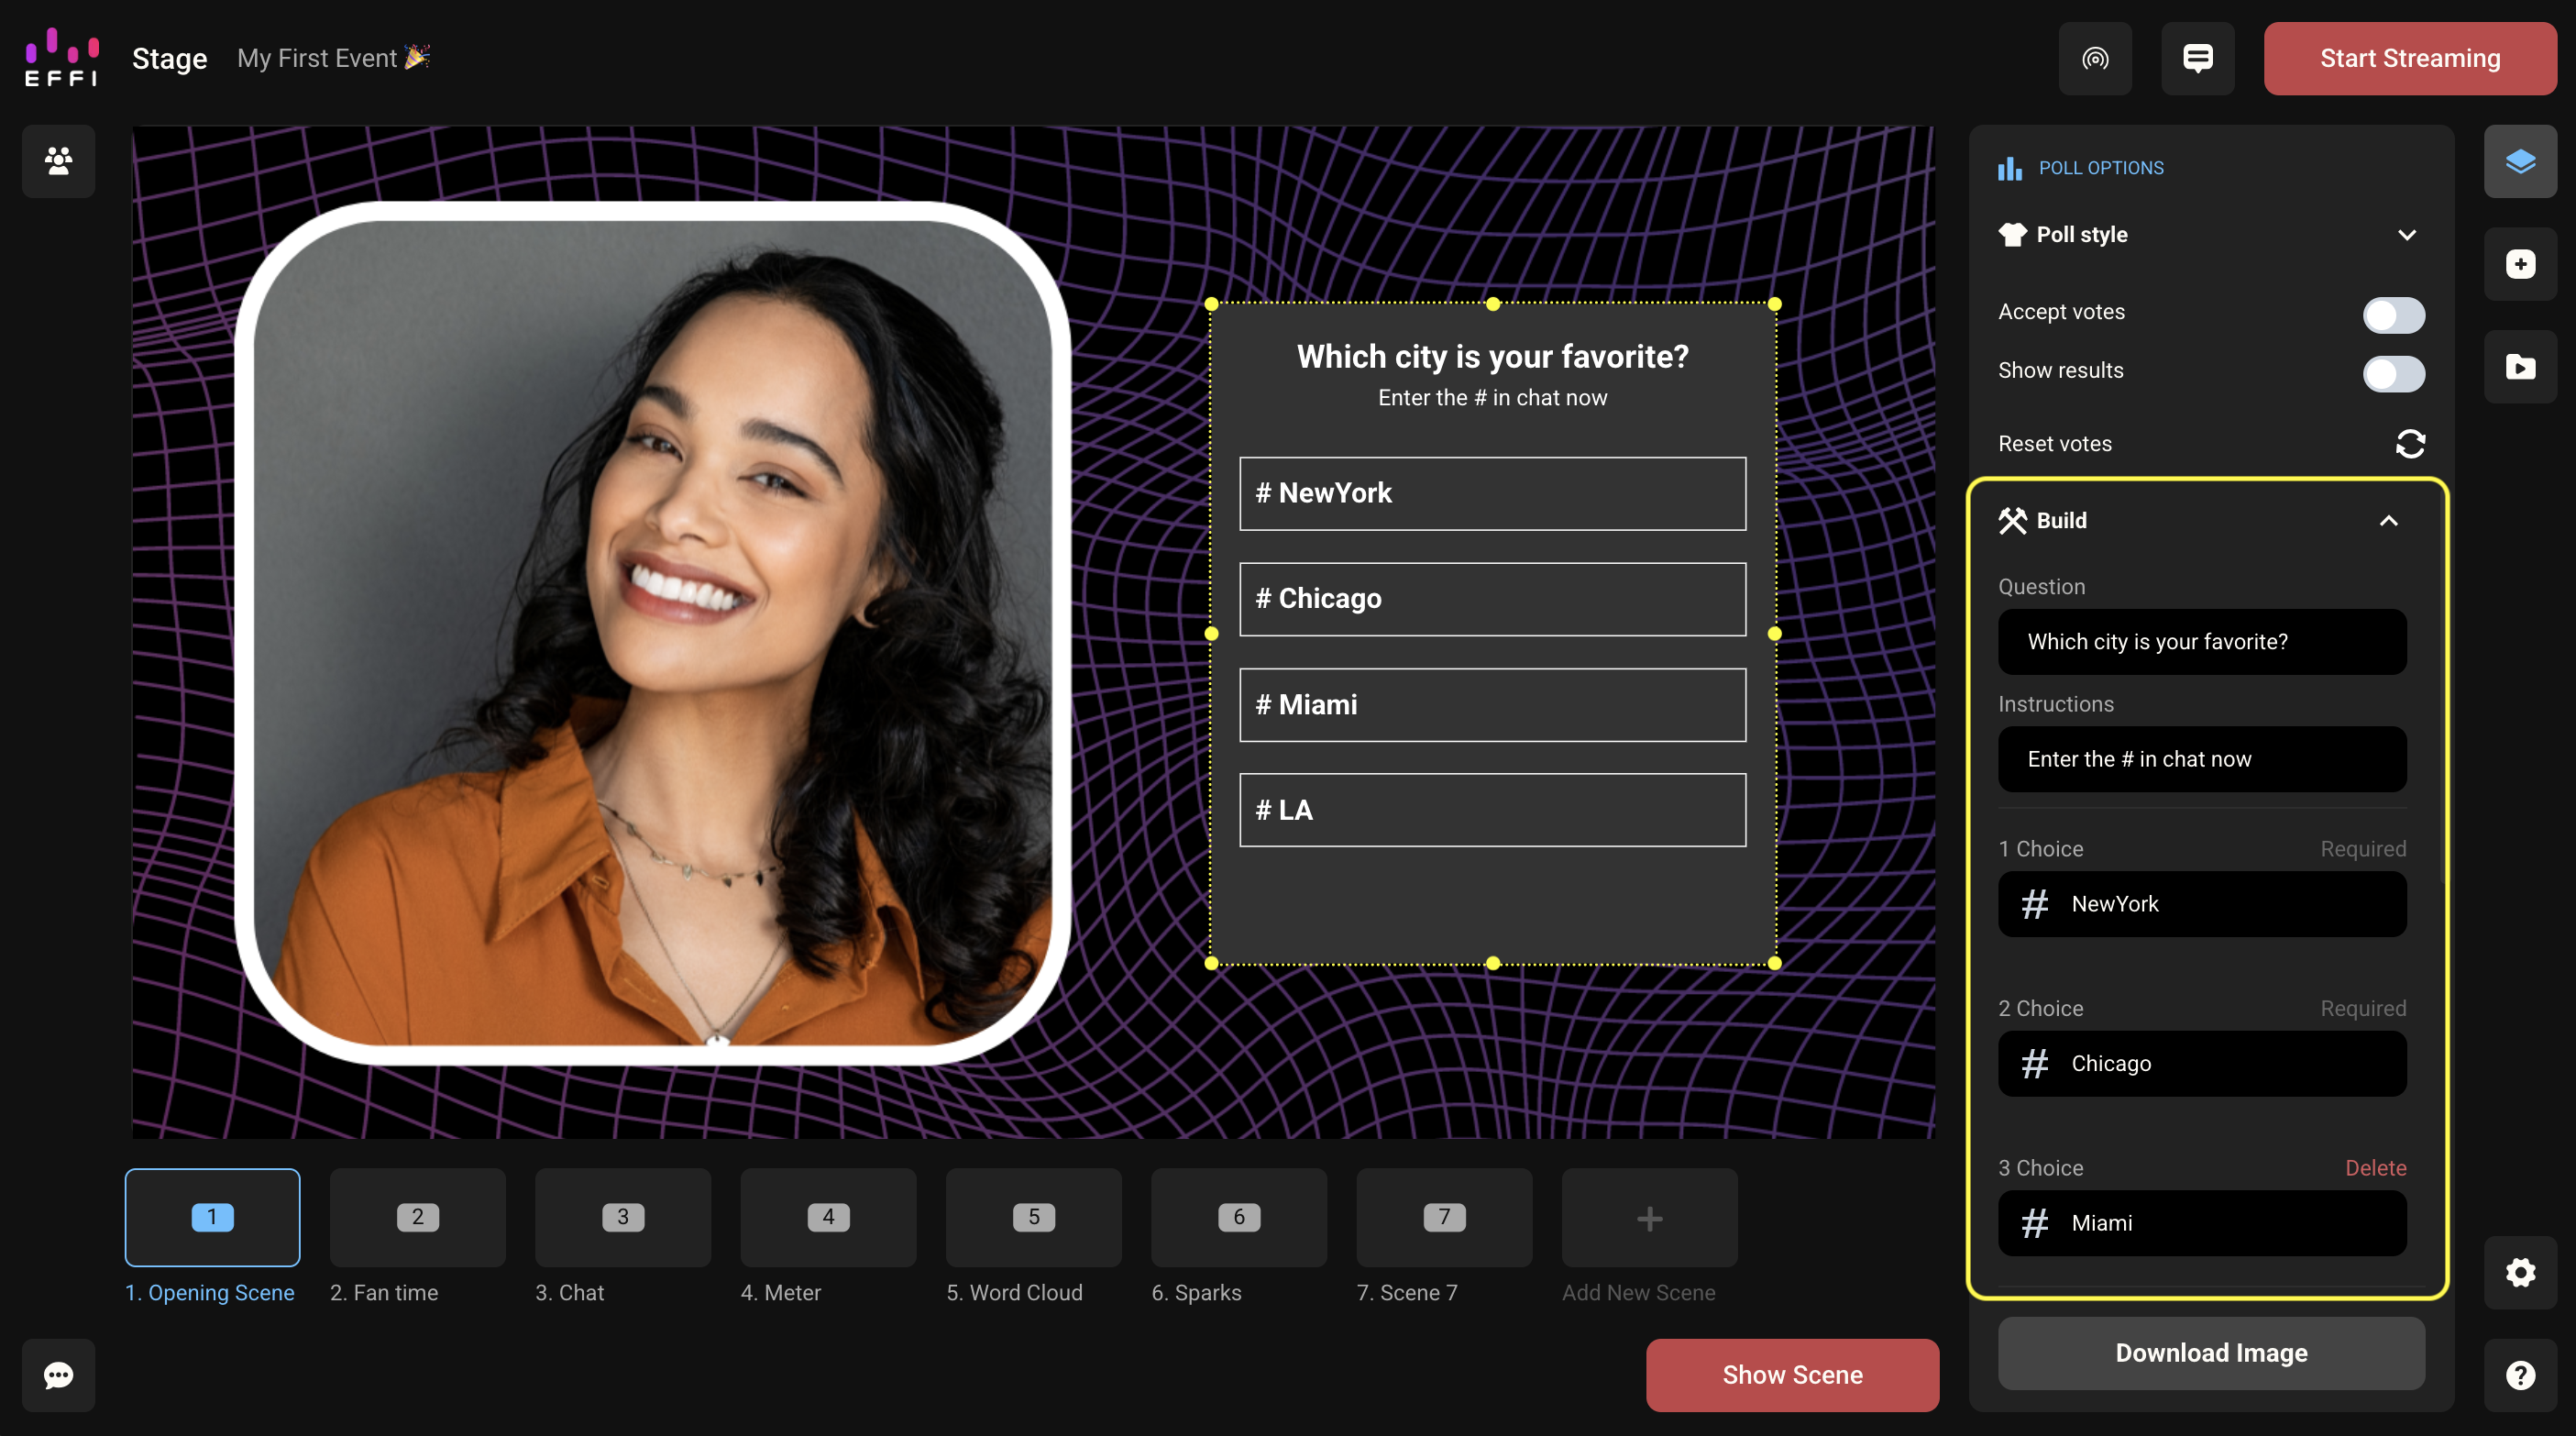
- Fill in your question in the text field and choices in the appropriate text fields.
Important: Polls require a hashtag but that can be whatever you'd like. For example, #A, #B, #C or #1, #2, #3 or even #NewYork, #Chicago, #Miami... As long as there is a hashtag you are all set. If you have a long choice with multiple words, we recommend using a numbered or lettered hashtag.
Note: You can leave instructions to tell your audience how to vote on the poll. Don't want the instructions? Just delete the text.
- You can add more choices by scrolling to the bottom and clicking "add choice."
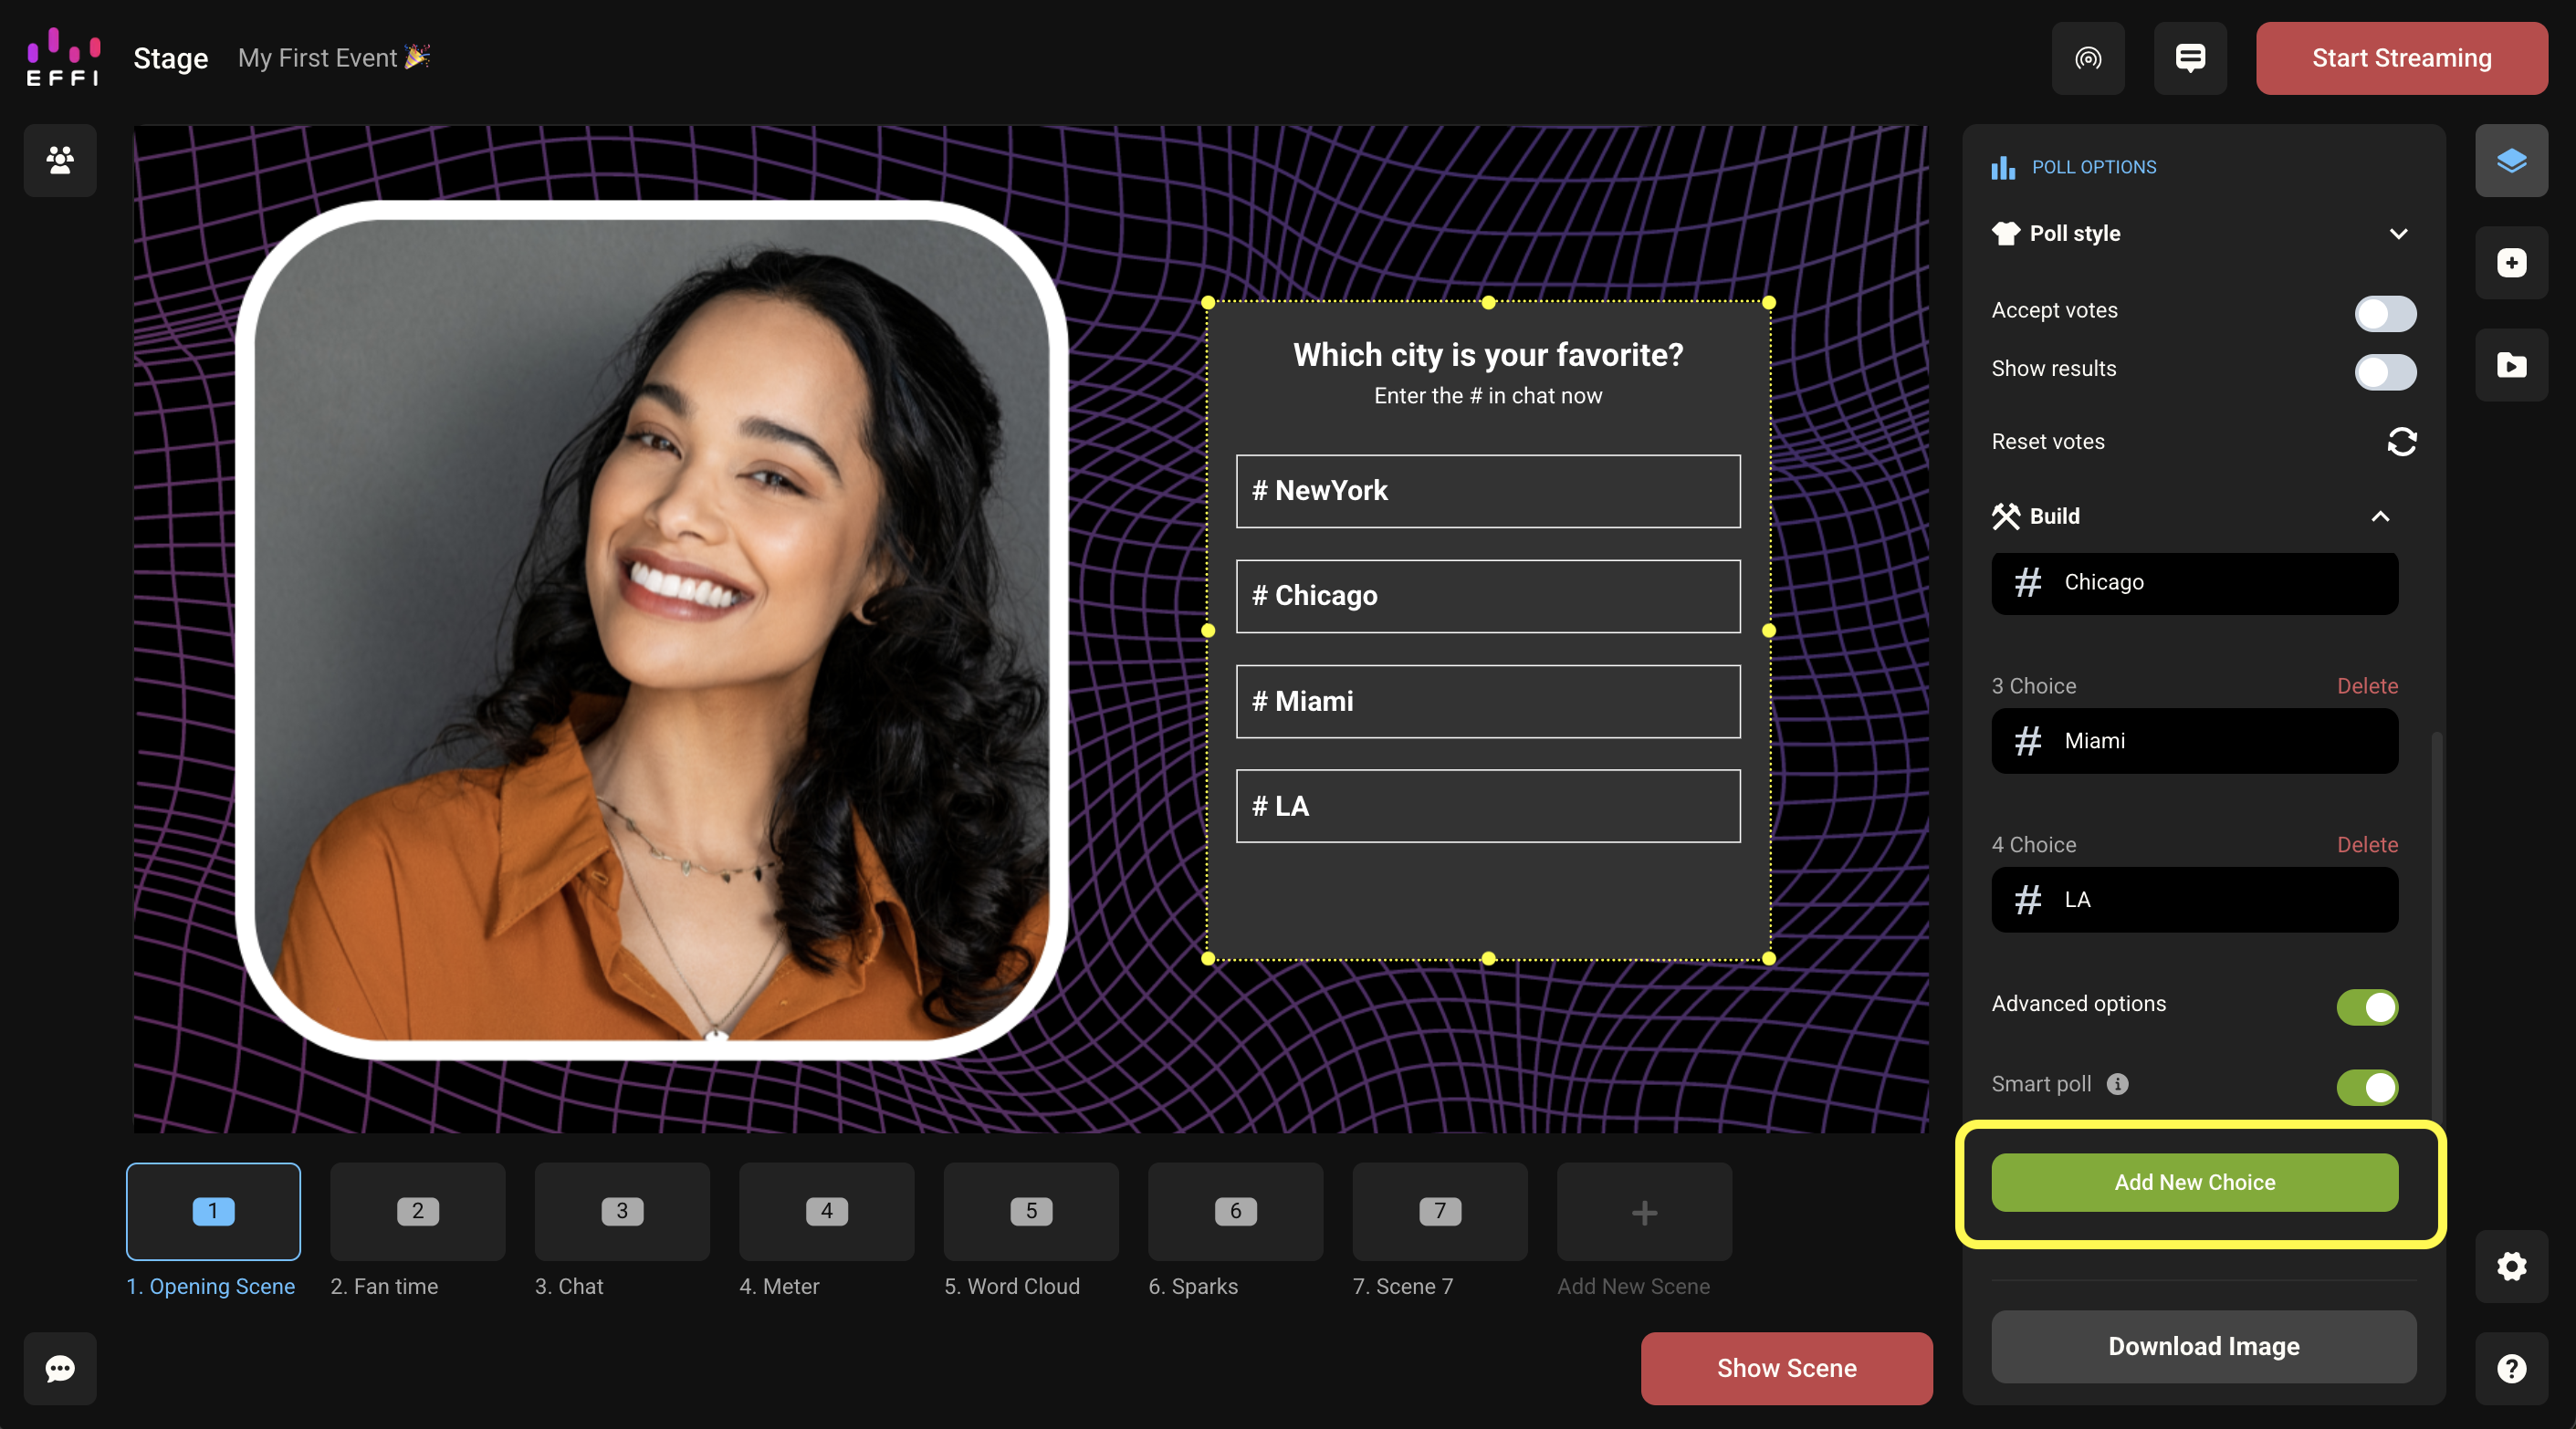
You may also notice something that says "Smart poll." This feature uses AI to capture more data by accounting for possible typos and variations in expressions. For example, "NYC" and "NY" would count towards "New York." So toggling this on means we count additional variations towards your responses in addition to just the hashtags.
At this point, you have taken care of all the major steps to adding a Poll to your stream. Way to go! You can stop here and be ready to go, but if you would like to customize your poll to match your event keep reading.
Designing Polls
- Click "Design" in the Poll Options menu on the right-hand side.
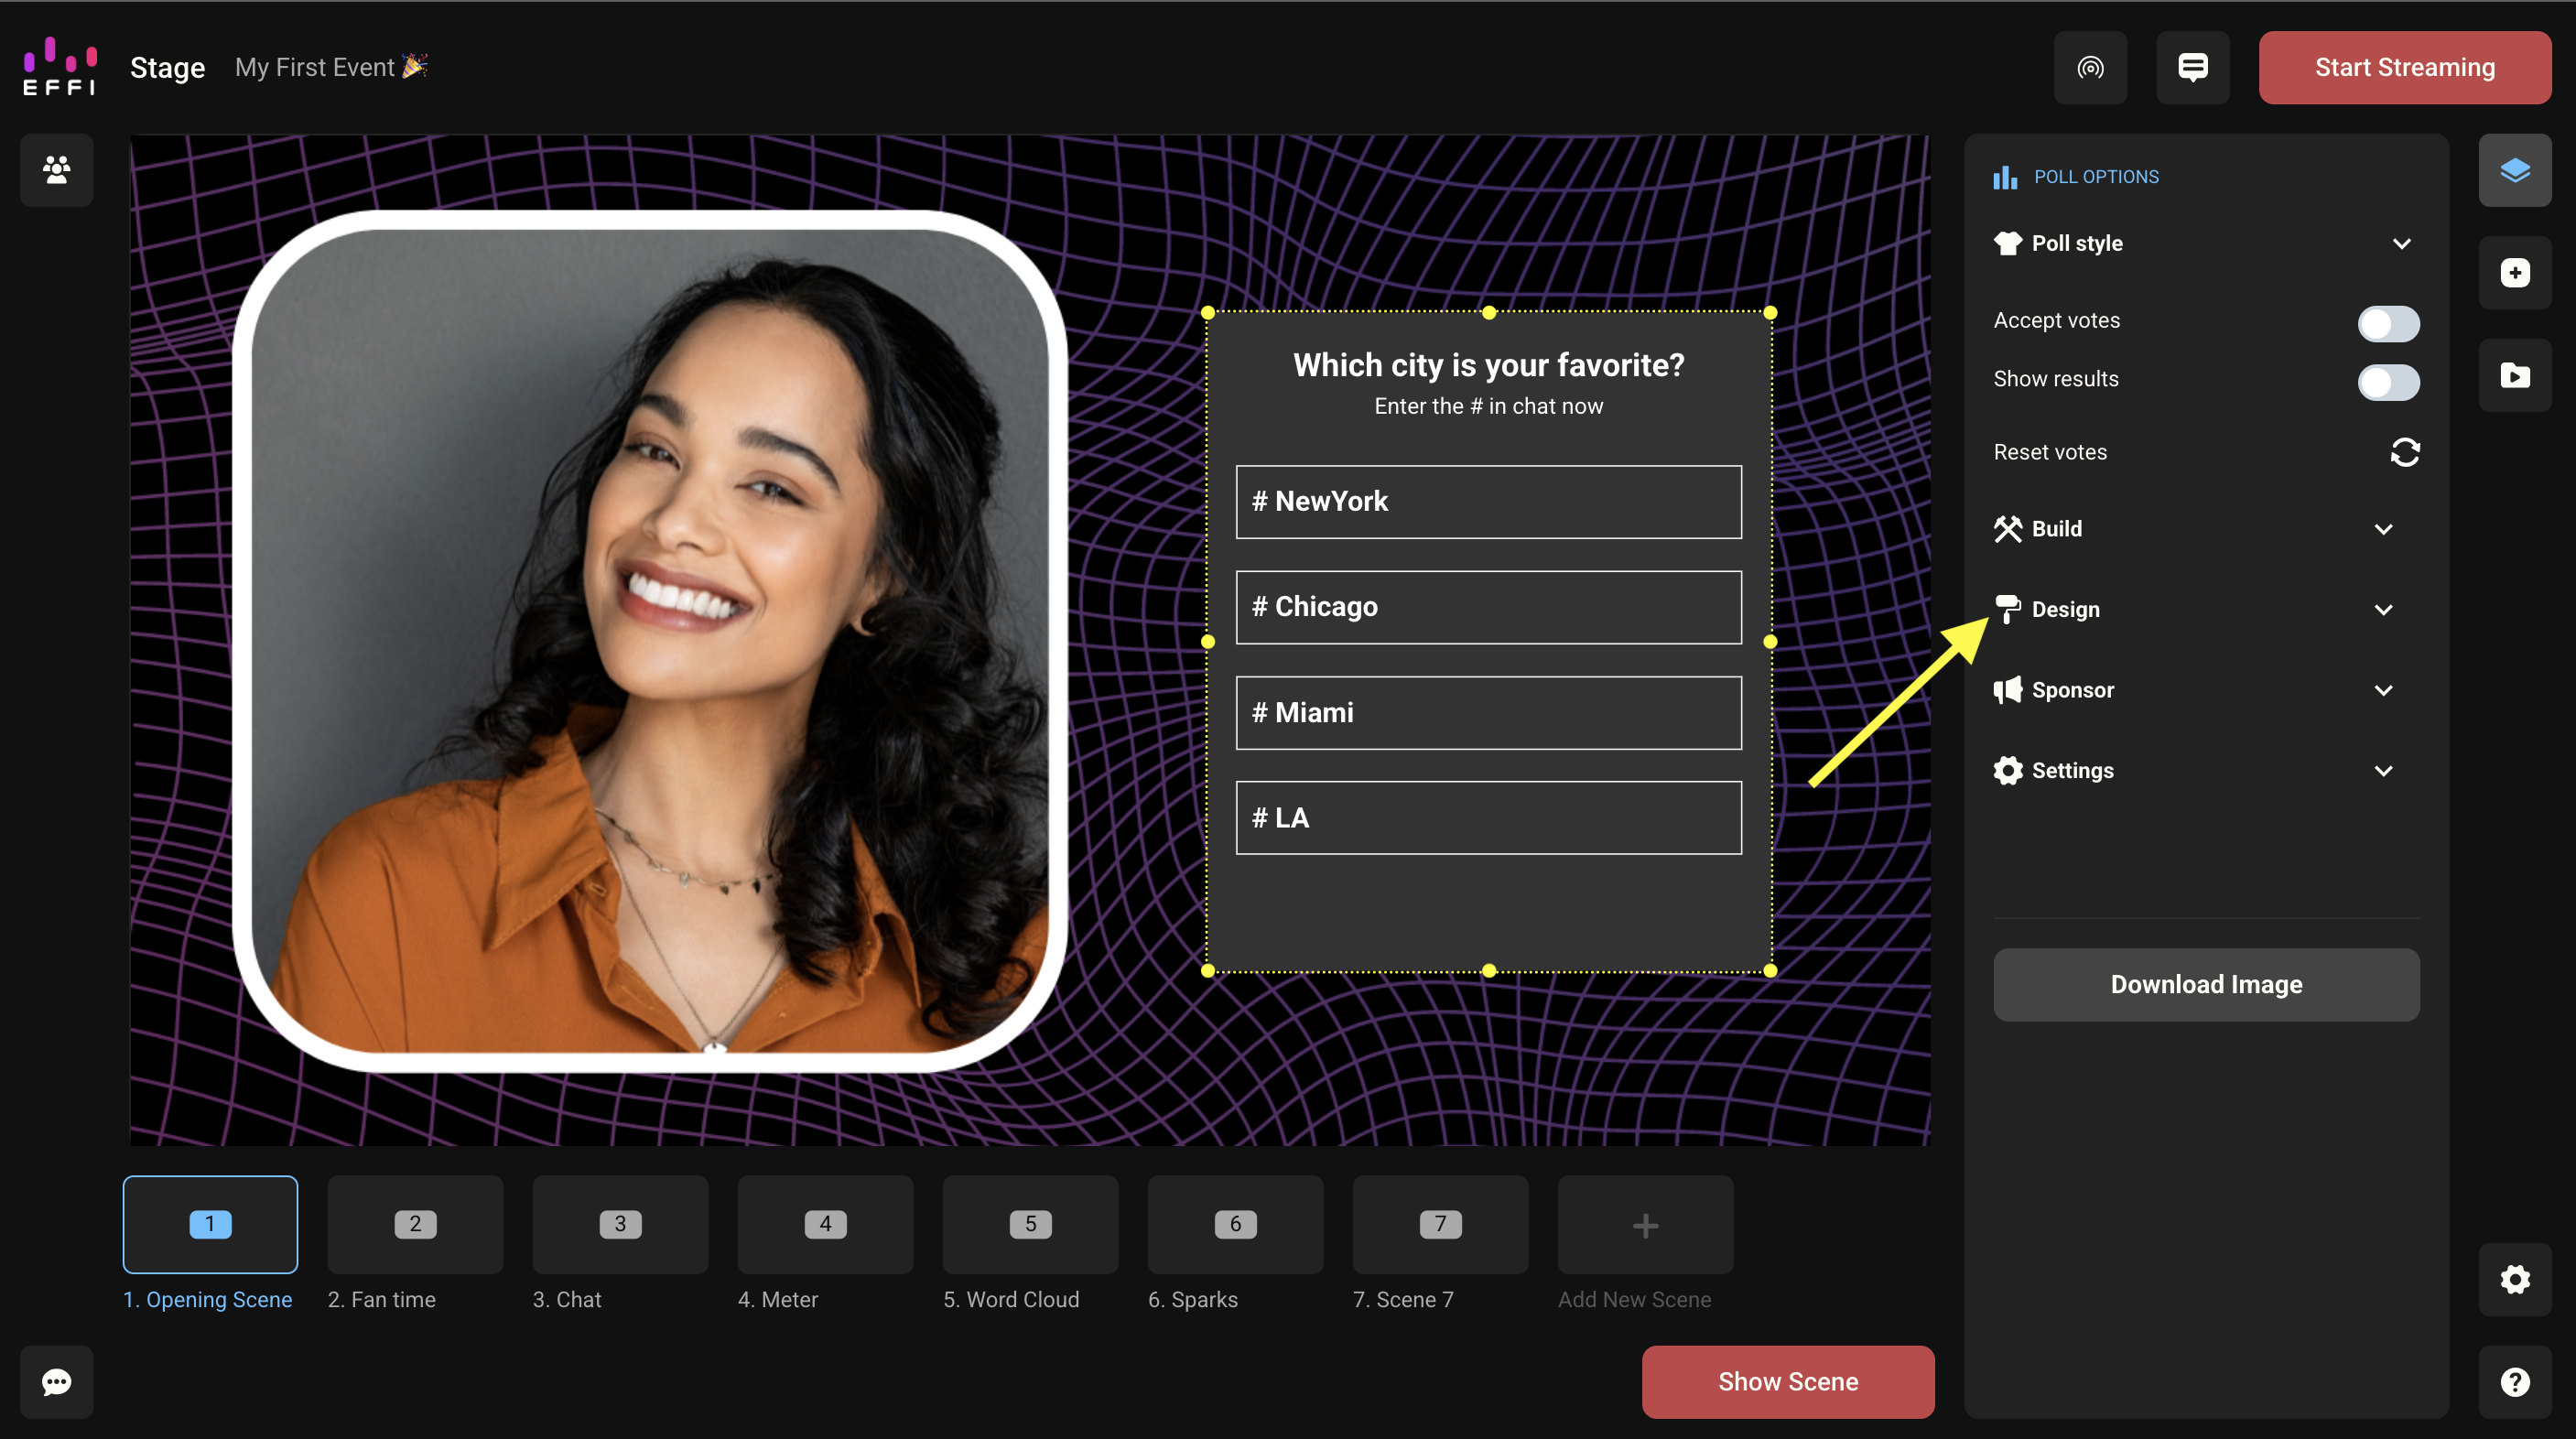
- Choose fonts and colors for your question, instructions, and choices. Change the background color or image of your Poll, and even designate a fill color for when your results start showing up in your Poll.
That's it. You've officially added a Poll to your event and the last thing to do is set it live for your audience to see and vote on.
Send Live & Accept Votes
When your scene is live, your Poll will be viewable to the audience. But they will only be able to vote once you toggle on "Accept Votes" at the top of the Poll Options panel. As soon as that's on, it will start collecting responses.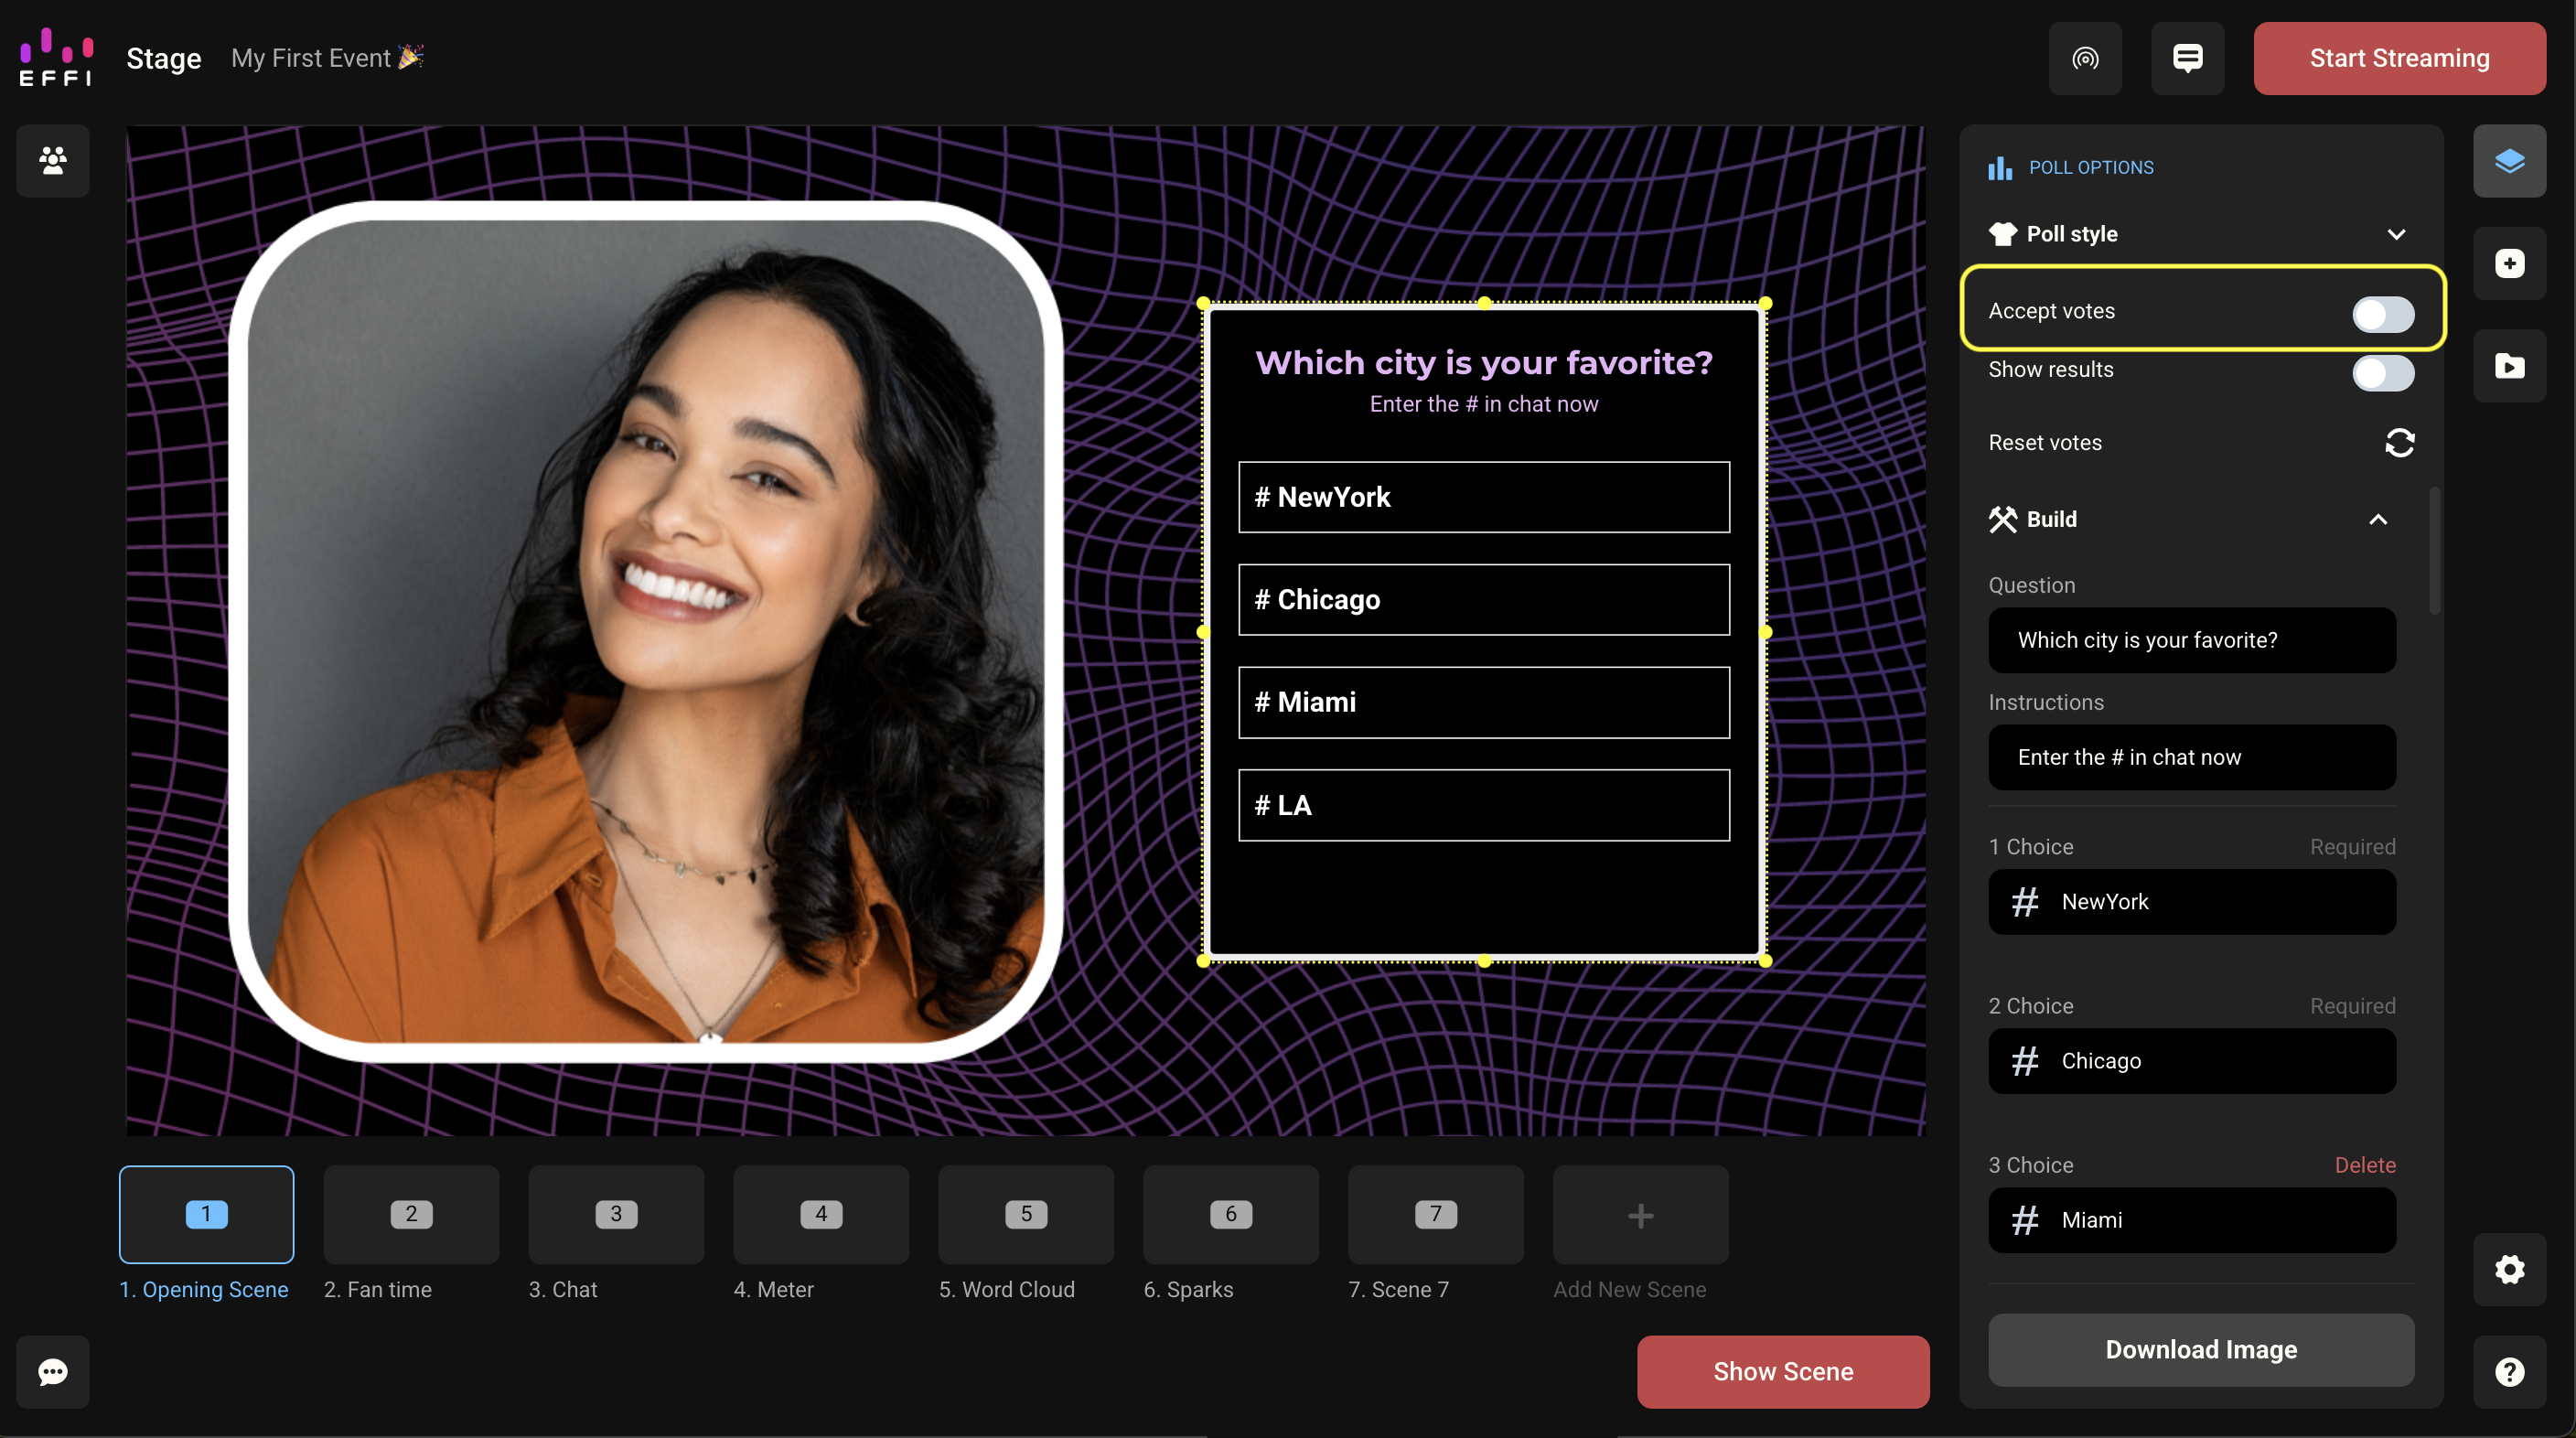
If you want to show the audience the results as they come in — we recommend this because it's fun to see how the audience is swaying — make sure "Show Results" is also toggled on. You will find that right under the "Accept votes" toggle.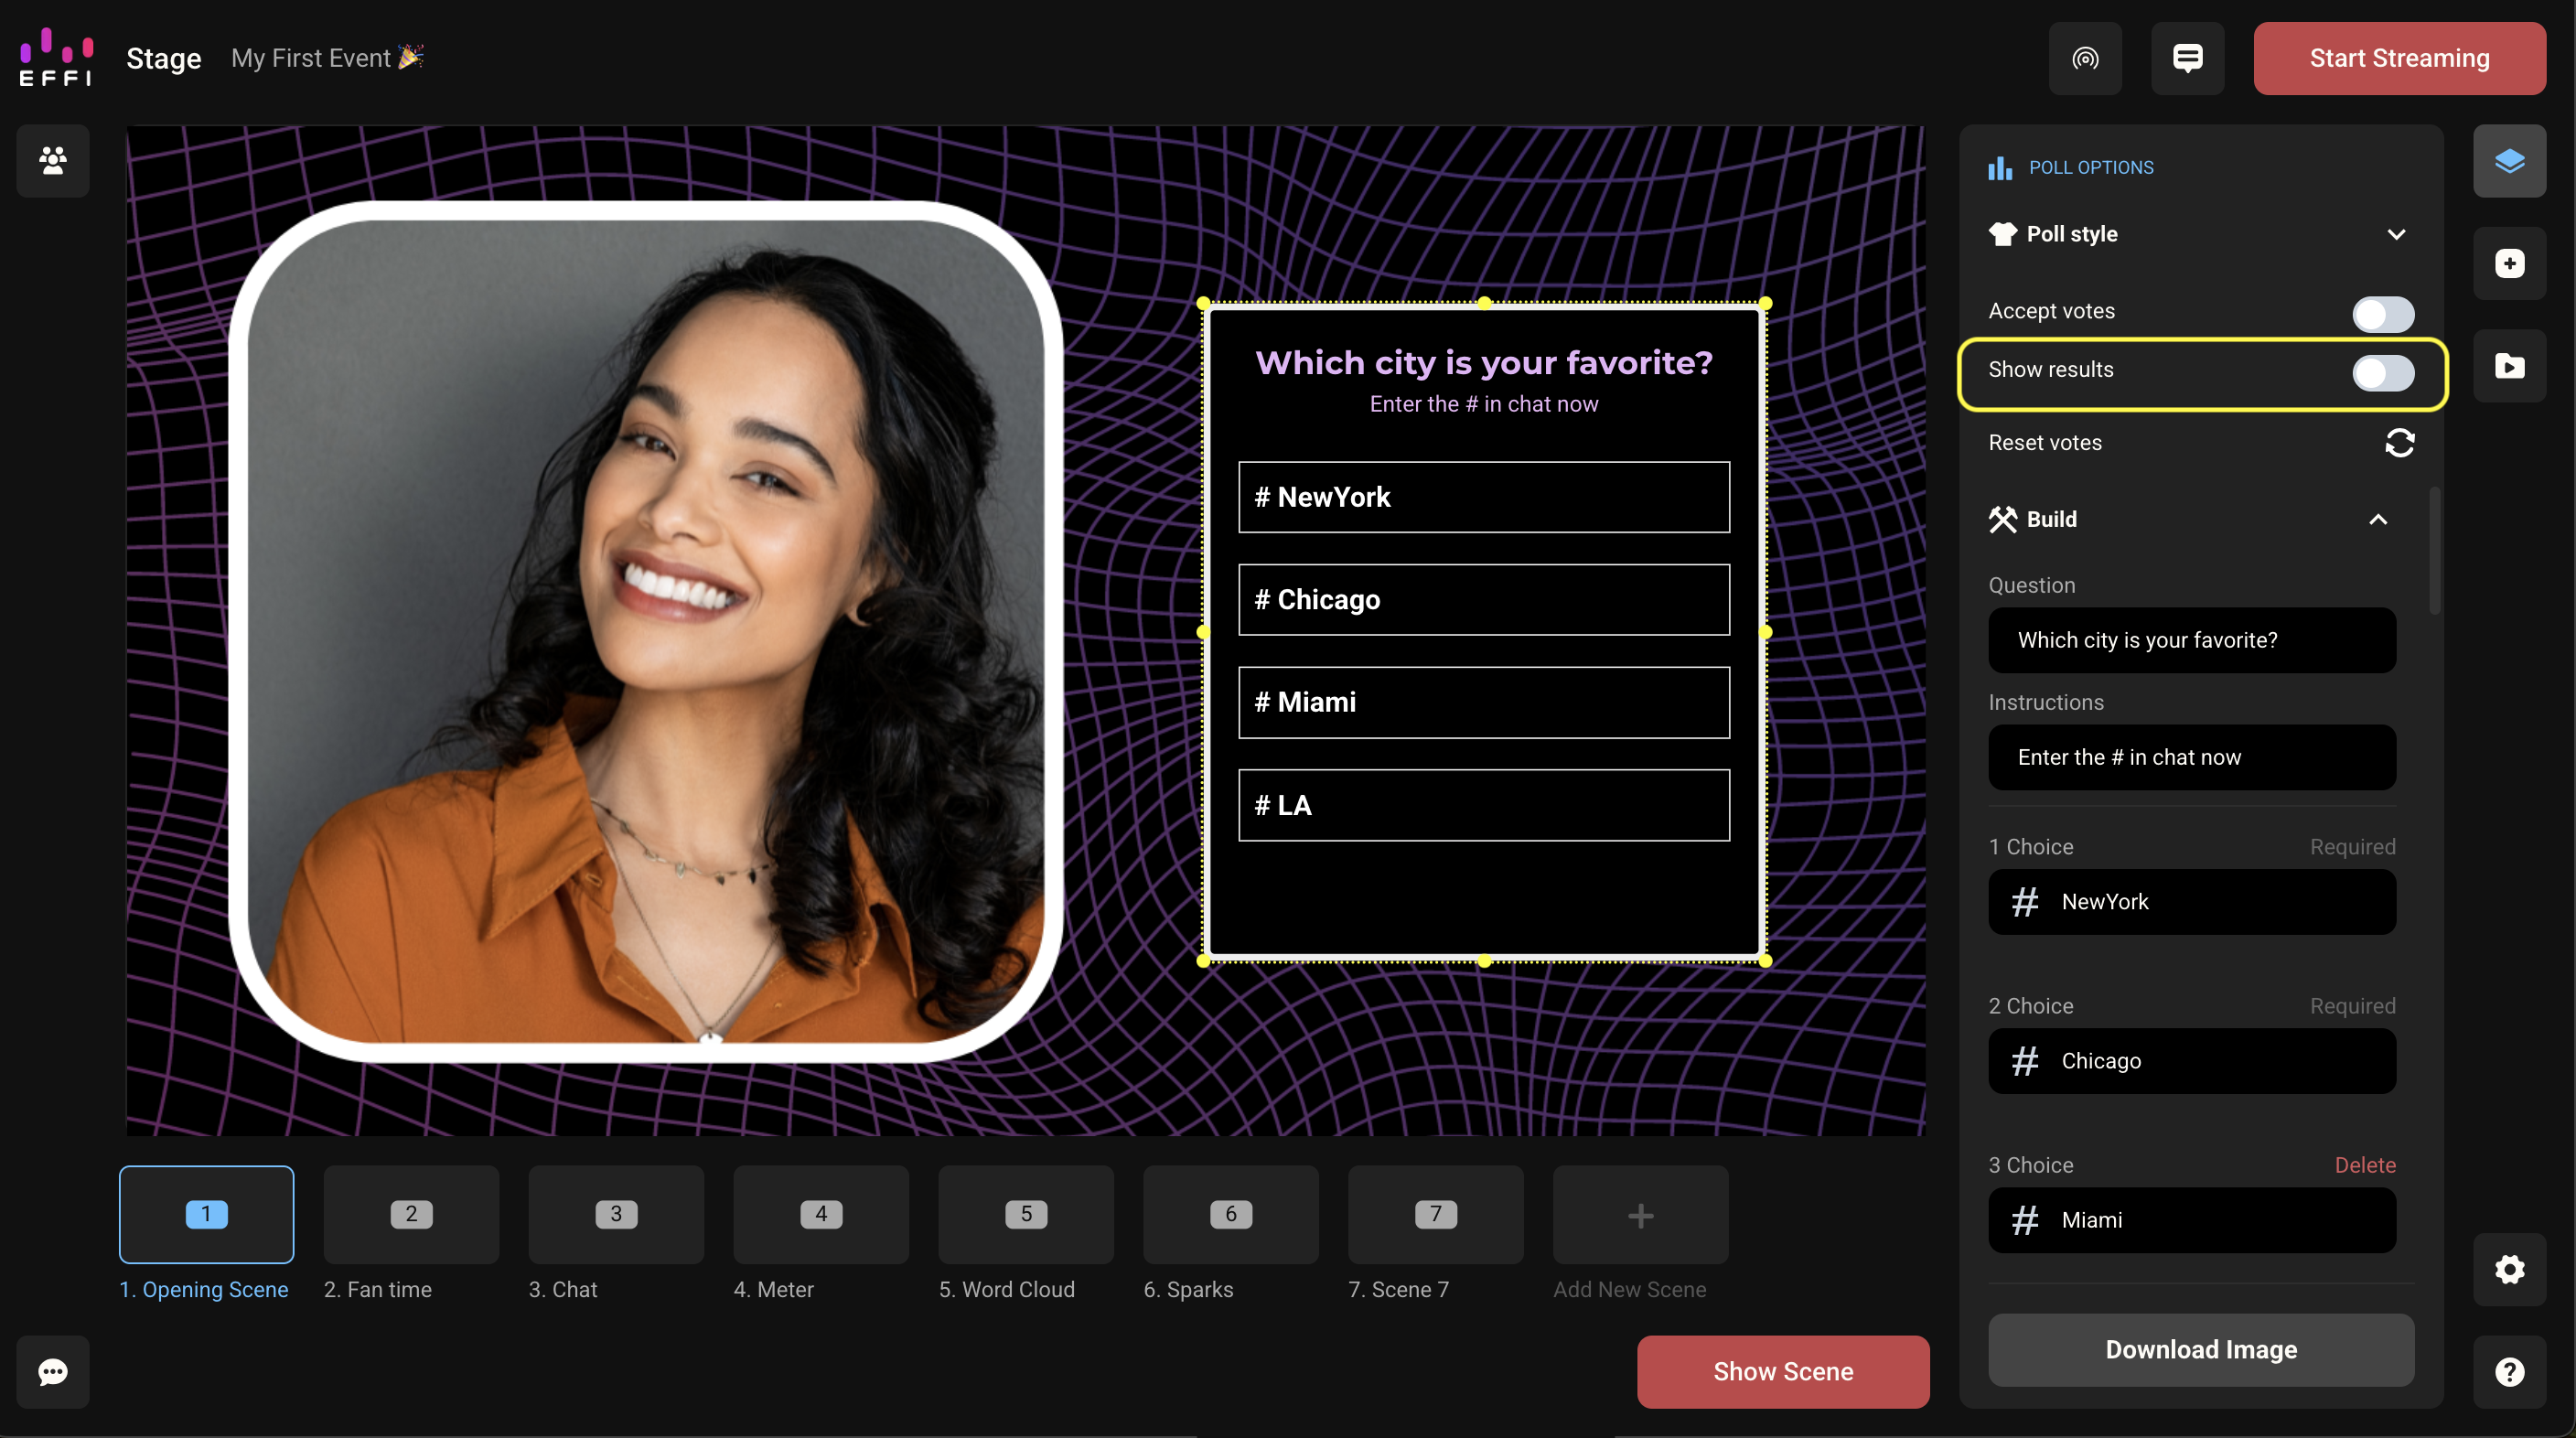
Make sure both the "Show results" toggle and the "Accept votes" toggle are toggled on in order to see the votes start piling in.
Note: If "Show results" is toggled on when your audience starts voting, you will see an animation of the fill bars moving as soon as a vote comes in. This animation was added to give the audience time to vote before one answer shows 100% — because while it's true that if a single person votes then 100% of the vote went to their choice, that could come off as rigged to viewers watching.
When you're ready to stop accepting votes, simply toggle off "Accept Votes" and see what your audience chose.
Once the scene is no longer live, your poll will no longer be viewable. However, if you only want to hide the poll and keep the rest of the scene visible, you can do that by just hiding the Poll.
- Open the Layers & Scenes menu and press the eye icon next to the Poll you want to hide.
Now that you know all the ins and outs of adding Polls to your events, start using them for a fun and simple way to add a bit of interactivity to your events.
How Many Times Can Someone Vote on a Poll?
One concern people often have when it comes to voting is if the audience can rig the vote by spamming the chat, i.e., typing the same option over and over and over again? The great news is, no they can't!
To prevent spamming of any kind, Effi has made it so that each person only has one vote. If a user wants to change their vote, they may do so, but then their vote will switch to their current choice.
Let's Illustrate with an Example
Using a poll asking "What should we do next?" with choices Q&A, Trivia, Bonus Footage, and Game, let's say Ashley chooses #2 (Trivia). Her vote is counted towards #2 (Trivia).
If Ashley changes her mind and types in #1 (Q&A), her vote will be taken out of the total for #2 (Trivia) and added to #1 (Q&A).
How Do Viewers Vote on a Poll?
All voting on Effi Polls is done through chat, but it's important for you and your viewers to know how to vote on a Poll in order for their vote to count.
When building out a poll, you'll be asked to choose a hashtag that the viewers will vote with. For example, you can use #A, #B, #C to represent your options, or you can opt for #NYC, #LA, #Miami. There are different ways to set up Polls.
Your audience will be directed to use the hashtag to vote, however as the user you have the option to enable Smart Polls. Smart Polls use AI to collect more data to account for typos and variations in expressions. So when Smart Polls is enabled, "NYC" and "NY" would count towards "New York" even if the user doesn't use the hashtag.
Note: Not all elements operate the same. For example, Meters do not require you to enter a hashtag at all, and instead of an automatic "Smart Meter" feature, you can enter what we call Accepted Answer on your own.
Best Practices for Voting on Polls
- You can choose the hashtag you would like the viewers to use to vote. For example, "#A, #B, #C..." or "#1, #2, #3..." You can even choose to just use the choices themselves: "#NewYork, #LA, #Chicago..." It's up to you to choose something that best suits your event.
- Each Poll comes with a line of instructions right under the question. You can edit it, or erase it altogether. Just make sure your audience understands how to participate.
- Remember that Smart Polls will make it so that even if an audience member uses the wrong hashtag or forgets to add it, their vote will still be counted. So enabling it will allow more votes to count. However, it's up to you whether you want to use it or not.
Important: While you can make the voting option the same for all your polls, make sure that you only have one poll on at a time, or when your audience votes it might affect the results of a future Poll.
Was this article helpful?
That’s Great!
Thank you for your feedback
Sorry! We couldn't be helpful
Thank you for your feedback
Feedback sent
We appreciate your effort and will try to fix the article