The Embeddable Video Player lets you stream your Effi event directly on your own website. You add it as a destination, customize the player, chat, and access rules, then paste the embed code wherever you want your audience to watch.
Adding the Embedded Player to your event
- Open your event from the Dashboard.
- Click Set Destination at the top right.
- Under Add new destinations, click Embedded Player.
The Embedded Player is added right away and the Embedded Channel Options panel opens.
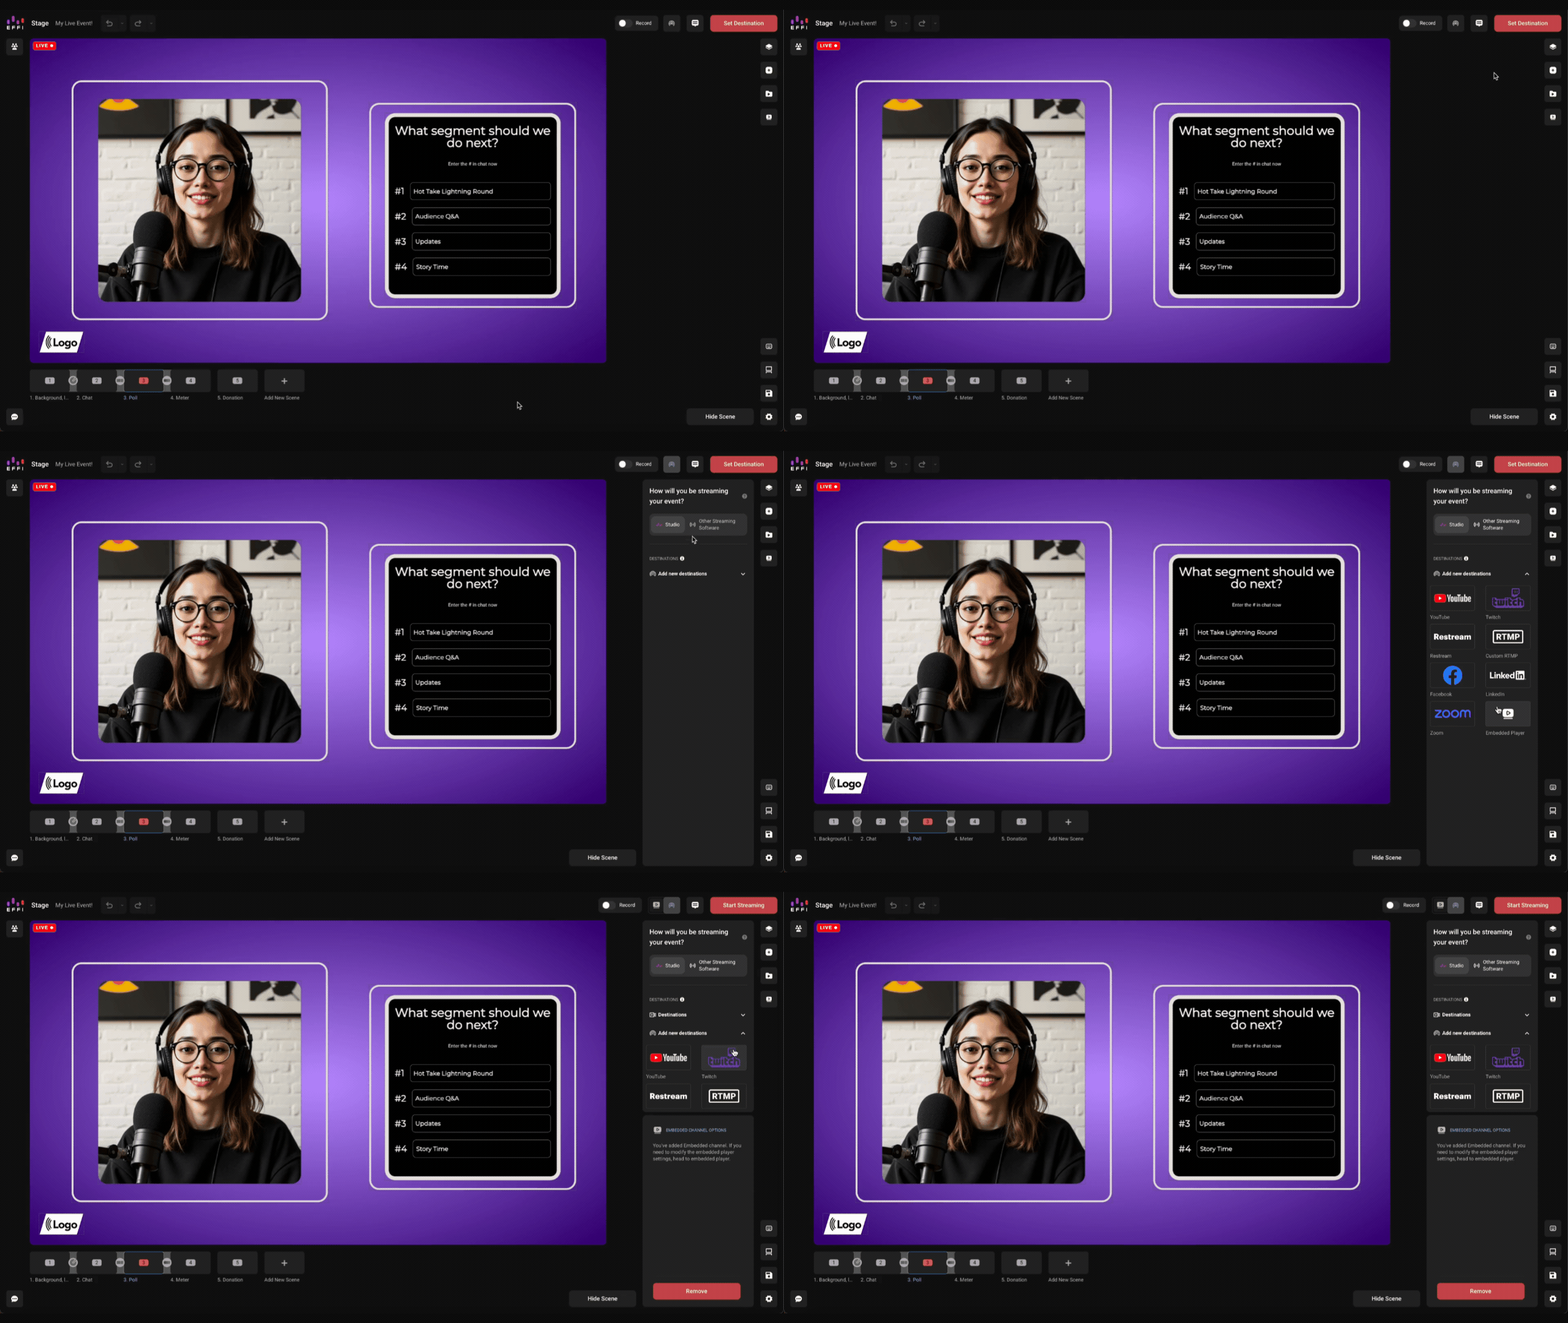
Opening the Embedded Player settings
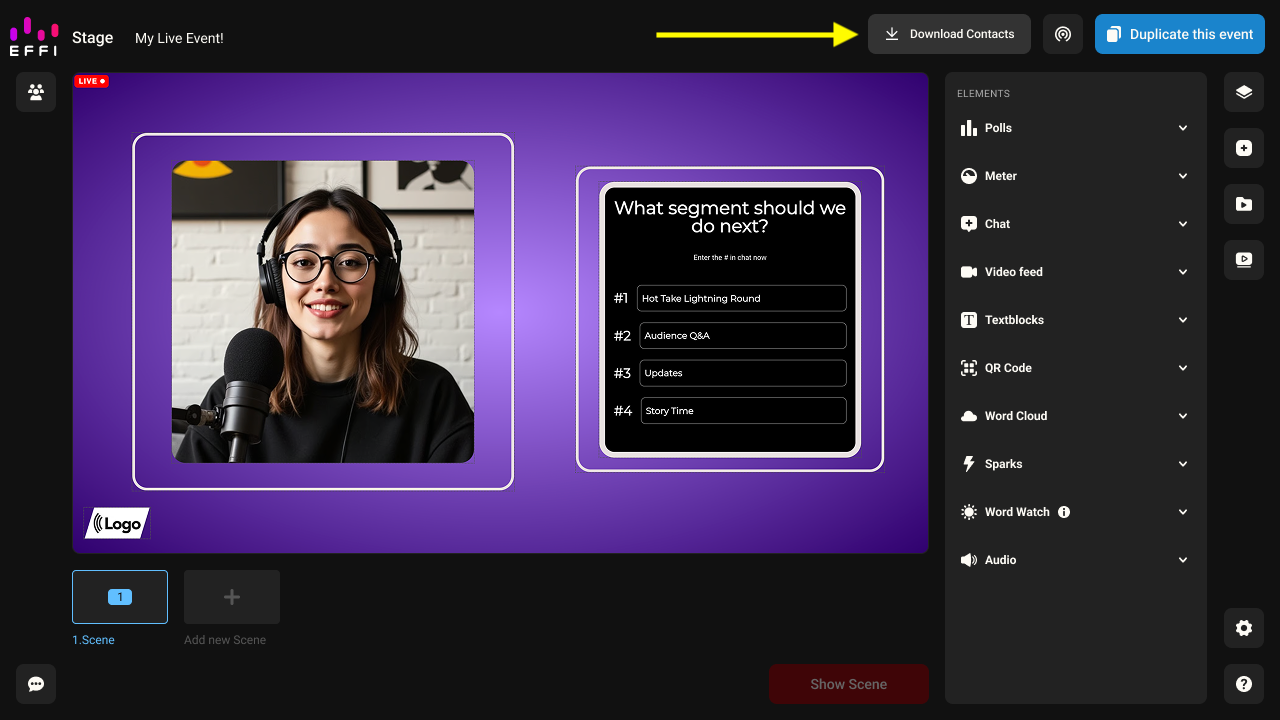
- In Stage, click the Embedded Player icon in the right-hand rail (the fourth icon from the top).
- The settings page opens with three tabs: Video Player, Chat Settings, and Access Settings.
Each tab has a Preview on the right so you can see your changes as you make them. Click the back arrow at the top left to return to the Stage.
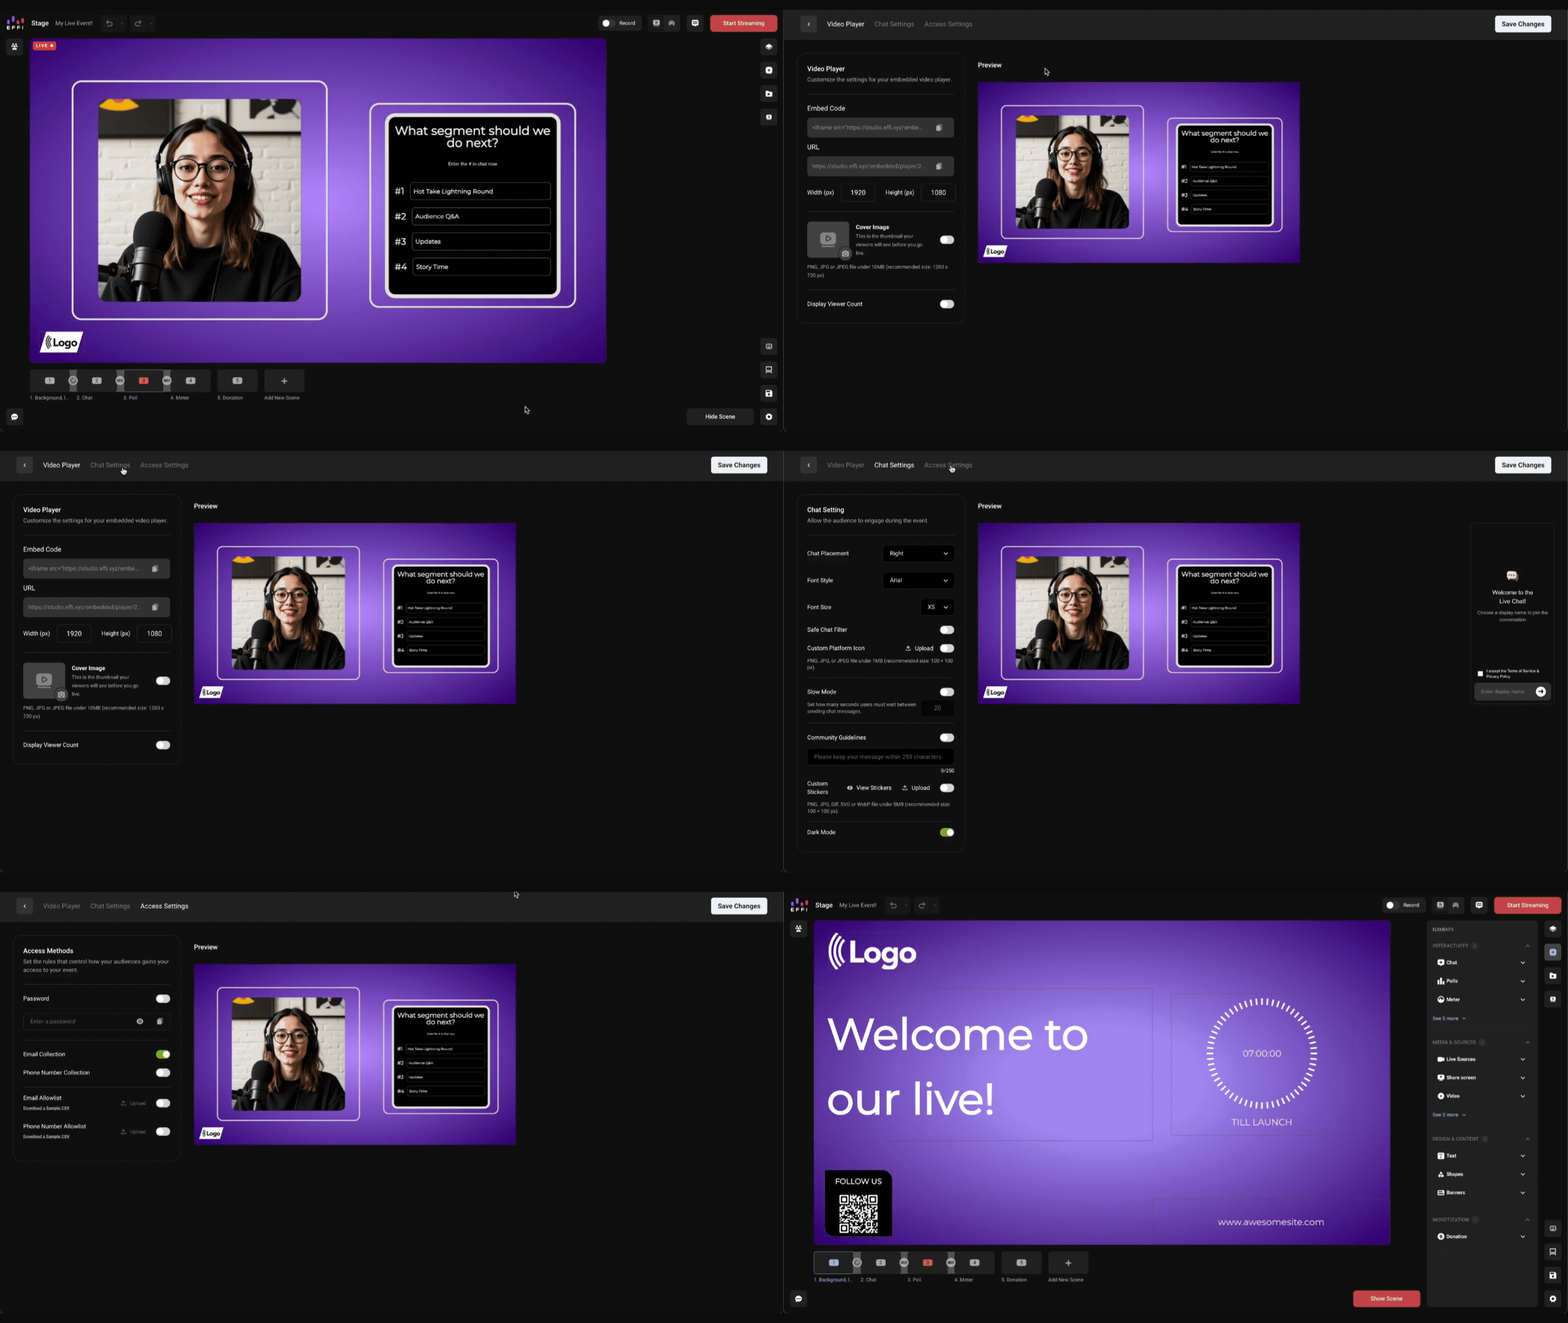
Customizing your player
Video Player
This tab is where you get your embed code and set up how the player looks.
| Setting | What it does |
|---|---|
| Embed Code | The iframe code to paste into your website. Click the copy icon to copy it. |
| URL | A direct link to the player page. Click the copy icon to copy it. |
| Width and Height (px) | The size of the embedded player. The default is 1920 x 1080. |
| Cover Image | The thumbnail viewers see before you go live. Turn on the toggle and upload a PNG, JPG, or JPEG under 10MB (recommended size 1280 x 720 px). |
| Display Viewer Count | Shows viewers how many people are watching. |
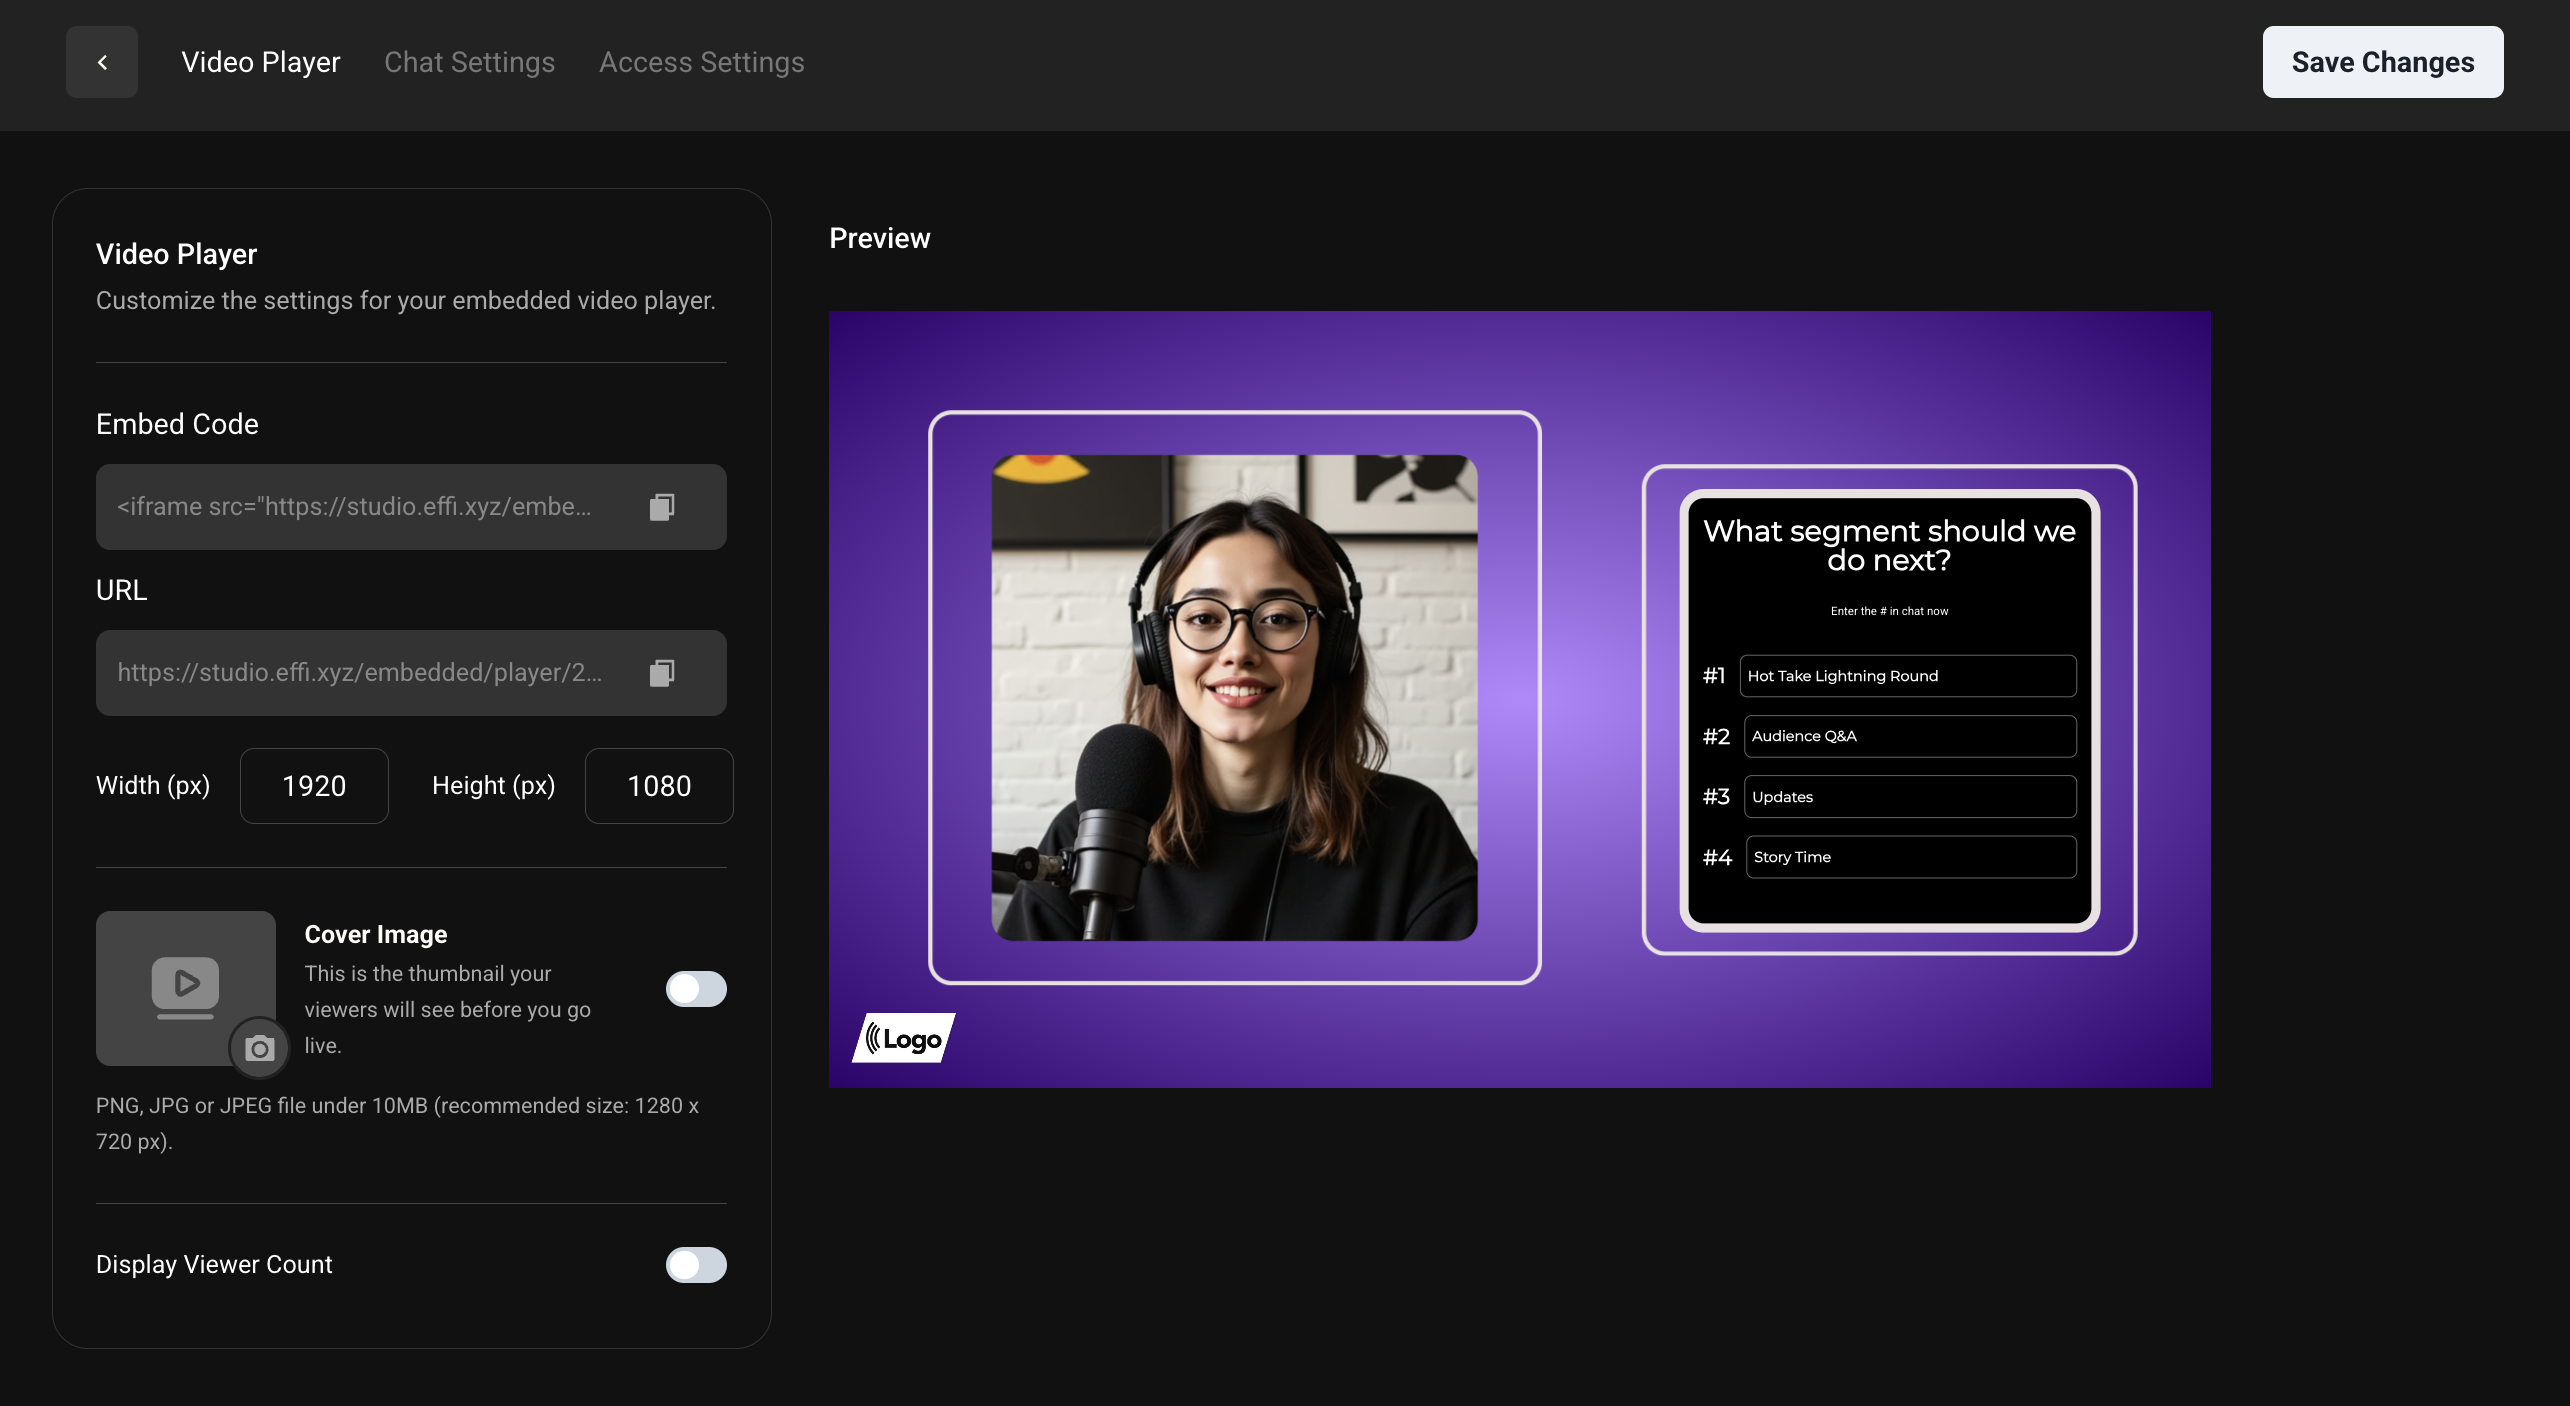
Chat Settings
This tab controls the live chat that appears alongside your embedded player.
| Setting | What it does |
|---|---|
| Chat Placement | Places the chat on the left or right of the player. |
| Font Style | Choose from Arial, Helvetica, Times New Roman, Courier New, Verdana, Roboto, or Open Sans. |
| Font Size | Choose from XS, SM, MD, LG, or XL. |
| Safe Chat Filter | Filters inappropriate messages from the chat. |
| Custom Platform Icon | Upload your own icon for the chat. PNG, JPG, or JPEG under 1MB (recommended size 100 x 100 px). |
| Slow Mode | Sets how many seconds viewers must wait between sending messages. |
| Community Guidelines | Add chat rules for your viewers, up to 250 characters. |
| Custom Stickers | Upload stickers viewers can use in chat. PNG, JPG, GIF, SVG, or WebP under 5MB (recommended size 100 x 100 px). Click View Stickers to see what you've uploaded. |
| Dark Mode | Switches the chat to a dark theme. |
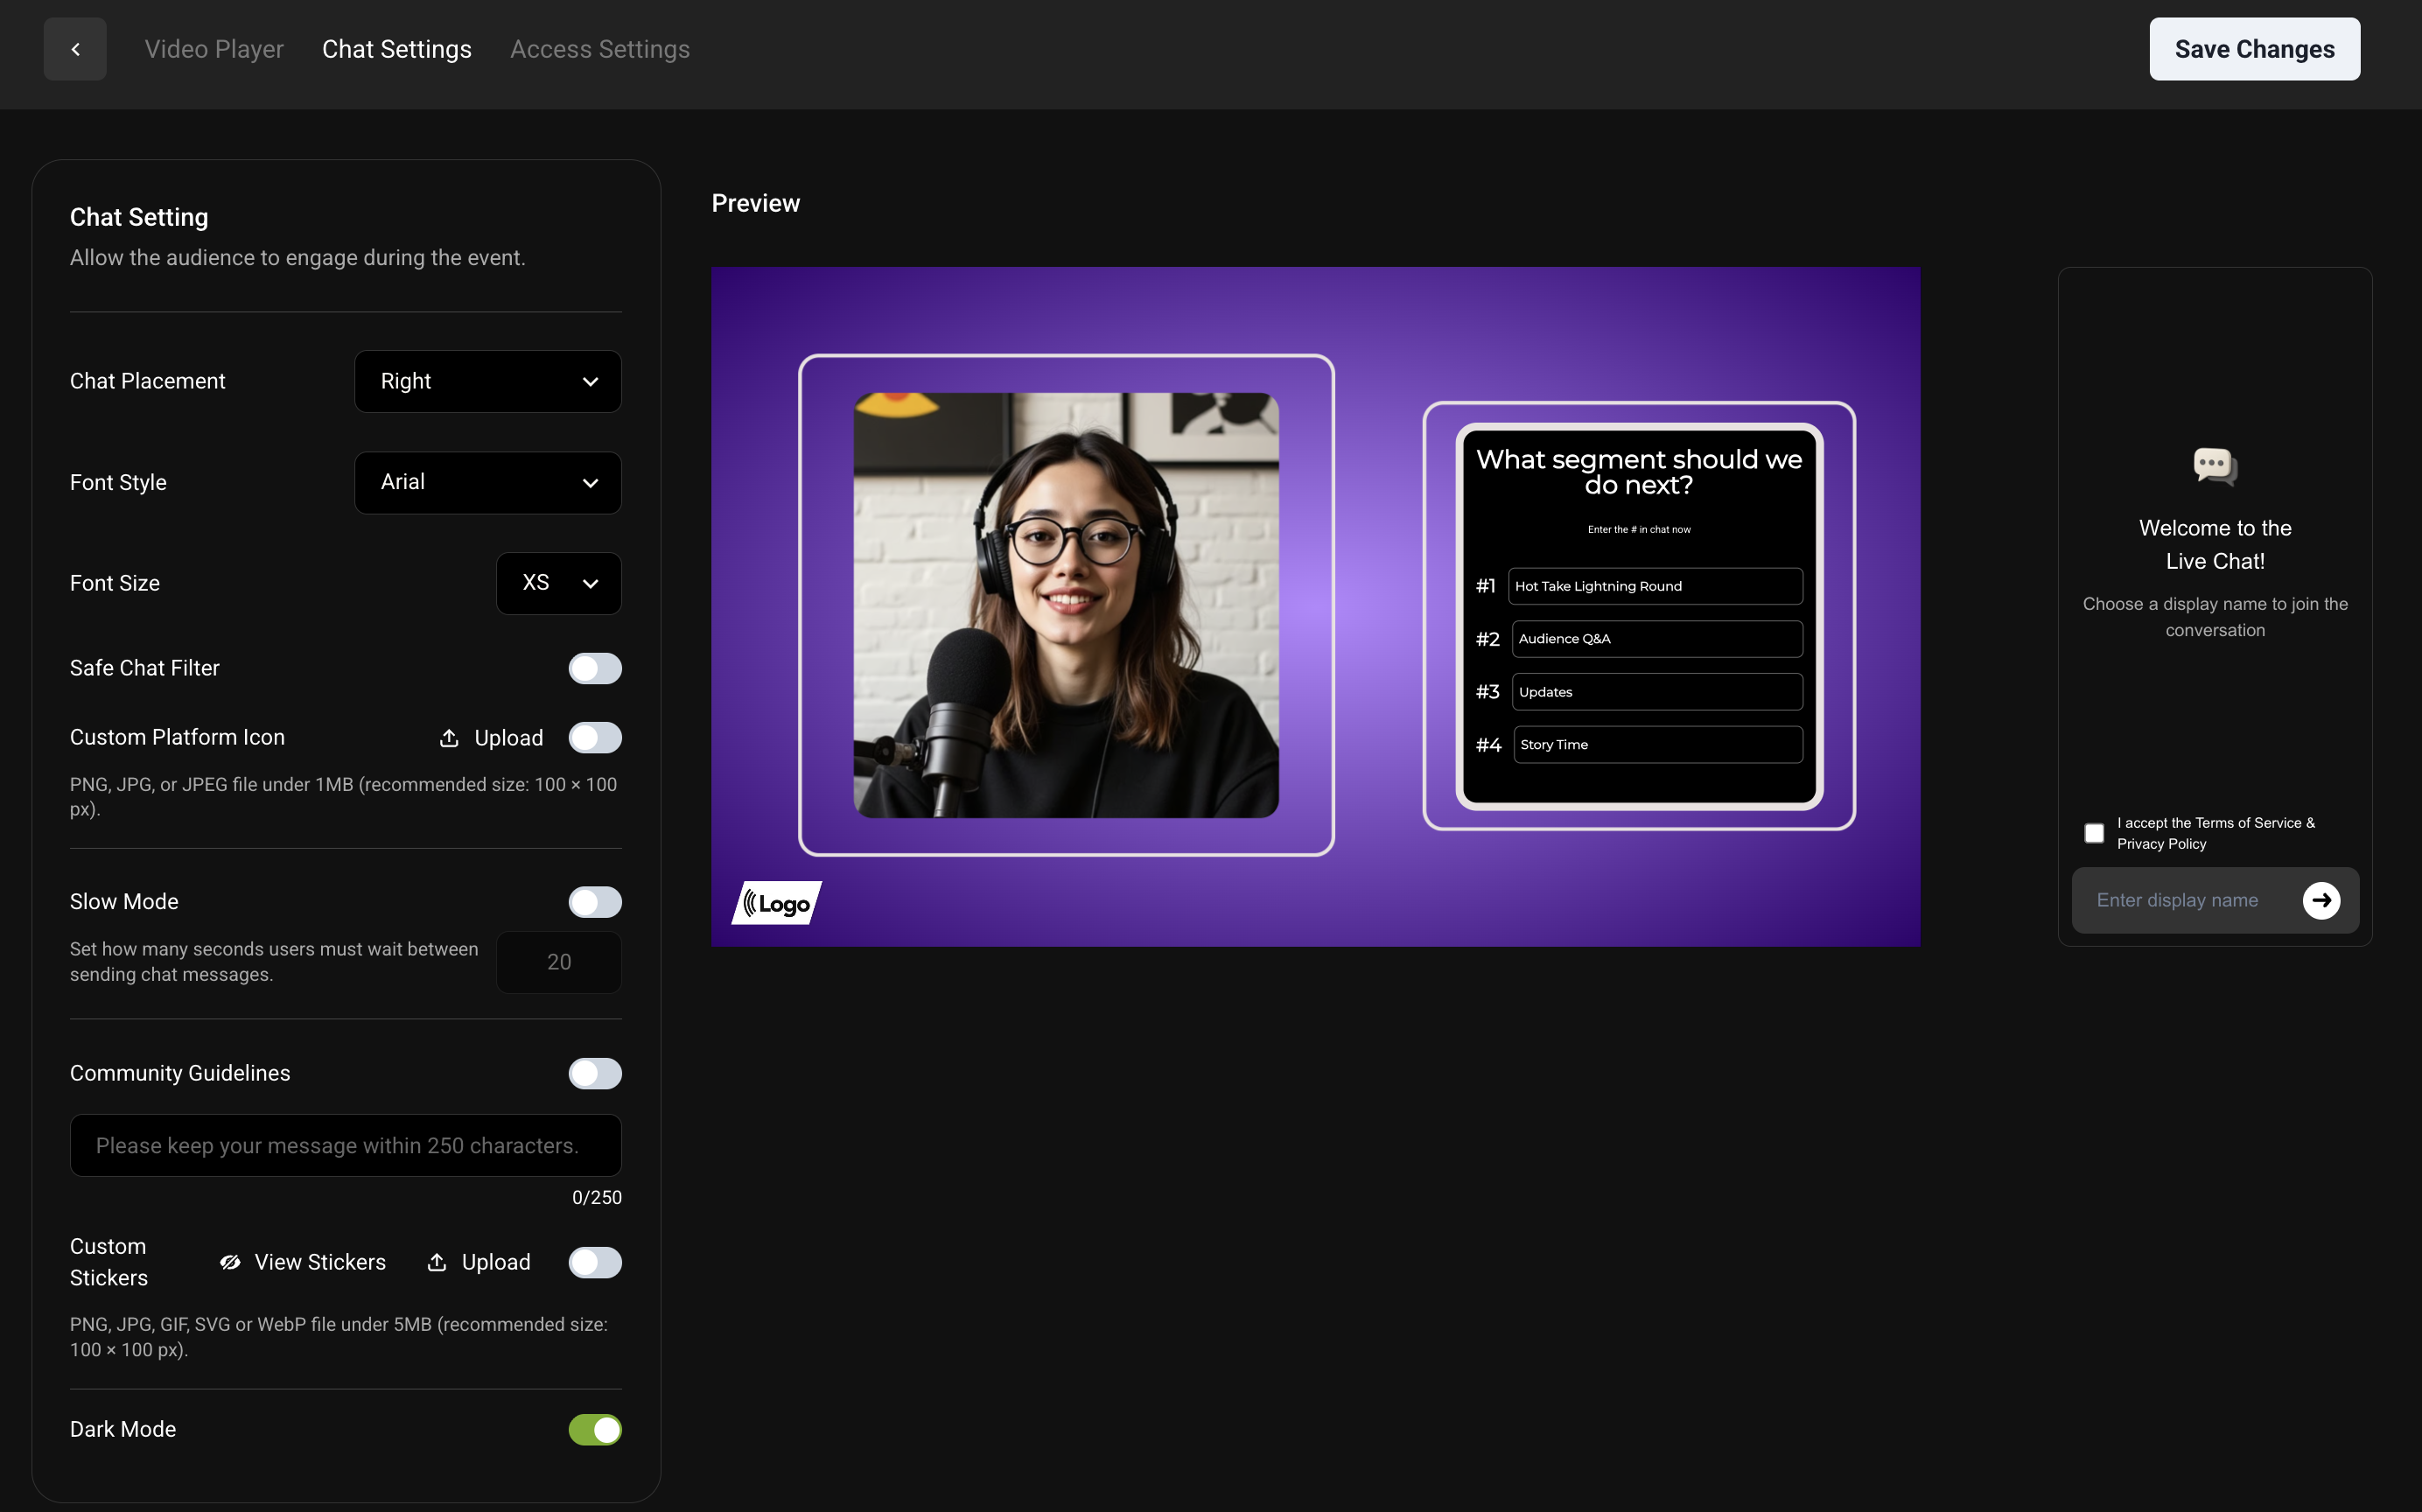
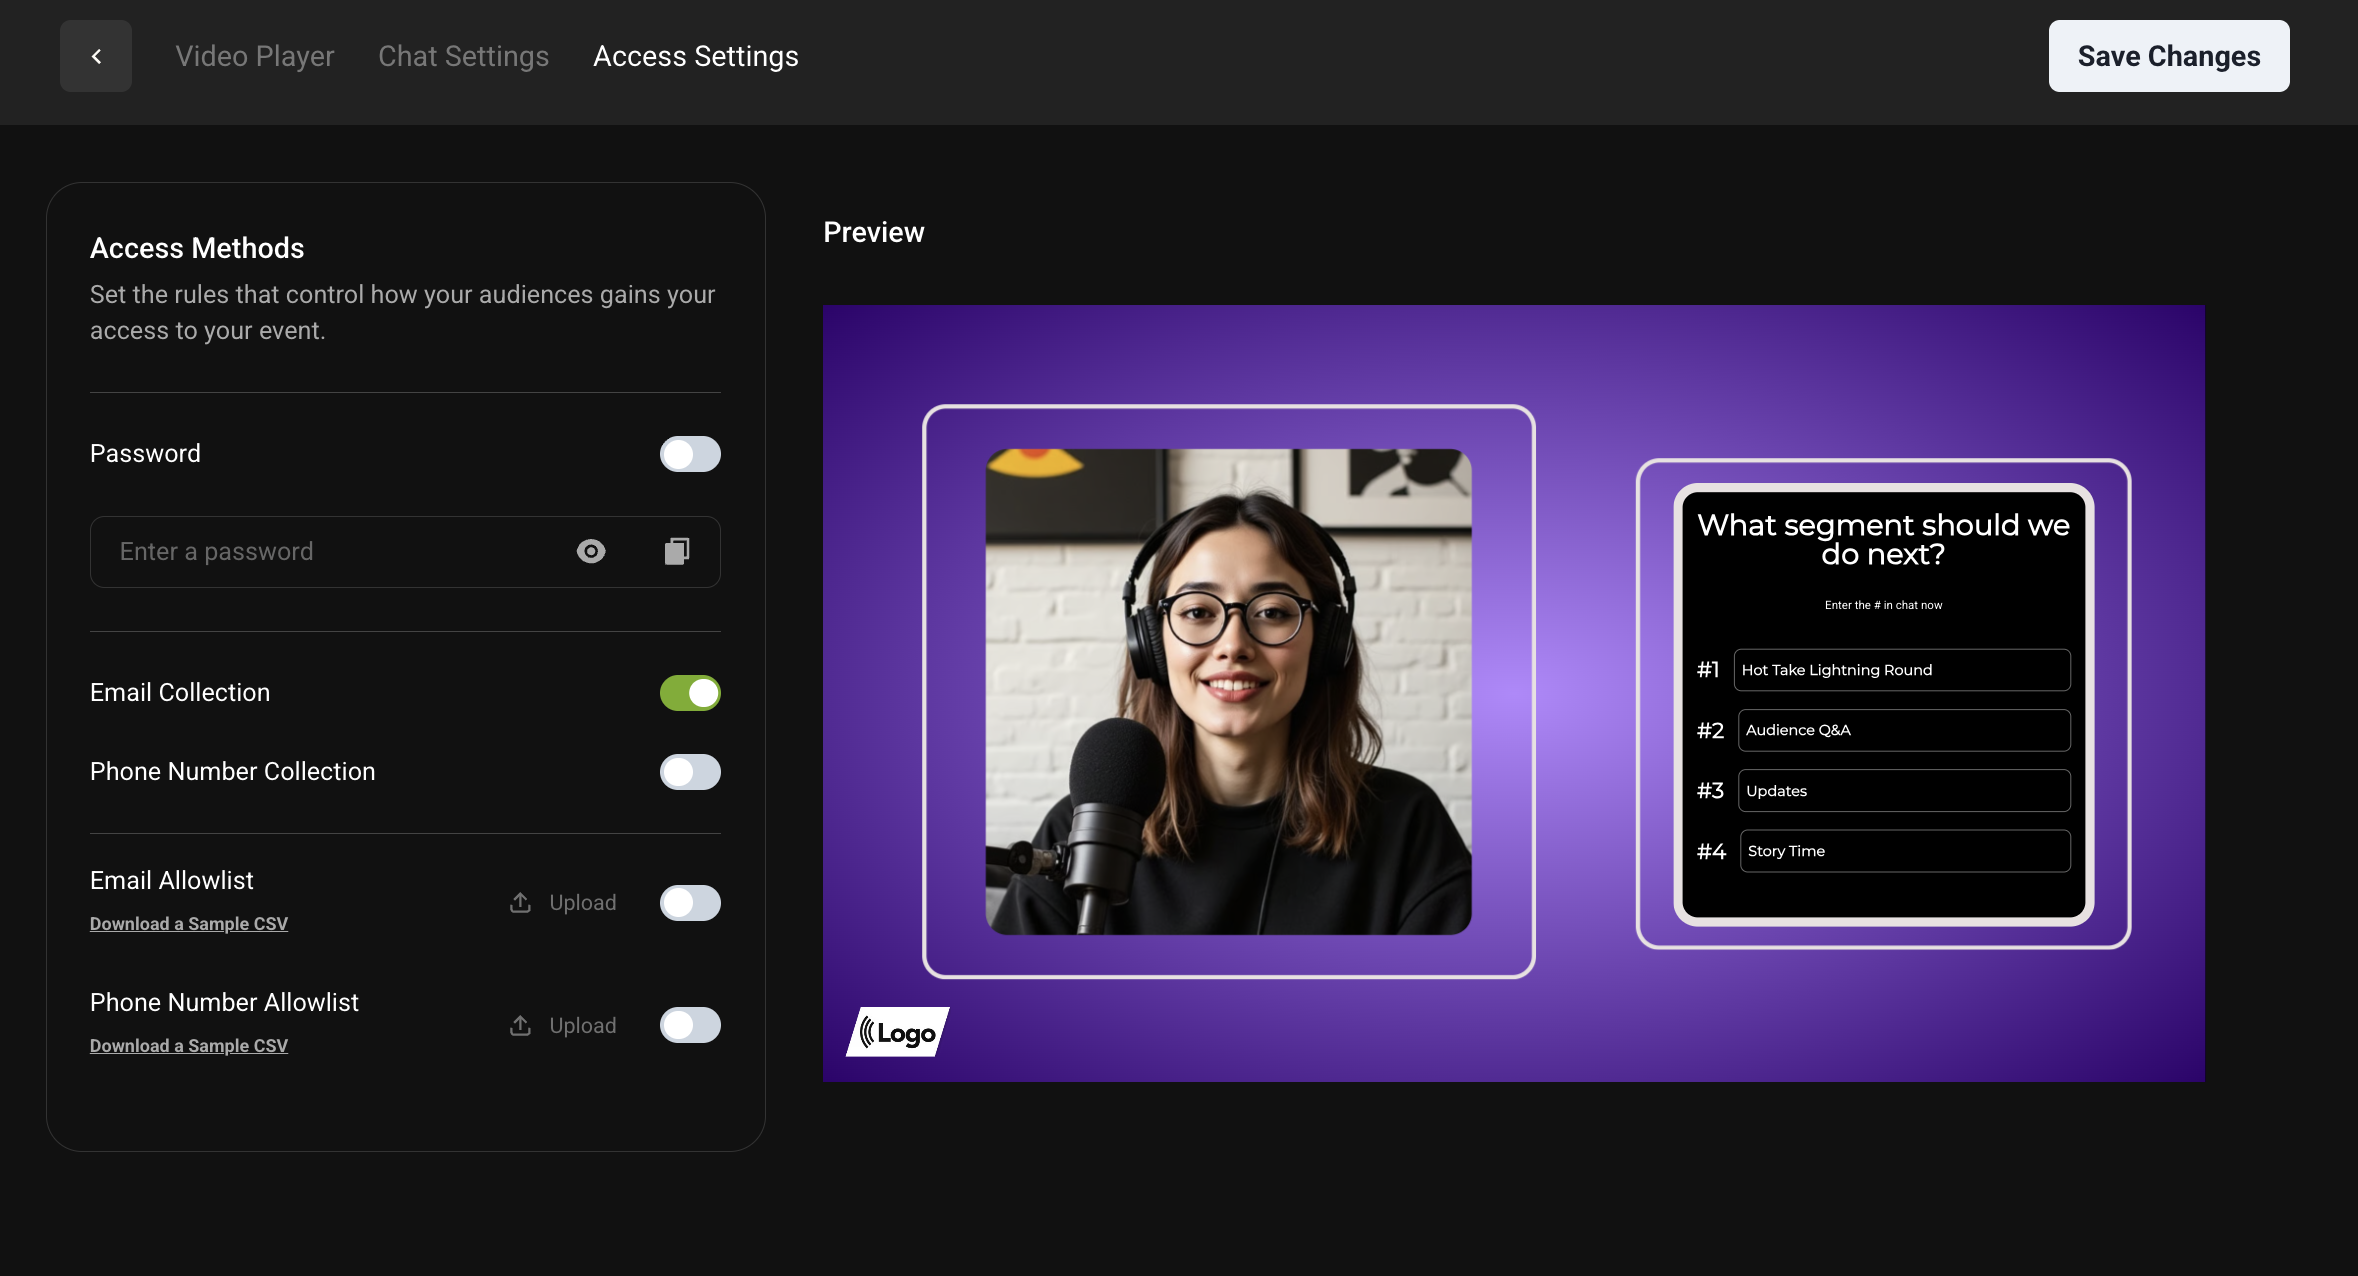
Access Settings
This tab controls how viewers get into your event. Viewers see these requirements on a gating page before they reach the player.
| Setting | What it does |
|---|---|
| Password | Requires viewers to enter a password. Use the eye icon to show it and the copy icon to copy it. |
| Email Collection | Asks viewers for their email address. |
| Phone Number Collection | Asks viewers for their phone number. |
| Email Allowlist | Limits access to the email addresses on a list you upload as a CSV. |
| Phone Number Allowlist | Limits access to the phone numbers on a list you upload as a CSV. |
Adding the player to your website
- In the Video Player tab, click the copy icon next to Embed Code.
- Paste the code into your website where you want the player to appear.
- When you're ready, go back to the Stage and click Start Streaming. Your stream plays in the embedded player on your site.
Was this article helpful?
That’s Great!
Thank you for your feedback
Sorry! We couldn't be helpful
Thank you for your feedback
Feedback sent
We appreciate your effort and will try to fix the article